Nishan Dixit describes a minimally invasive alignment, bleaching and edge-bonding case in which the patient was ‘elated and confident’ after their smile transformation.
This case highlights how the align, bleach and bond approach can be a simple and conservative technique to help transform a smile. The three steps work together perfectly: first tooth alignment, then whitening, followed by composite edge-bonding to complete the ortho-restorative process. Each stage complements and improves on the previous one, resulting in a minimally invasive makeover and avoiding more complex and expensive treatment.
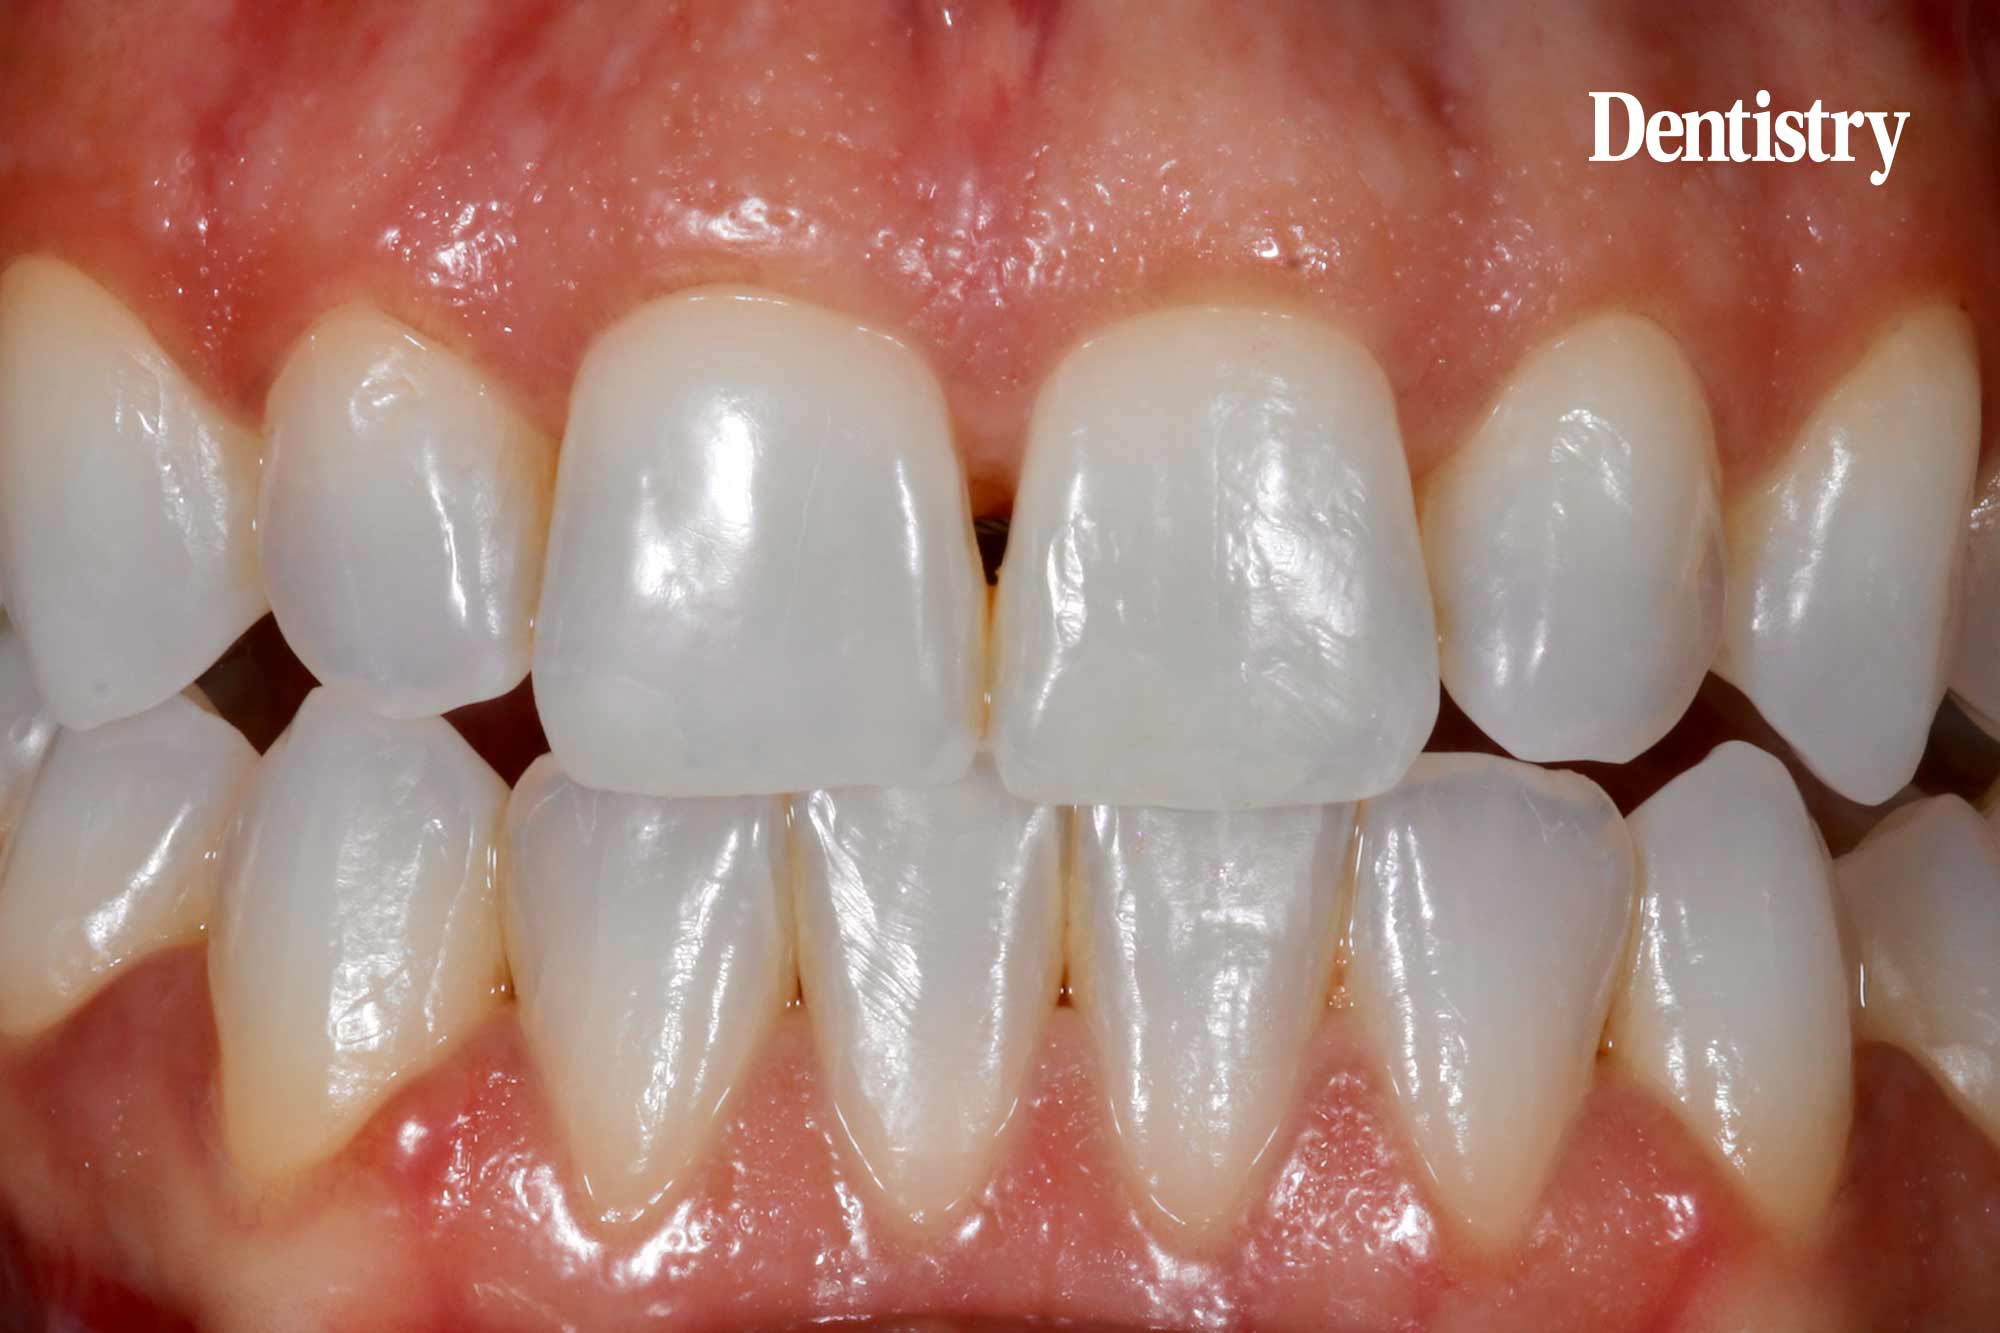
A 38-year-old lady attended Blue Court Dental because she was concerned about a chipped front tooth which had been damaged by a fork when she was younger (Figures 1 and 2). She was interested in aligning her teeth to address the upper and lower anterior crowding (Figure 3).
Over the long term, she was keen to replace some existing amalgam restorations (Figures 4 and 5). The patient was also unhappy with the colour of her teeth and felt that their overall appearance prevented her from smiling.
Clinical examination and orthodontic assessment
During an in-depth consultation, an Itero 3D intraoral scanner was used to report on findings relating to the teeth and gums. The orthodontic and functional assessment revealed that the patient had a class III skeletal pattern, high Frankfort-mandibular plane angle (FMPA) and average lower face height.
A class III incisor relationship and a molar class III and canine class III on both sides were also identified (Figure 6). She had an anterior crossbite, reverse overjet and mild crowding in upper and lower labial segments. The centrelines were not coincident, and her lips were symmetrical and competent.
The clinical examination also concluded the patient had good general dental and periodontal health with no outstanding issues. She had no temporomandibular joint (TMJ) disorder complaints or symptoms.
 Figure 1: The patient was concerned about a chipped front tooth


Treatment options and planning
Several orthodontic options were discussed, including fixed braces, clear aligners and referral to a specialist. The patient was interested in clear removeable aligners as they would have less of an impact on her daily lifestyle.
She was shown a smile simulation on the Itero scanner which visualised the proposed outcome after a course of Invisalign treatment. After confirmation that she was happy with the preview of her new smile, a Clincheck treatment plan was undertaken.
The 3D animation shows the predicted results during and after Invisalign treatment, including the position of composite attachments and the amount of interproximal reduction (IPR) required (Figures 7 and 8). The patient chose to proceed with orthodontic alignment using Invisalign clear aligners, followed by whitening and composite edge-bonding. After alignment, a bonded retainer would be fitted for permanent retention.
Tooth alignment and whitening
Initially, a series of 13 custom digitally designed aligners were fabricated, followed by a further 11 aligners to allow refinements to be made. This was necessary due to a lapse in compliance during the latter stages of the first set of trays.
The patient was advised that she would need to wear each aligner for 10 days, 22 hours a day, removing them only for eating, drinking and oral hygiene. Before alignment commenced, the patient attended a hygienist appointment.
IPR was carried out in accordance with the Invisalign digital software. Composite attachments using Venus Pearl One were temporarily placed on 11 upper teeth (UR6, UR5, UR4, UR3, UR2 and UL1, UL2, UL3, UL4, UL5, UL6) and seven lower teeth (LR1, LR3, LR4, LR5 and LL5, LL4, LL1) (Figures 9 and 10). The attachments were placed to provide additional leverage points to assist tooth movement and augment appliance retention (Figure 11). Alignment was completed in approximately eight months (Figures 12 and 13). At the final orthodontic visit, fixed upper and lower lingual stainless steel wire retainers were bonded using Kulzer Venus Diamond Flow to prevent tooth relapse (Figure 14).
The flowable composite has good bond strength, which helps to securely attach the lingual retainer wire to the teeth. The material also allows for smooth and flush bonding of the retainer, minimising any potential interference with the patient’s bite and producing a more aesthetic appearance.
The patient was given a two to three-week course of home whitening using the Boutique system, comprising 10% carbamide peroxide to be used at night in her final set of aligners. B1 was recorded on the Vita shade guide following the home bleaching course.
 Figure 7: The Clincheck shows the position of composite attachments, the amount of IPR required and the predicted results after Invisalign treatment


Composite restorations
Composite edge-bonding was carried out on the UR1 two weeks after tooth whitening was completed. The waiting period allows for shade stabilisation and ensures bonding effectiveness, predictability and accuracy. It also helps to minimise sensitivity.
The margins were bevelled, and the tooth was etched with 37% phosphoric acid etch gel and bonded with Kulzer Ibond Universal using a selective etch technique. Ibond is easy to apply and does not cause sensitivity.
Kulzer Venus Pearl A1 shade was my composite of choice in this case because of its easy and convenient handling. Sculpting and contouring is simple and straightforward without any pullback. The material has excellent colour adaptation and polishes to a high lustre.
The composite was placed freehand and built up incrementally using a single shade (Figure 15). The UL1 was smoothed with Sof-lex discs and then finished using the Kulzer Venus Supra polishing kit. The amalgam restorations are being replaced gradually. To date, the LR5 and LR4 have been restored using Venus Pearl One (Figures 16 and 17). I find that the composite has a ‘chameleon effect’ as the One shade blends seamlessly into the surrounding dentition.
The material has good aesthetics when placed in small cavities and is easy to handle, contour and sculpt. The composite also offers high strength and durability. Once fully cured, the composite restorations were finished with Sof-lex discs and the Kulzer Venus Supra polishing kit, which creates a long-lasting, glossy shine in just two working steps, with minimal material abrasion.
Secondary polishing was completed with aluminium oxide paste and a felt-coated polishing point, which gives the restorations an extremely high lustre. Following the anterior restoration, the patient returned a couple of weeks later for a review. This appointment included a hygiene visit and the bonding on the UR1 was given a final polish.
Successful aesthetic outcome
A successful aesthetic outcome was achieved over approximately 14 months using the minimally invasive approach of align, bleach and bond (Figures 18 and 19). However, the replacement of the amalgam fillings is ongoing.
The patient was thrilled with the result (Figure 20) and posted a five-star review, commenting that she has had the most incredible transformation of her smile. She was elated and the treatment has given her so much confidence in all aspects of life.
 Figure 15: Composite edge-bonding was carried out on the UR1 using Venus Pearl A1 shade


