The aim of this article is to present a smile reconstruction case which describes the protocol for producing near full mouth Glam ceramic veneered IPS e.max lithium disilicate crowns.
Creativity, a part of our work, has multiple definitions that can be adapted to different situations. Creativity is a style of thinking. It is expressed in task-related thought processes being derived from ideas, concepts and facts. This results in concepts, inventions and discoveries.
In short, the results of creativity are as original as they are effective.
The definition of creativity as a style of thinking was derived from both a cognitive and behavioural attitude. This idea was was born at the beginning of the twentieth century. Studies on the topic followed in the 1920s.
This ability to be creative goes through a creative thought process that allows us to find a better creation or solution.
Realisation and creativity
I’ve always been fascinated by creative thinking and how it surfaces from the dental technician’s thought processes.
As such, I have found that the process can be summarised in five steps.
After starting off with a goal (the rehabilitation we must create), the five steps are:
- Analysis (case study)
- Saturation (collection of all the useful information for the design)
- Incubation (processing of collected data)
- Enlightenment (solution found with the aid of feedback)
- Realisation (implementation of the case processed).
Realisation fulfils the goal set out through knowledge and experience. This cannot be expressed without some form of creativity, separating us from being mere machines.
Realisation via creativity is fundamental to incisal edge design.
The incisal edge design technique was born due to a need for human-touch when working with modelling wax or CAD designs. It involves a specific protocol which tends to reduce laboratory working time.
An incisal edge design protocol was not only created because nowadays it is not efficient practice to take time to think/waste material. It was also created to free up more time to:
- Design the case (analysis)
- Collect all the necessary information (saturation)
- Ponder (incubation) the solution (enlightenment).
The patient case
The patient was eager to improve his appearance.
This article’s case was evaluated and a Biologically Oriented Preparation Technique (BOPT) was used to prepare the teeth. This was done using a vertical preparation or feather edge.
Temporaries were made until the final product was delivered 40 days later.
The Anatomical Functional Geometry (AFG) modelling is a ceramic layering technique. It features compactness and brightness qualities which are crucial to an aesthetic restoration being congruent to the BOPT.
We usually reserve the LED technique for veneers, crowns and small bridges made of lithium disilicate.
The latter stages of the technique must include a faithful reproduction of ideal dental anatomy. This is done using the aid of a silicone mask made from a diagnostic wax-up/printed provisional model (used in this case, Figures 1a to 1d).
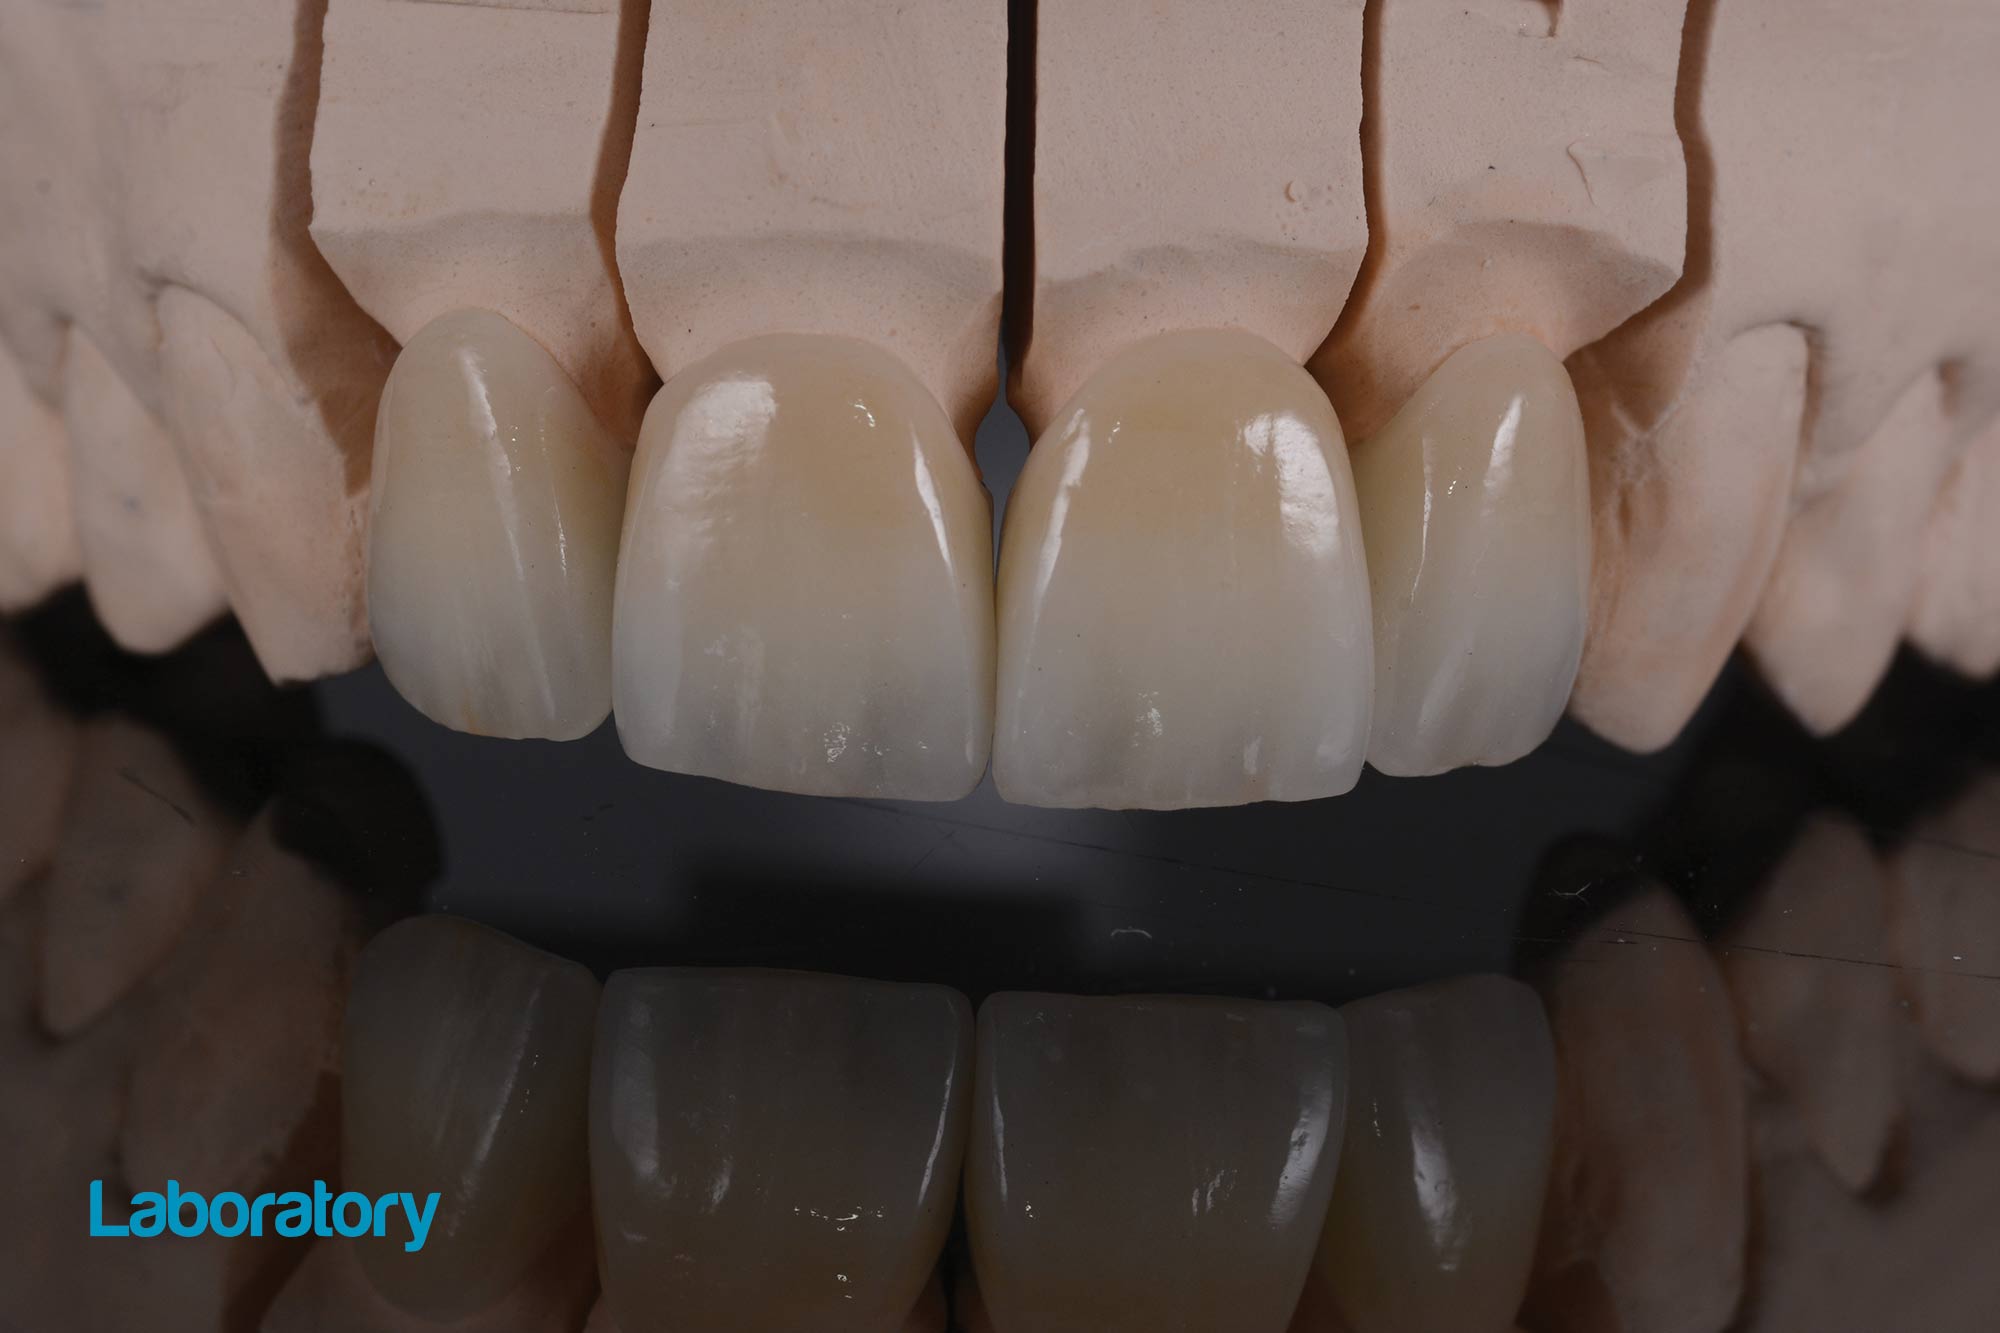
The waxed crowns are shown in Figures 2a and 2b. The buccal surface does not require a detailed finish as it will be reduced/veneered. Only the contours of the teeth must be accurate.
Figures 3a to 3c show you a detailed look of the incisal edge design preparatory reduction. The interproximal contact areas and occlusal surfaces remain intact and the incisal areas are reduced but without undergoing any uncontrolled reduction.
 Figure 1a-d: The CAD designed provisionals were incorporated into virtual models, and then those models were 3D printed


Tooth colouring
Spruing and pressing of the wax-ups was carried out (Figures 4a to 4c).
Then the finished frameworks underwent a first colouring treatment which was the colour basis of our future layering (Figures 5a and 5b).
The crown framework’s contact points were inspected (Figures 6a to 6c).
 Figure 4a-4c: IPS emax lithium disilicate crowns were made by spruing, investing and pressing with lithium disilicate ignots. The crowns were seated on the models


At this point the work must proceed quickly, concentrating only on minimal layering of the buccal surface.
We increasingly find ourselves veneering teeth with fewer incisal effects because patients usually request restorations without any yellow or grey – just of white teeth without being too white.
After colouring, a washbake firing was done in order to get a perfect wetting of the framework surface and to intensify the A2 basic shade (Figure 7).
Subsequently, a first layering with effect liner was carried out and then fired.
A base dentine mass, transparent dentine mass and an enamel layer were applied (Figure 8) and then the three masses were fired (Figure 9).
 Figure 7: The structure was coloured with an ideal shade, and then a washbake firing was carried out (MDL Nobil Metal Spa)


Subsequent incisal edge design steps are shown in Figures 10 to 18. Notice how the incisal area was deliberately kept brighter while the cervical area was layered with the Glam Raw Sienna product which is inherently redder than it is yellow.
 Figure 10: Final layering with Opal effect Glam ceramic which has a high level of compactness.


Pre-rehabilitation, the sizes of UR1 and UR2 compared to the sizes of UL1 and UL2 were different.
As seen in Figure 10, the final layering was done using Glam Opal effect which has a high level of compactness. Other masses were also mixed together to get varying effects.
The ideal situation is to make the proportions using measuring cups to create a repeatable processing protocol.
The masses can be diversified during layering using colouring liquids or by smearing your palette with water-based markers to create a lifelike visual effect once fired.
Aesthetic enhancement
It is to be noted that during the final incisal edge design, with the use of a golden proportion caliper, we applied the correct ratio between the width of the two central incisor restorations and the vertical height of the central incisors (Figures 20 and 21).
The AFG technique numerical codes that were learned at Alberto Battistelli’ s course allowed us to realise that numerical harmony had been reached (Figures 22 to 25).
 Figure 21: The golden proportion caliper is a useful IED technique tool


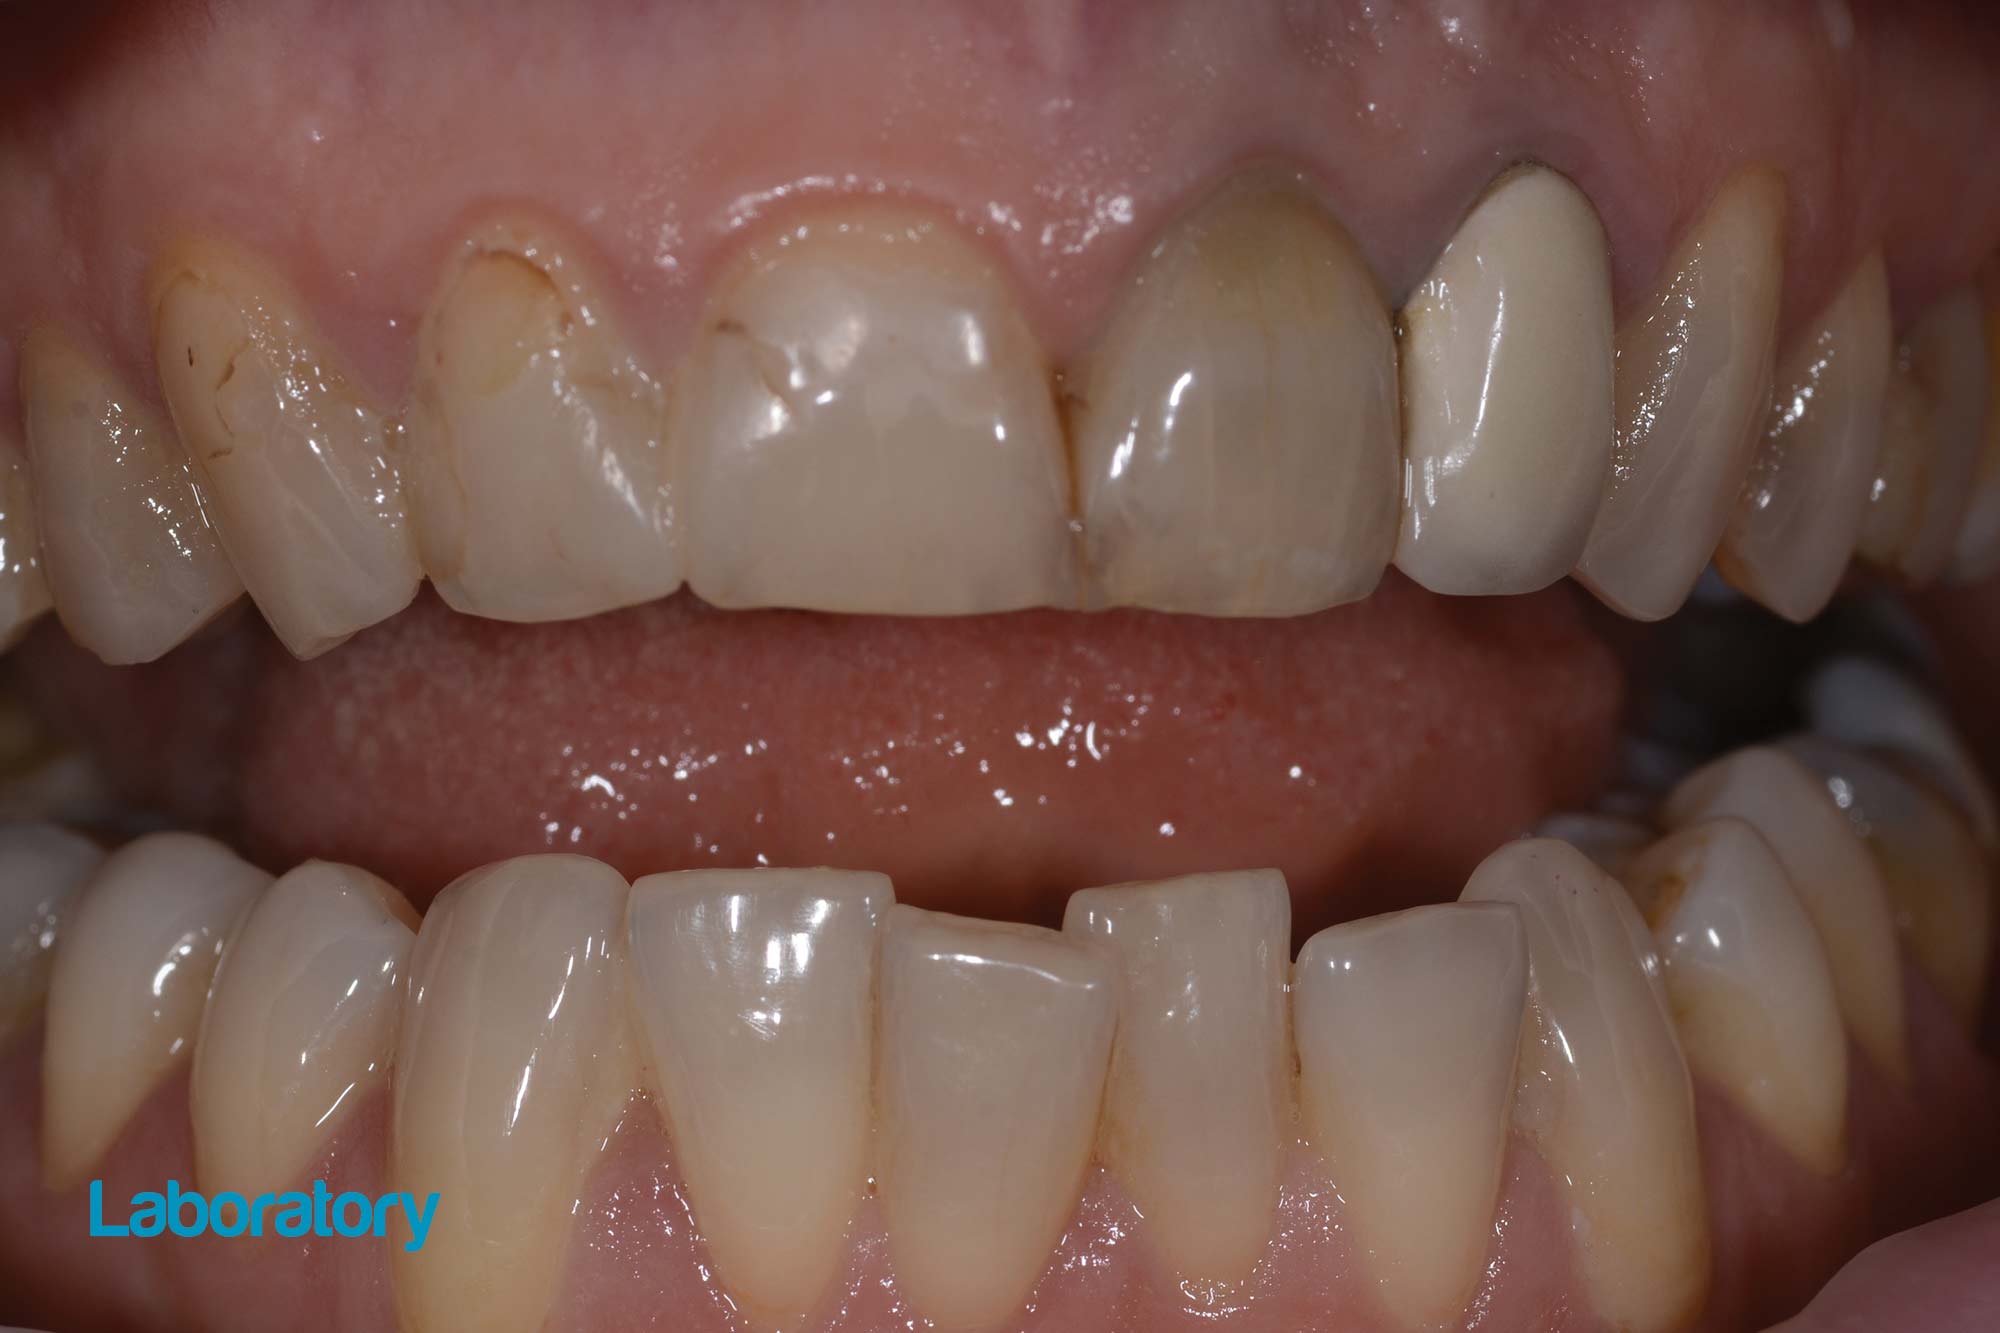
The veneered lithium disilicate crowns were delivered to the dentist, who then used different try-in pastes when trying in the final crowns.
The brown/black translucent try-in paste seemed to exhibit age appropriate aesthetics while also having accomplished the masking of the discoloured stumps.
Figures 29 and 30 show the before and after photos.
The final IPS emax L2 A2 restorations were veneered with Glam ceramic and the incisal edge design technique.
This resulted in ideal form and function which was created using our wax-up procedure.
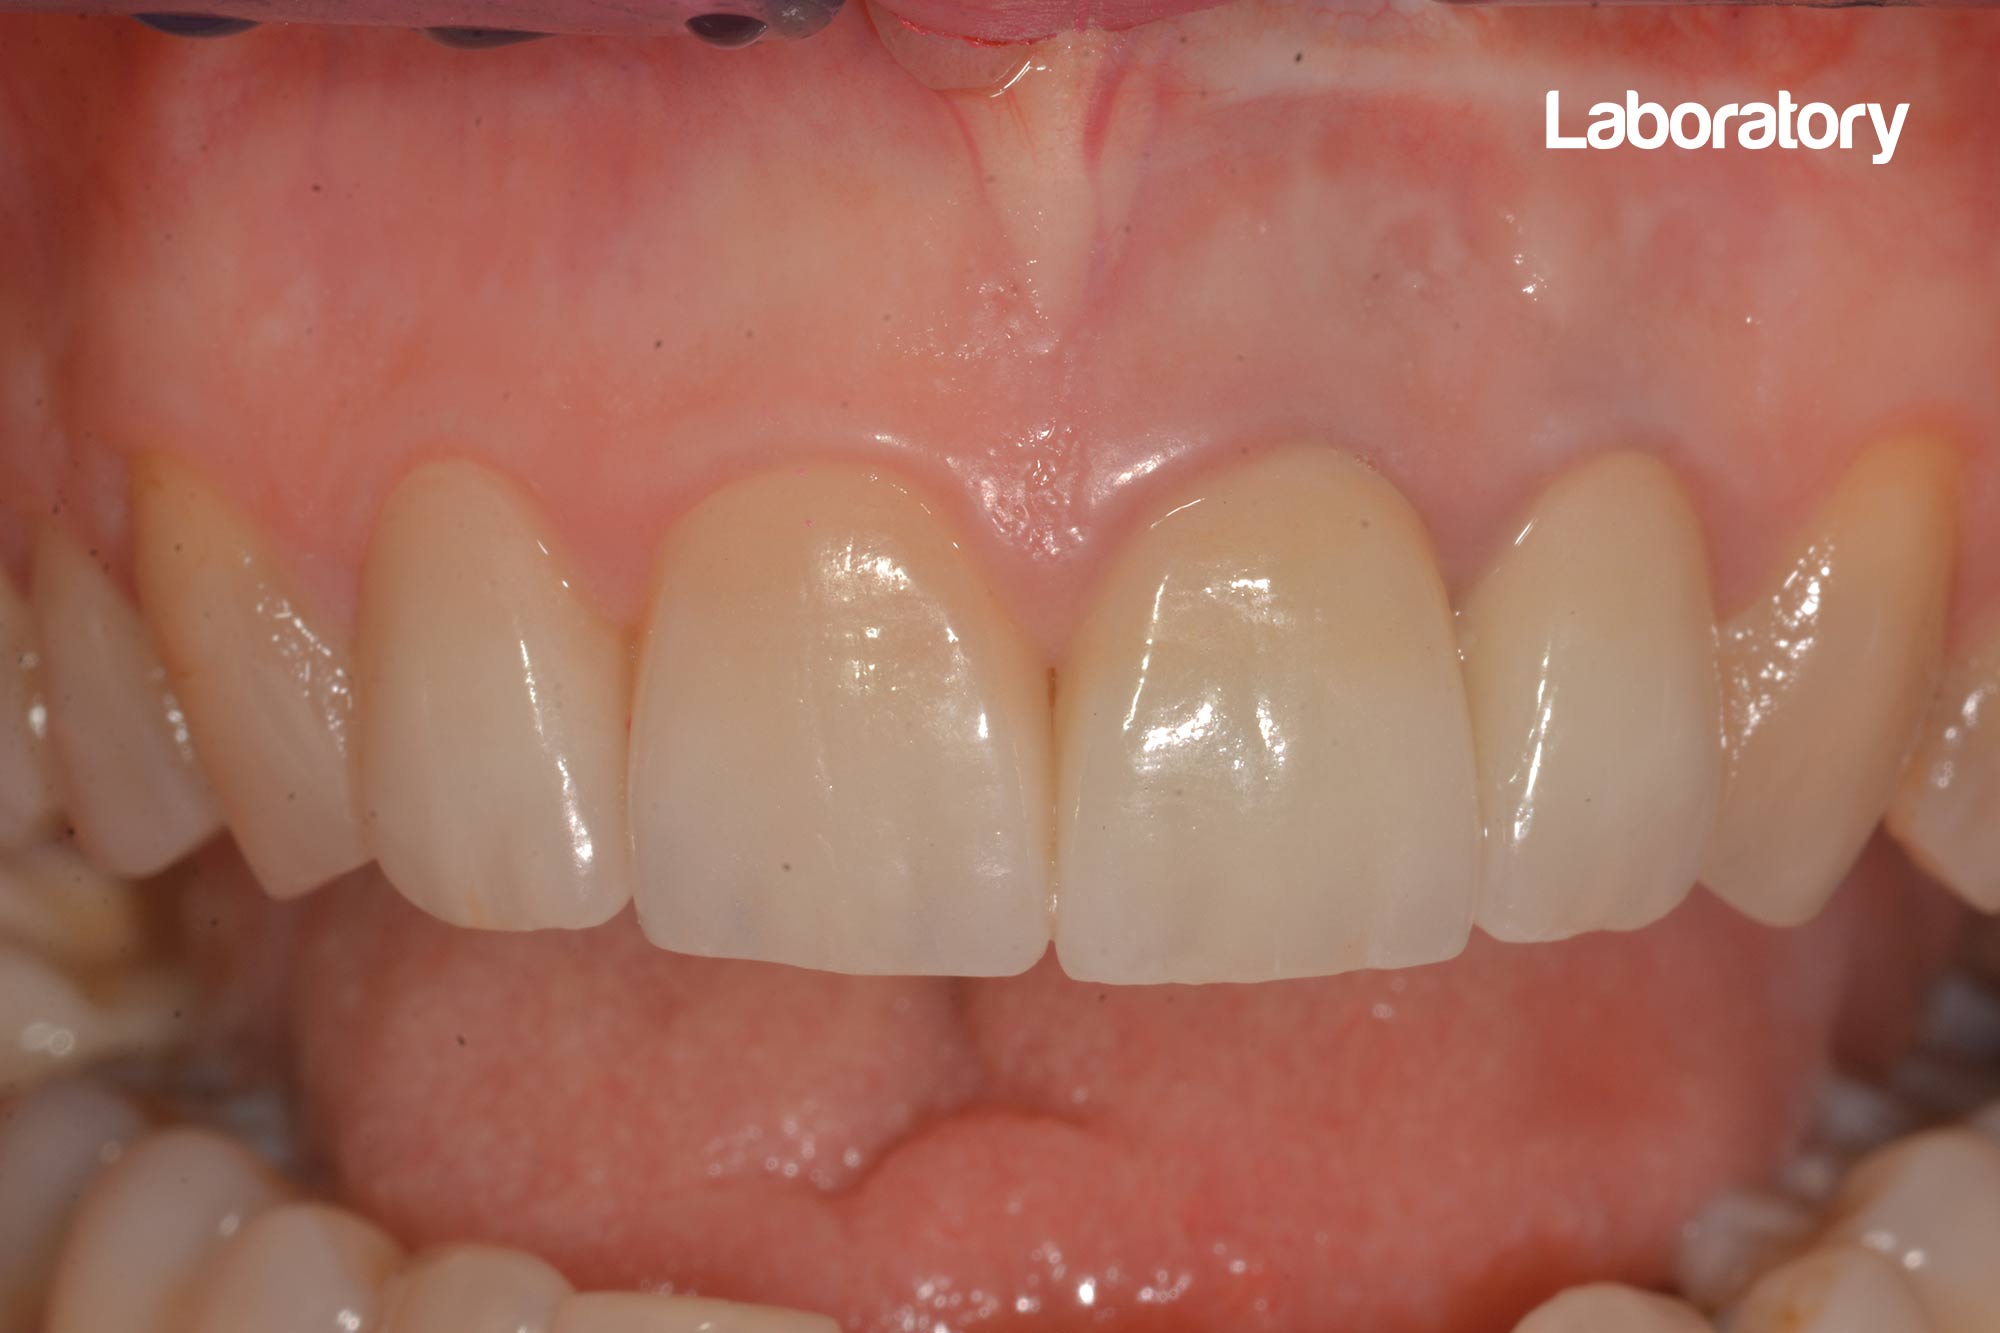
Notice the more attractive smile line. The result was a success.
Follow Dentistry.co.uk on Instagram to keep up with all the latest dental news and trends.

