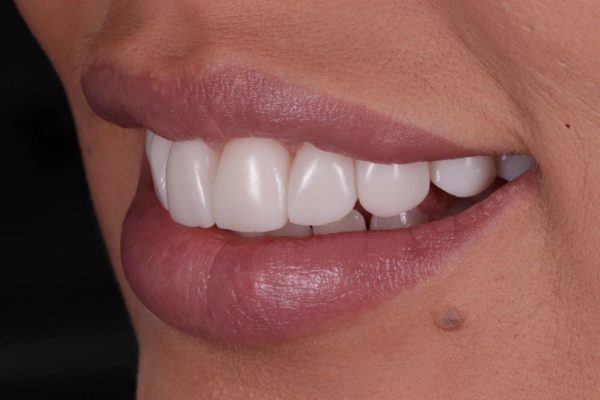
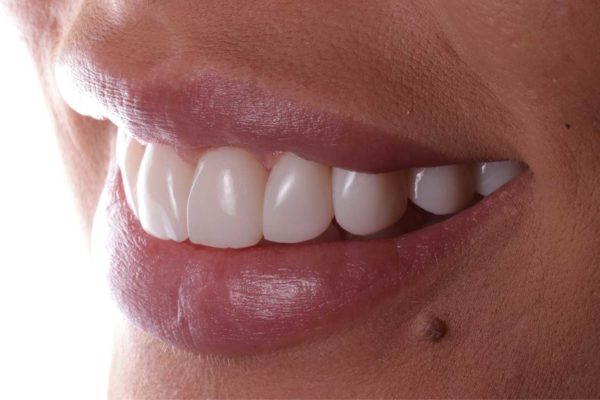
Harrison Child explains how he treated a patient with composite veneers using an injection-mould technique.
With recent innovations in smile design technology, gaining predictable results becomes increasingly more straightforward. For any cosmetic restorative case, we can produce a digital mock-up and use this to create a trial smile directly in the patient’s mouth.
This provides an extra layer of consent. Patient satisfaction with the design is confirmed, before moving to the restorative phase.
While there is generally more refinement involved than with freehand composite restorations, injection-mould composite veneers deliver a highly predictable outcome. This provides additional reassurance for the clinician and more certainty for the patient.
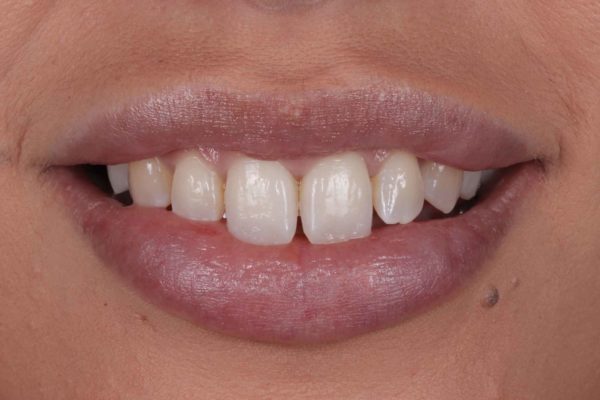
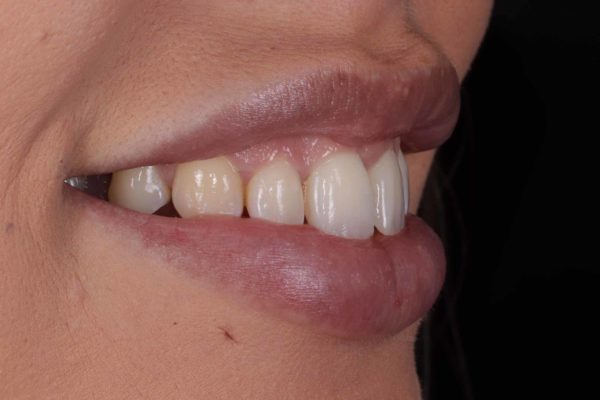
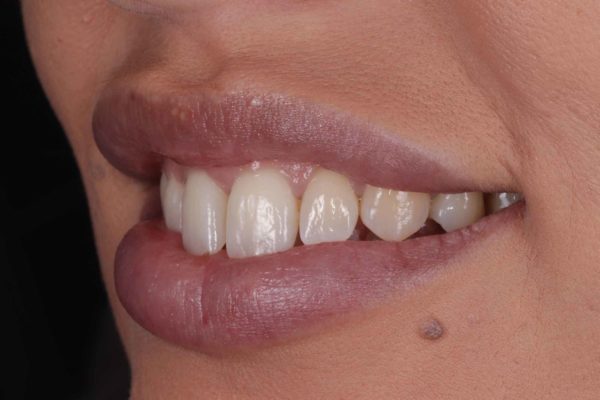
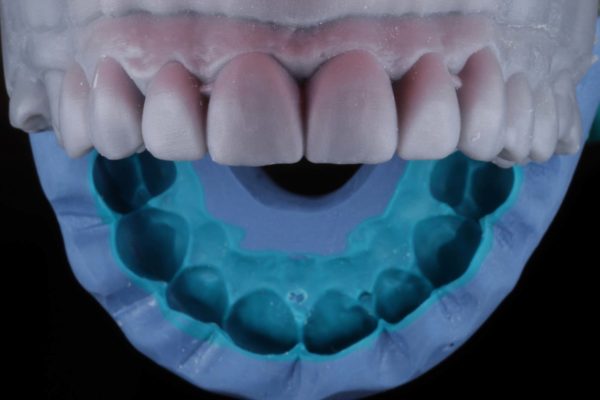
A 33-year-old eyelash artist came to see me because she wanted a bigger, brighter smile without the result appearing too unnatural (Figures 1-3). Her main concern was the two upper central incisors looking too prominent and long (Figure 4).

She did not like the appearance of the pronounced embrasures between her teeth. She felt as though it made them look gappy. And she also wanted her teeth whitened.
The patient won the prize of a smile makeover in an Instagram competition during 2019. But treatment was delayed due to the COVID-19 pandemic.
Patient stabilisation and treatment planning
Although the main prize of the Instagram competition was a full set of upper composite veneers, alternative cosmetic options were discussed. The patient was carefully assessed for her clinical suitability. Composite edge-bonding or less extensive restorative options were considered.
However, in this case, edge-bonding was not appropriate due to the shape of the patient’s teeth and her desired smile outcome (Figure 5). We agreed to proceed with composite veneers to cosmetically improve the appearance of nine upper teeth. From the UR4 to the UL5.

On examination, generalised gingivitis and localised mild periodontal disease were revealed. As well as two failing restorations.
The patient’s UR5 was also missing.
Stabilisation was completed prior to the smile makeover. This included supra- and sub-gingival scaling under local anaesthetic, and appropriate restorations.
She then completed a three-week course of home tooth whitening using Philips Zoom! Daywhite 6% hydrogen peroxide gel with instructions.
Smile design and patient consent
At the review appointment, impressions were taken. The patient’s smile was digitally designed by Dental Excellence laboratory. The cast model was digitally uploaded and, with the assistance of CAD/CAM technology, a digital mock-up of the teeth was created by the technician (Figure 6).

A resin model of the smile mock-up was 3D printed. From this a silicone stent produced (Figure 7).
The stent was then used to create a trial smile directly in the patient’s mouth, which enabled her to visualise the end result.
The patient was very happy with the design, so we proceeded to the next stage.
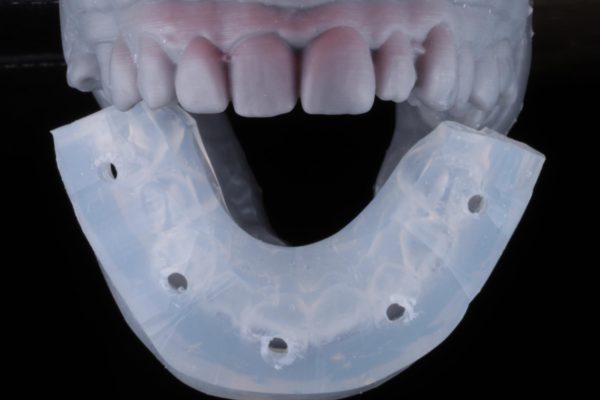
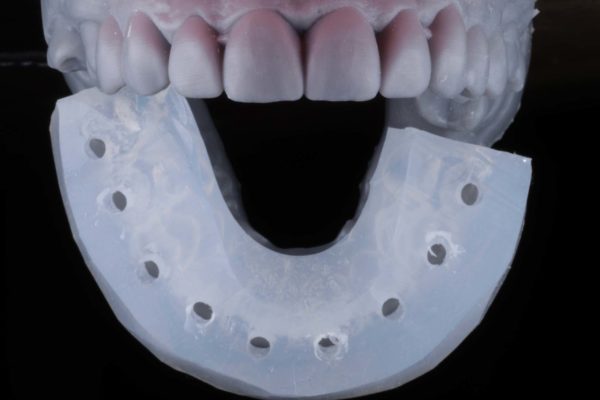
Two clear matrix stents were fabricated at the laboratory for the injection-mould procedure. Having two stents allows for an alternate tooth build-up method. On each stent, holes are drilled through to the incisal edge of the teeth, and match the diameter of standard composite capsules.
The first stent would be used for the production of five composite veneers on alternate teeth starting from the UL5 (Figure 8). The second stent would be used for the production of four composite veneers for the remaining teeth (Figure 9).
Composite veneers with reliable handling
The composite chosen for the case was Kulzer Venus Pearl.
I find that Venus Pearl exhibits incredibly reliable handling throughout this procedure. It is high performing for both freehand and injection-mould techniques. But especially for the latter, as it remains where it is injected and does not lead to air bubbling.
On the day of treatment, a shade test was carried out using Venus Pearl B1, BL and BXL shades. The patient wanted to avoid going too white with the final effect and opted for BL shade.
The test tabs were removed and the patient’s teeth were cleaned, polished and air-abraded. I used the Aquacut Quattro air abrasion system for micro-abrasion to aid bonding, followed by partial isolation and lip retraction.
I initially prepared and treated every other tooth, one at a time, guided by the first clear matrix stent. The teeth to be treated were etched and the adjacent teeth were isolated using PTFE tape. The etched teeth were bonded and the first stent was placed in the patient’s mouth.
Avant Garde technique
Nine upper composite veneers were placed with an injection-mould technique following the Avant Garde protocol (Figures 10-12).
The composite, which had been heated to 70oc, was injected through each hole in the stent. When injecting the composite, continuous pressure is applied until the space between the clear matrix and the tooth is completely full.
The capsule is removed from the hole and the composite pressed down firmly to ensure it is tightly packed around the incisal portion of the tooth. The process is purely additive, with no enamel reduction. The digital design allows for any composite thickness, but I always aim for a minimum of 1mm to avoid areas of weakness and translucency.
Light-curing took place through the stent in accordance with the manufacturer’s instructions. The incisal area was cured for 20 seconds, followed by a 20-second cure of the buccal section. I then moved on to treat the next tooth in the sequence, repeating the process in an alternating technique for the remaining teeth in the first set.
The first clear matrix was then carefully taken off and excess composite was removed from the gingiva and incisal areas where the injection had been placed.
Shaping and polishing
Shaping and refinement took place using fine metal abrasive interdental strips. An initial polish was carried out, after which the entire process was then repeated for the remaining teeth with the guidance of the second stent.
Once all nine teeth had been built up, a full polish was performed using Shofu Super-Snap Polishing Disks from coarse to medium and fine, followed by a final polish using silicone points and discs (Figure 13). While the patient displayed no signs of previous bruxism, a lower bite guard was made for her to wear at night following treatment.
Patient shares her story on social
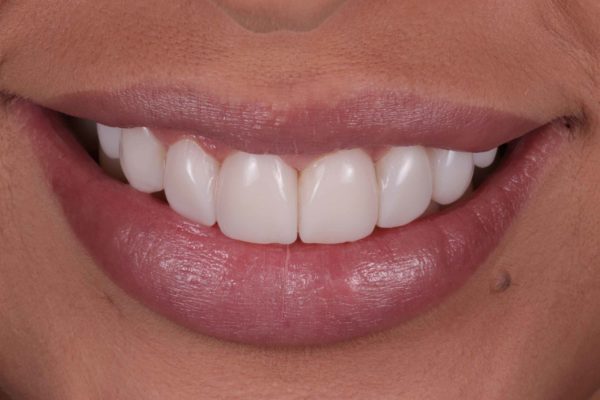
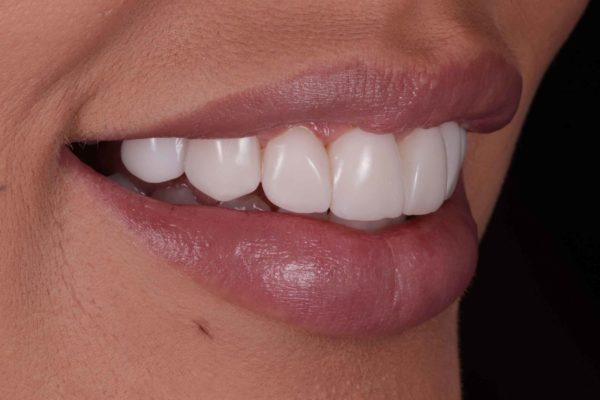
Despite the initial delay to the treatment due to the first national COVID-19 lockdown, the result was worth the wait. Venus Pearl was found to produce a highly aesthetic effect upon completion of the final polish (Figure 14).
The patient was delighted with the outcome (Figure 15). She reacted very positively and has been an enthusiastic advocate of composite veneers ever since, posting regularly about her experience on her own Instagram account.

For more information contact Avant Garde Dentistry on 0151 729 0000, email [email protected] or visit avantgardedentistry.co.uk.
This article first appeared in Dentistry magazine. You can read the latest issue here.
Follow Dentistry.co.uk on Instagram to keep up with all the latest dental news and trends.


