
Lucy Stock presents a case study highlighting the use of customised titanium membranes for guided bone regeneration in implant dentistry.
Many years ago, dental implant treatment was considered successful if the implant didn’t fall out of the mouth. Patients accepted the gap being filled with something white, even if it didn’t quite look or function as a tooth.
Thankfully dentists are now more discerning. Tooth loss is accompanied by powerful patient expectations that the future implant will act, feel and look like a perfected version of the original.
The first membranes to promote guided bone regeneration (GBR) around implants were developed for their cell occluding properties to allow maturation of the bone. A range of materials have been tried in order to achieve the greatest gain in bone volume with the lowest complication rate.
Since 1969, titanium has been widely favoured in membranes due to its high strength, biocompatibility, and low corrosion rate. However, the issues with titanium have included premature membrane exposure, difficulty removing it due to bone encapsulation and increased surgical time spent shaping the membrane to fit the defect. With the advent of fully digital implant workflows, customised titanium membranes are now easier to fabricate and increase GBR predictability (Sagheb et al, 2017).
Case study
This case study uses a customised Zimvie Accuramesh made from titanium alloy using selective laser melting technology and finished with an electropolished surface. These meshes are useful in providing reliable bone volumes (Takahashi et al, 2023).
Due to the rigidity of the titanium mesh, the integration of the graft typically performs well as it provides excellent protection from exterior trauma and non-functional forces (von Arx, Hardt and Wallkamm, 1996).
The smoothness of the rounded edges diminishes the risk of flap rupture and membrane exposure (Xie et al, 2020), with the added advantage that the mesh is preformed thus reducing surgery time and risk of infection.
Initial presentation
A 57-year-old woman presented at the practice – she had a non-painful, suppurating post crown for 10 years. Her fear of the dentist prevented her from commencing implant treatment sooner. However, the increasingly foul taste and smell emanating from the area compelled her to seek treatment.
The lady is a non-smoker and on levothyroxine. Her moderately restored dentition was periodontally healthy except for the UR2.
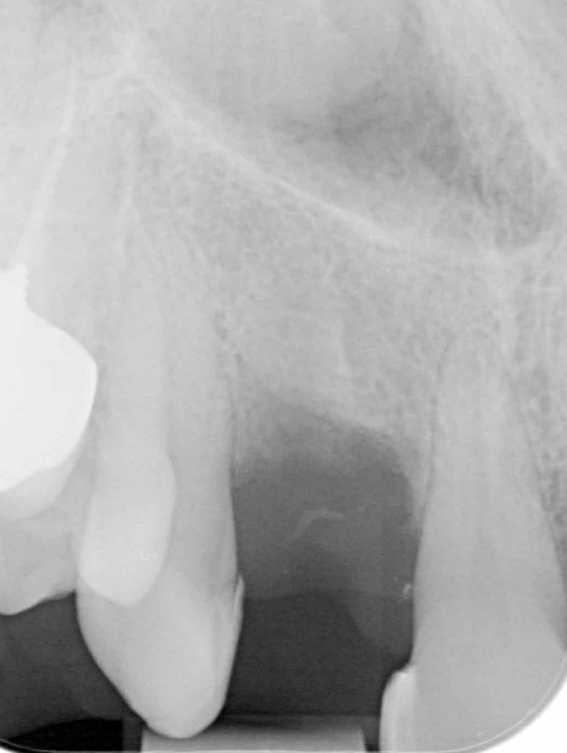
The UR2 had a suppurating 8mm pocket mesiopalatal, terminating at the post apex, with substantial bone loss evident radiographically. A diagnosis of root fracture with a hopeless prognosis was made.
Presurgical preparation
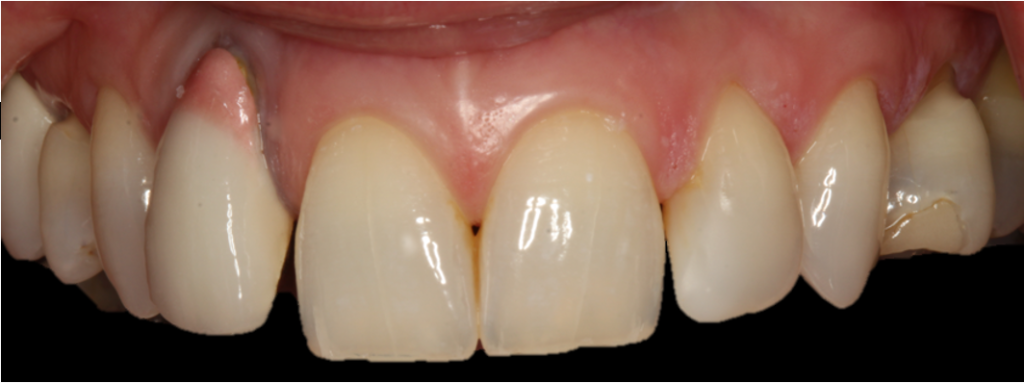
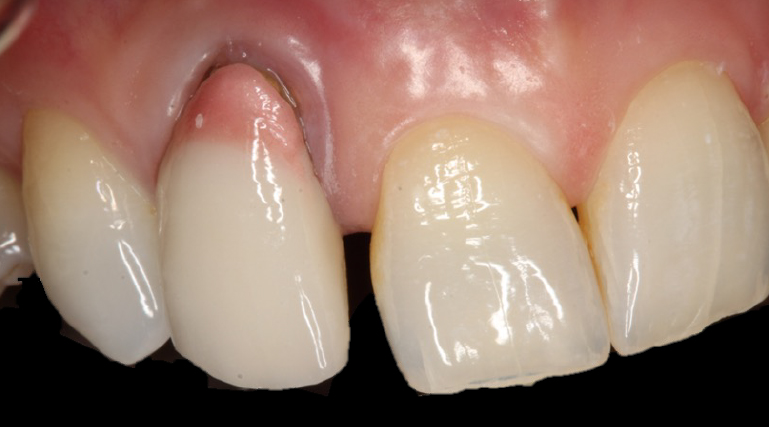
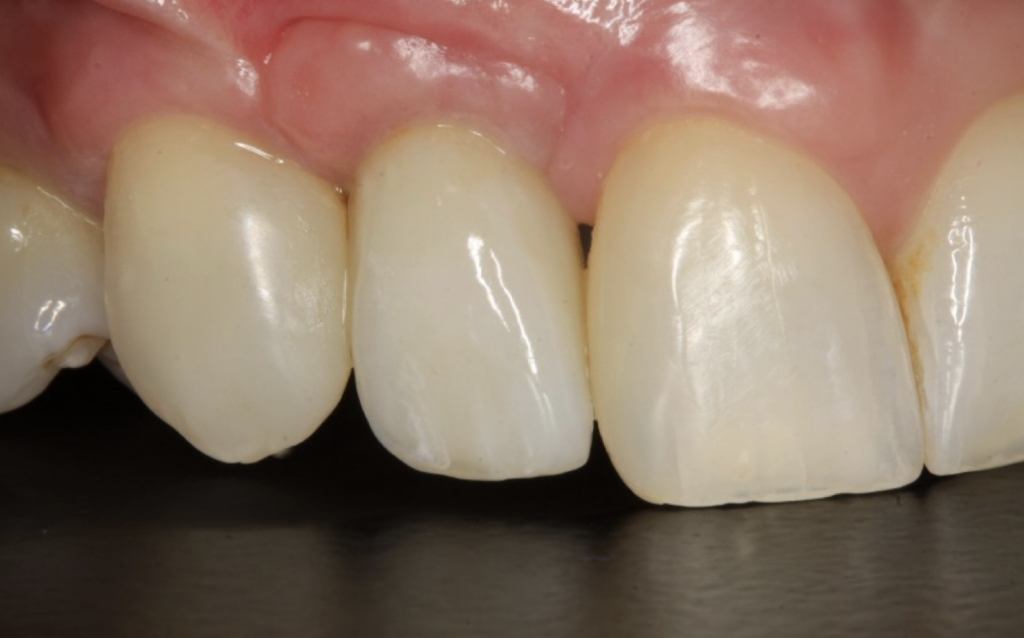
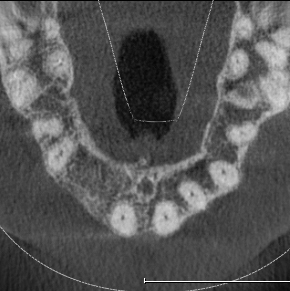
Pre-operatively, the UR2 crown was aesthetically already broader than the UL2. The mesial gap meant that closing the existing space with a crown would leave the patient with three centrals, thus shattering the rule of golden proportions (Figures 1 and 2).
Moreover, the UR2 cervical margin was positioned 4mm apical to that of the UL2, its root protruded out of the buccal alveolar bone, and it was draped with a thin gingival phenotype.
Pre-extraction, I recontoured the distal of the UR2 crown.
Composite bonding was performed on the mesial of UR3 and distal of UR1 to create a 7mm mesiodistal width, leaving the implant site easier to surgically plan, and prosthetically restore.
Due to the chronic nature of the infection, the lack of keratinised tissue, the height of the gingival zenith and the extent of bone loss on the distal of the adjacent centrals root, I decided to take a delayed approach to placement. The lateral incisor was extracted, and the socket was assertively debrided. The socket continued to suppurate in the following weeks, and a second debridement was carried out, with the area subsequently healing normally. A temporary denture was worn without enthusiasm, during healing.
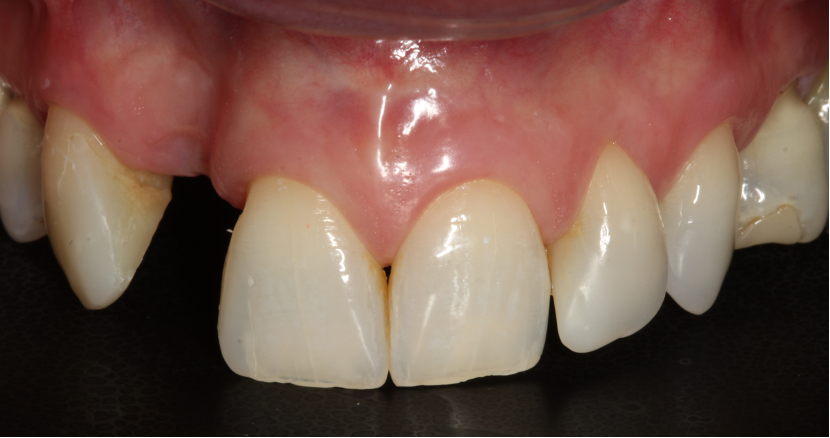
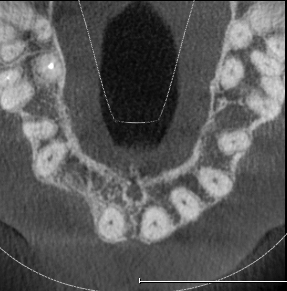
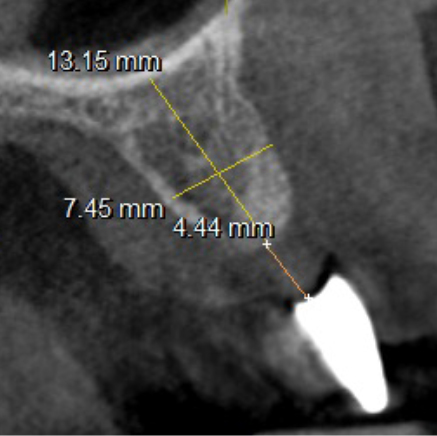
Extensive horizontal and vertical bone loss with blunting of papillae occurred following extraction (Figure 3). The gingiva was left to fully mature for six months before a CBCT scan (see Figures 12 and 14) was used to fabricate the Zimvie Accuramesh (Figure 5).
The surgery
A trapezoidal flap was created using a no.15 blade, the horizontal incision was made slightly palatal on the crest of UR2 site, then intra sulcular cervically around UR1 and UR3, before the mid papilla, mesial and distal relieving incisions were made. A full thickness flap was then raised and undermined. A periosteal releasing incision was performed, and the flap was brushed to give adequate soft tissue release.
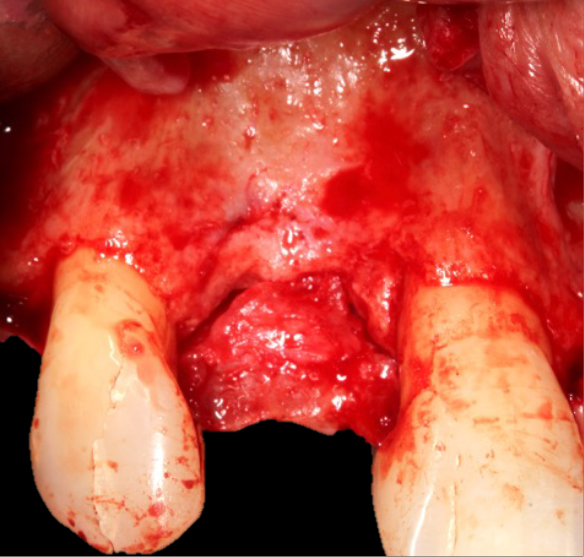
The favourable bone peak on the mesial of UR3, the bone loss on the distal root surface of the UR1 and the vertical crestal bone loss are evident in Figure 4. The UR1 and UR3 root surfaces were prepped with an ultrasonic scaler, hand scaled and then cleaned with EDTA. The buccal wall was decorticated and scraped.
The Accuramesh was tried in. It can be observed in Figure 5 that the second screw hole was situated over the UR1 root so was not utilised.
Zimvie Puros Blend allograft mixed with Hyadent BG (hyaluronic acid gel) was sculpted onto the buccal and crest. This was encased within the Accuramesh and secured with one titanium 4mm buccal screw.
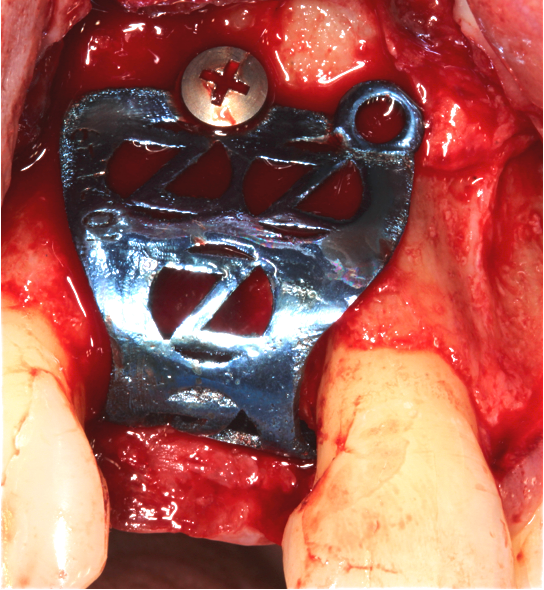
The Accuramesh had good stability. It was then covered with a Copios Extend Zimvie membrane that was secured with two titanium tacks. Closure was with continuous 6.0 Prolene polypropylene sutures interspersed with simple interrupted 5.0 cytoplast PTFE.
Post-operative reviews
Two weeks later, there was a small 2mm crestal dehiscence, no suppuration, with the patient complaining of mild discomfort palatally. I deepithelised the edges of the crestal part of the flap and rotated a split thickness palatal finger of epithelium over the crest to close the area.
The graft was then flushed with chlorhexidine and saline, metronidazole prescribed and HSMW recommended.
At the four-week review, the area had started to epithelialise well, and the discomfort had resolved. The surgical site continued to heal normally.
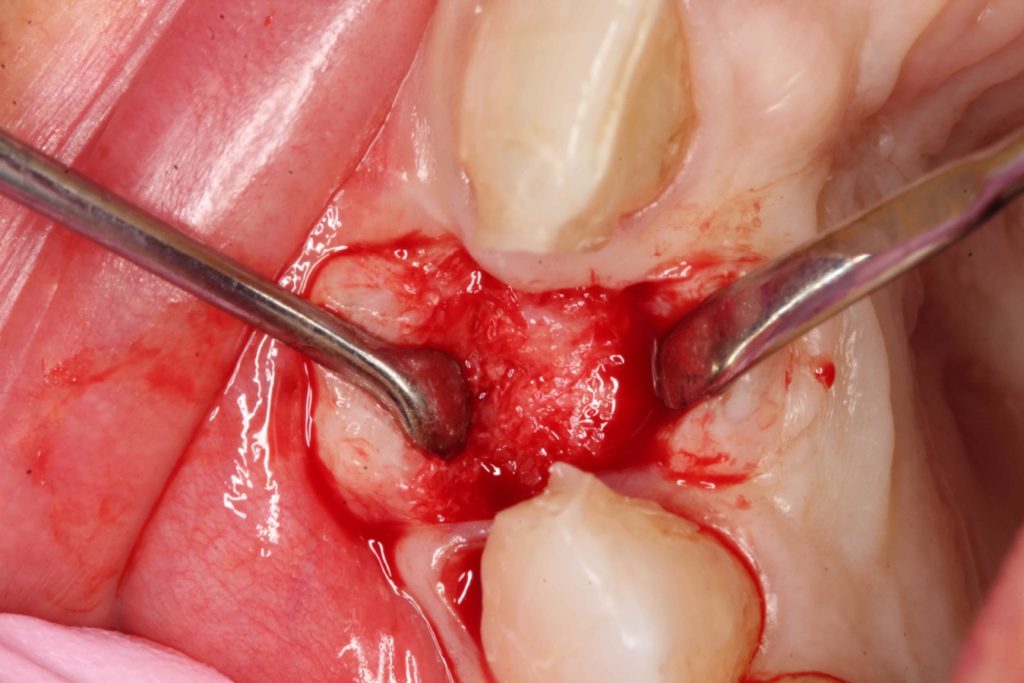
Three months after the bone graft was placed, the Accuramesh was uncovered and removed with ease. Good integration of graft was visually apparent. The patient couldn’t attend the practice and the implant was inserted eight months post graft (Figure 6).
An Ankylos 11 CX implant was placed with a compact gingival former. The bone felt good, the osteotomy bled well, and the implant had a primary stability of 45Ncm. The keratinised tissue from the crestal tissue was deepithelised and tucked buccally to improve the quality of soft tissue.
Restoration
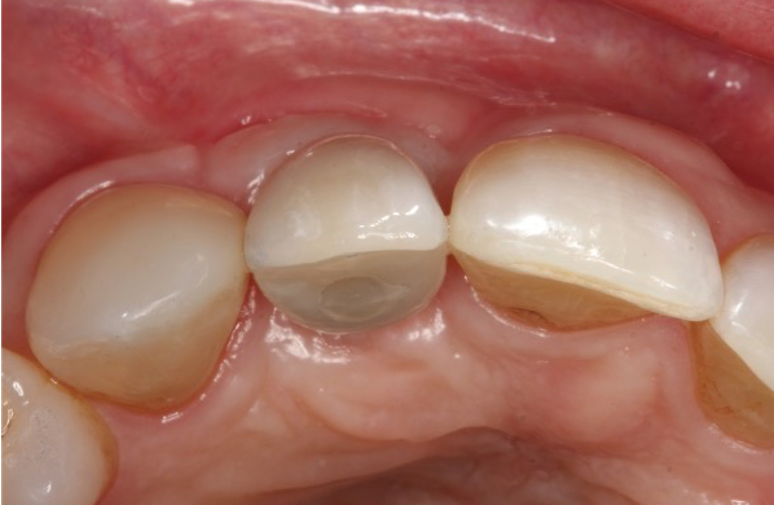
I restored the implant three months later with a gold hue Atlantis abutment and screw-retained zirconia crown.
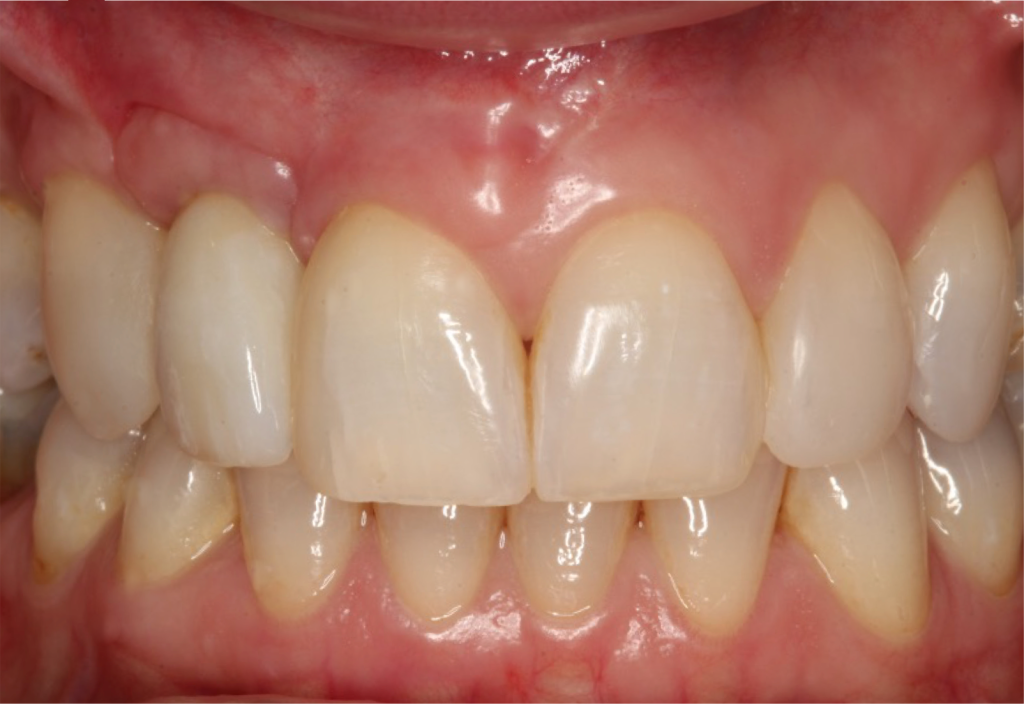
The beautiful prosthetic work was created by the talented hands of Eva Forst at Fusion Dental Laboratory, Newbury in England (Figures 7, 8 and 9).
Case reflection
I found the Accuramesh easy to use. The company support was also great in terms of assisting with the digital workflow requirements. As this was one of the initial Accurameshs, there are design elements that have already been resolved. For example, the placement of the second screw hole.
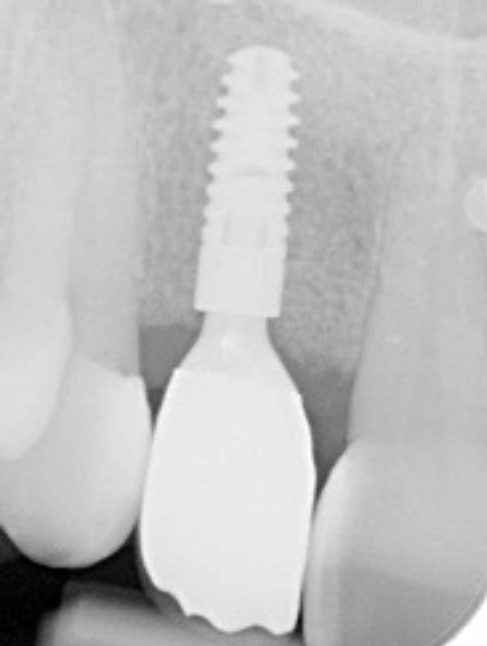
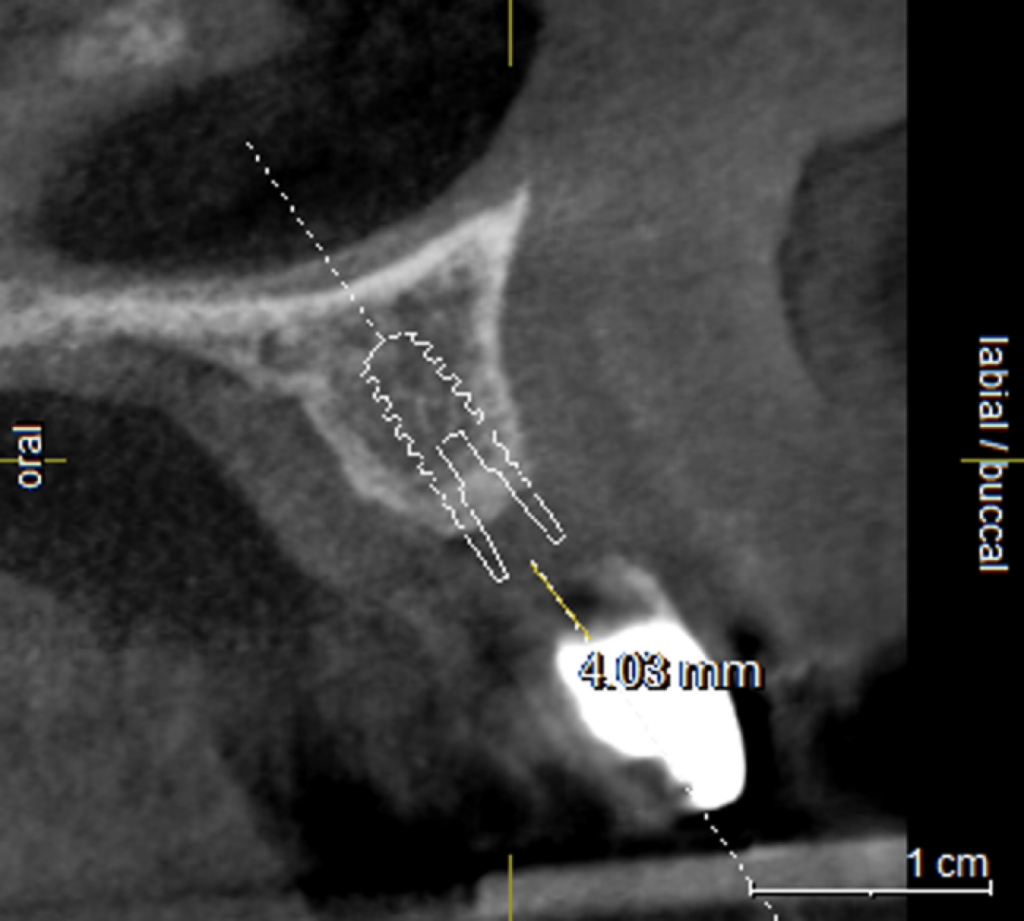
The mesh was stable enough with one screw and the bone regeneration volume achieved reinforces the degree of stability that was given to the biomaterial (Figures 12, 13, 14 and 15).
I was delighted with the bone gain on the distal of the UR1. My completely biased assessment of the postoperative radiograph (Figure 11) is enthusiastically positive that the bone growth on the distal of the UR1 is more coronal than the preoperative situation (Figure 10).
What could be improved?
The Accuramesh was convex down the palatal wall. I feel this added slightly too much pressure on the tissues, resulting in the minor soft tissue dehiscence. Design modification to flatten the palatal contour would resolve this issue.
Adjusting the mesh configuration to additionally work as a surgical guide would add to the attraction of using Accuramesh.
The electropolished surface undoubtably helped with the non-escalation of graft infection. If this had been a traditional titanium membrane, then the outcome may well have been frustrating.
The incision scars in Figure 9 could be improved and the band of keratinised tissue widened by placement of a further soft tissue graft. However on balance, the keratinised tissue is adequate for the implant long term.
The dentally phobic patient managed very well throughout the treatment to date, so no need to poke a sleeping bear. These types of scars have never been brought to my attention by any of my patients. However they remain a fascinating source of debate among implant dentists.
References
- Sagheb K, Schiegnitz E, Moergel M, Walter C, Al-Nawas B, Wagner W (2017) Clinical outcome of alveolar ridge augmentation with individualized CAD-CAM-produced titanium mesh. Int J Imp Dent 3(1): 36
- Takahashi A, Inoue K, Imagawa-Fujimura N, Matsumoto K, Yamada K, Sawai Y, Nakajima Y, Mano T, Kato-Kogoe N, Ueno T (2023) Clinical study of 14 cases of bone augmentation with selective laser melting titanium mesh plates. Materials (Basel) 16(21): 6842
- von Arx T, Hardt N, Wallkamm B (1996) The TIME technique: a new method for localized alveolar ridge augmentation prior to placement of dental implants. Int J Oral Maxillofac Implants 11(3): 387-394
- Xie Y, Li S, Zhang T, Wang C, Cai X (2020) Titanium mesh for bone augmentation in oral implantology: current application and progress. Int J Oral Sciences 12(1): 37
Follow Dentistry on Instagram to keep up with all the latest dental news and trends.

