Mindaugas Kudelis introduces a case using injectable composite to restore a second molar.
Traditionally, dentists tend to limit the use of flowable composites to small or non-load-bearing cavities or use it as a liner or base.
Alleged inferior mechanical properties are often mentioned as a reason not to use flowable composite for moderate to large cavities. And that’s a pity, because a flowable consistency has many advantages: it adapts well to the cavity walls and it has good handling properties.
With current advancements in their development, it’s time to shake off that reputation and embrace new restorative methods that make our lives much easier.
Advanced technologies
Some time ago, G-ænial Universal Injectable (GC) was introduced to the market, promising the same or even better strength and wear resistance as conventional composites.
With advanced technologies, a high load of ultra-fine barium particles could be incorporated, while maintaining a low viscosity.
The full coverage silane coating (FSC) technology ensures that the particles remain strongly embedded in the matrix, resulting in exceptional wear resistance. The first clinical studies with these types of flowable composites for posterior restorations confirm their eligibility (Kitasako and colleagues, 2016).
Restoring entire cavities with a flowable or injectable composite requires a change of mindset. But when you take your time to familiarise yourself with G-ænial Universal Injectable’s thixotropic consistency, you’ll notice that it’s easy to apply without the need for modelling instruments.
before adhesive application
JE), ensuring tight contact
Its shape remains without slumping, but when a little pressure is applied, it flows smoothly into every irregularity, making it a joy to work with. Case study In the following case, a second molar was restored with this composite.
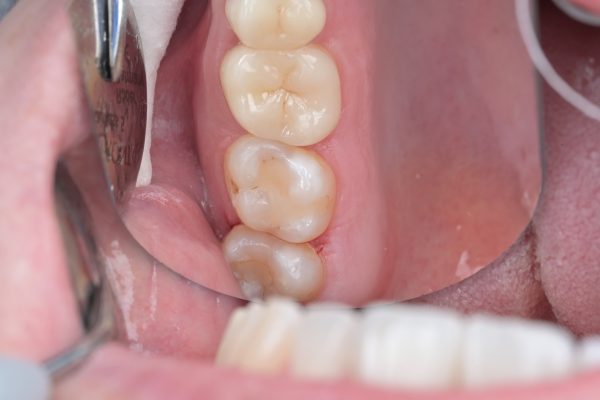
There was a carious lesion on the mesial side of tooth UL7 and the old composite restoration, still in place, showed some marginal defects (Figure 1).
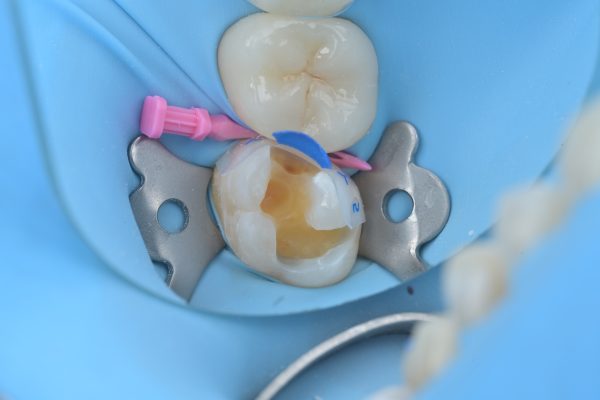
The decay and composite were removed, the teeth were isolated with a rubber dam and a transparent sectional matrix and wedge were placed (Figure 2).
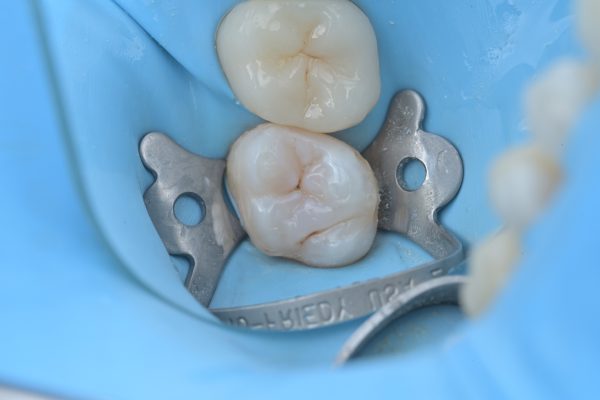
After a selective enamel etching and bonding protocol with a universal, two-step adhesive system (G2-Bond Universal, GC) (Figure 3), a separation ring was placed to compensate for the thickness of the matrix when restoring the contact point.
Flowable composite
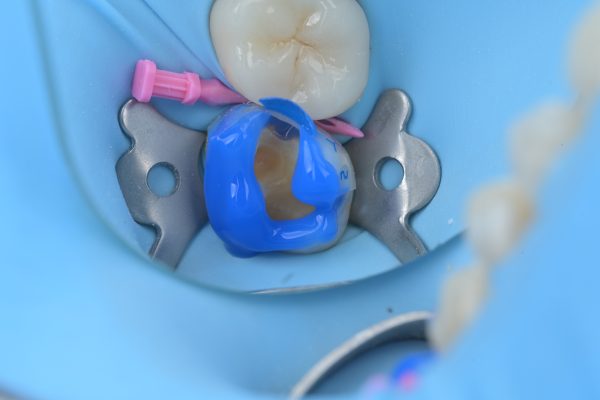
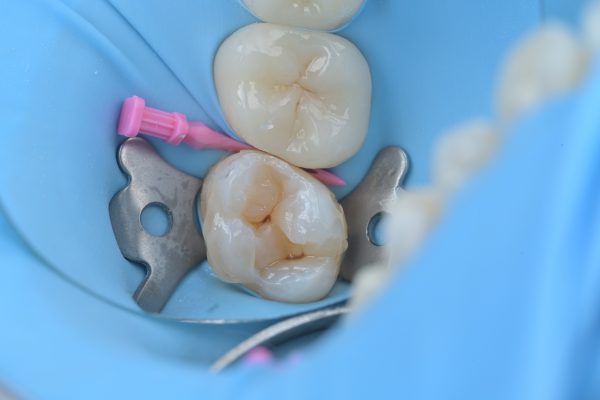
The proximal wall was then built first with JE shade (Figure 4) and the matrix and ring were removed. With the thin, bendable tip, the narrow and deep part of the class II cavity could be easily reached. The cusps were built up in small layers (Figure 5).
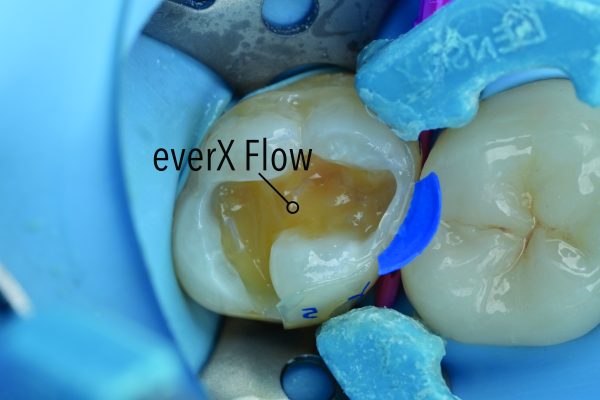
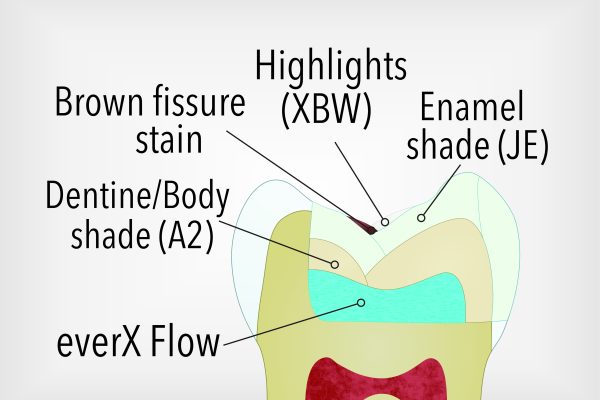
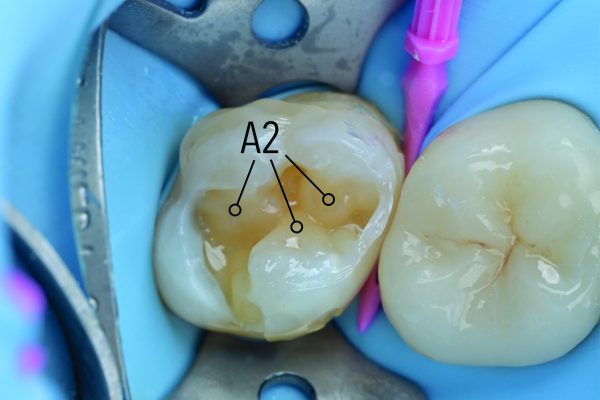
The first base layers at the bottom were made with a fibre-reinforced flowable composite (Everx Flow) in dentine shade. Next, the primary anatomy was laid using G-ænial Universal Injectable (shade A2) (Figure 6).
By injecting from the bottom up, following the existing anatomy, air bubble inclusion was avoided. The bases of the cusps did not touch each other, which left a free surface for shrinkage, avoiding the shrinkage stress that can build up.
‘Glazed’ appearance
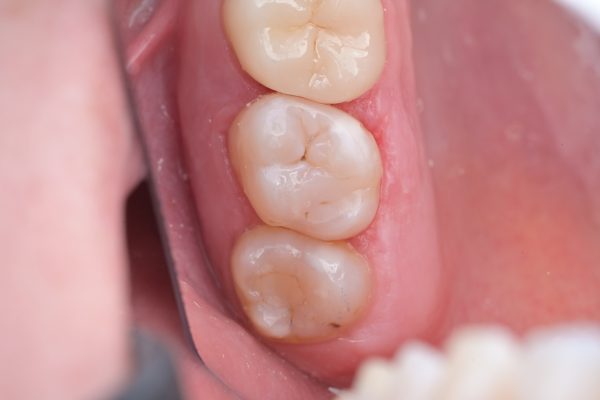
A tiny amount of brown stain was sparsely applied in the pits and fissures (Figure 7) before layering the more translucent JE shade on top to enhance the perception of the occlusal morphology in a delicate way (Figures 8-9).
The cusps can be shaped simply by using the tip of the proper syringe, so no modelling instruments are used; it reminds me of a wax-up technique, without the need to carve anything.
This also makes it a lot easier to switch between different shades than a traditional approach where you are working with paste and instruments.
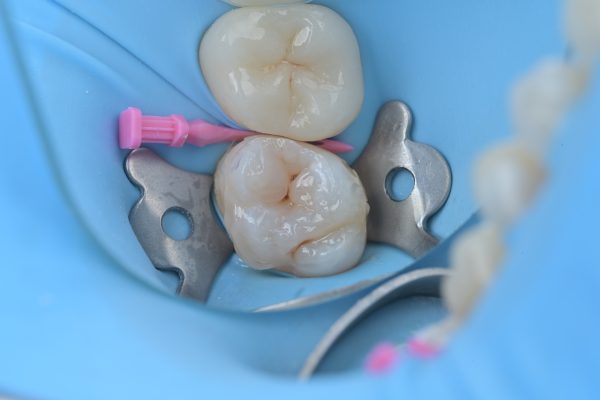
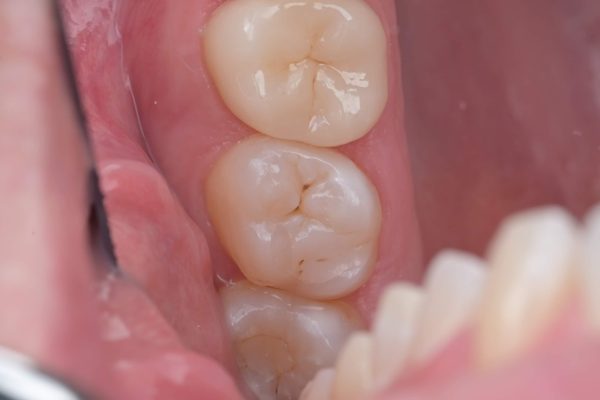
G-ænial Universal Injectable gives a ‘glazed’ appearance with rounded and soft shapes, like ceramics, with an easy-to-clean surface (Figure 10). At the follow-up appointment after one week, the remarkable gloss retention was again confirmed (Figure 11).
Conclusion
Dentists are always on the lookout for simplified approaches with less technique sensitivity. In this regard, it is definitely worthwhile to familiarise yourself with this new way of working – the easy manipulation of the thixotropic material grows on you and once you unleash its full potential, it will soon become your favourite.
The cusp-by-cusp additive technique truly offers a high-quality restorative option for a variety of clinical applications.
References
Kitasako Y, Sadr A, Burrow MF and Tagami J (2016)
hirty-six month clinical evaluation of a highly filled flowable composite for direct posterior restorations. Aust Dent J 61(3): 366-73
For more information visit www.europe.gc.dental/en-ER/products/gaenialuniversalinjectable

