Alan Cantagalli presents an onlay restoration case using natural-looking onlays, digital scanning and CAD design.
Onlays are restorations that replace a large amount of missing tooth structure, involving one or more cusps on molars or premolars. They are fabricated in the laboratory and then cemented by the dentist.
More and more, onlays are replacing full coverage crowns in treatment plans because they are more conservative in nature.
In this article, I explain how a natural-looking GC Cerasmart onlay was fabricated via analog impressions, the pouring of two models, the digital scanning of those models, CAD design, milling, staining and glazing, and then cementation.
Polyether impressions
After the onlay preparation was completed intraorally, a polyether impression was taken (Figures 1 and 2). This provides accurate impressions in moist conditions.
The polyether impression was spray disinfected with a chlorine compound, rinsed, blow dried and then sent to the laboratory.
The impression was kept dry and idle for four hours before the laboratory poured it. This was in order to ensure maximum accuracy.
As well as this, temperatures exceeding 60°C will damage polyether impressions.
An opposing alginate impression was also taken.
 Figures 1-2: The polyether impression


The fabrication of the plaster models
Steps:
- The master model was made with class N plaster and without any removable dies
- The opposing model was also made with class IV plaster to ensure maximum precision when mounting onto an articulator
- A duplicate single-tooth model was then made for the purpose of finishing and polishing the restoration, keeping the master model unaltered (Figures 3 and 4) and being used as a ‘check model’ only
- After the models were mounted onto an articulator, cusp infringement into the preparation space was assessed. Then the occlusal morphology of the final restoration was envisioned.
Digital scanning
The appropriate scans were carried out systematically with a Zirkonzahn intraoral scanner.
This is an extremely accurate scanner which helps ensure the exact fit of a final restoration.
Steps:
- The master model was scanned
- The opposing model was scanned
- The single tooth model was scanned
- A buccal bite scan was carried out
- After the model’s cloud points were stitched together with the software to create digital models, the digital master model (Figure 5) along with the opposing model were bite aligned. They were then mounted on the virtual articulator (Figure 6).
CAD design
A digital die spacer of 20 μm was implemented starting 0.5 mm away from all margins.
This cementation gap was created in order to remove all undercuts from the preparation.
Computer modelling was utilised to design and create the correct occlusal contact points, an interproximal contact point, the correct shape and accurate marginal adaptation of the GC Cerasmart onlay that was to be milled (Figures 7 to 9).
Milling
GC Cerasmart in High Translucency was the CEREC milling block choice that was used to produce the onlay.
Cerasmart is a unique dental material that combines the best characteristics of high strength ceramics and the best characteristics of composite.
With a revolutionary flexible nano ceramic matrix structure, this product provides unsurpassed physical properties and impact dispersion due to the homogenous nano ceramic network, and also produces superior gloss value and a natural opalescence and fluorescence.
After milling, the GC Cerasmart onlay was checked for marginal accuracy and fit on the single tooth model (Figures 10 and 11).
 Figures 10-11: The GC Cerasmart onlay checked for fit and marginal adaption on the single tooth model


Staining and glazing
Before staining and glazing the onlay restoration, its internal surface was sandblasted with aluminum oxide. This was in order to create roughness.
A layer of ceramic primer was then applied to the onlay’ s internal surface to improve the bond strength between the cement and the onlay’ s internal surface.
On the single tooth model, staining and glazing was carried out using Optiglaze Colour. This adds surface gloss, wear resistance and colour to the restoration.
Because sharp resolution initial photos were taken, a perfect shade match with the adjacent teeth was achieved by carefully applying the various Optiglaze Colour system options
Firstly, Optiglaze Colour clear glaze was applied and then light cured. Optiglaze Colour orange was applied to the occlusal grooves to give a depth effect, while at the same time making the restoration look as natural as possible (Figures 12 to 14).
Then opaque nail polish was applied to give the restoration an even more appealing aesthetic look.
A last layer of Optiglaze Colour clear glaze was applied followed by light curing.
Finally, the onlay restoration was checked on the master model for fit, a positive contact point, marginal adaptation and proper occlusion (Figure 15).
Cementation
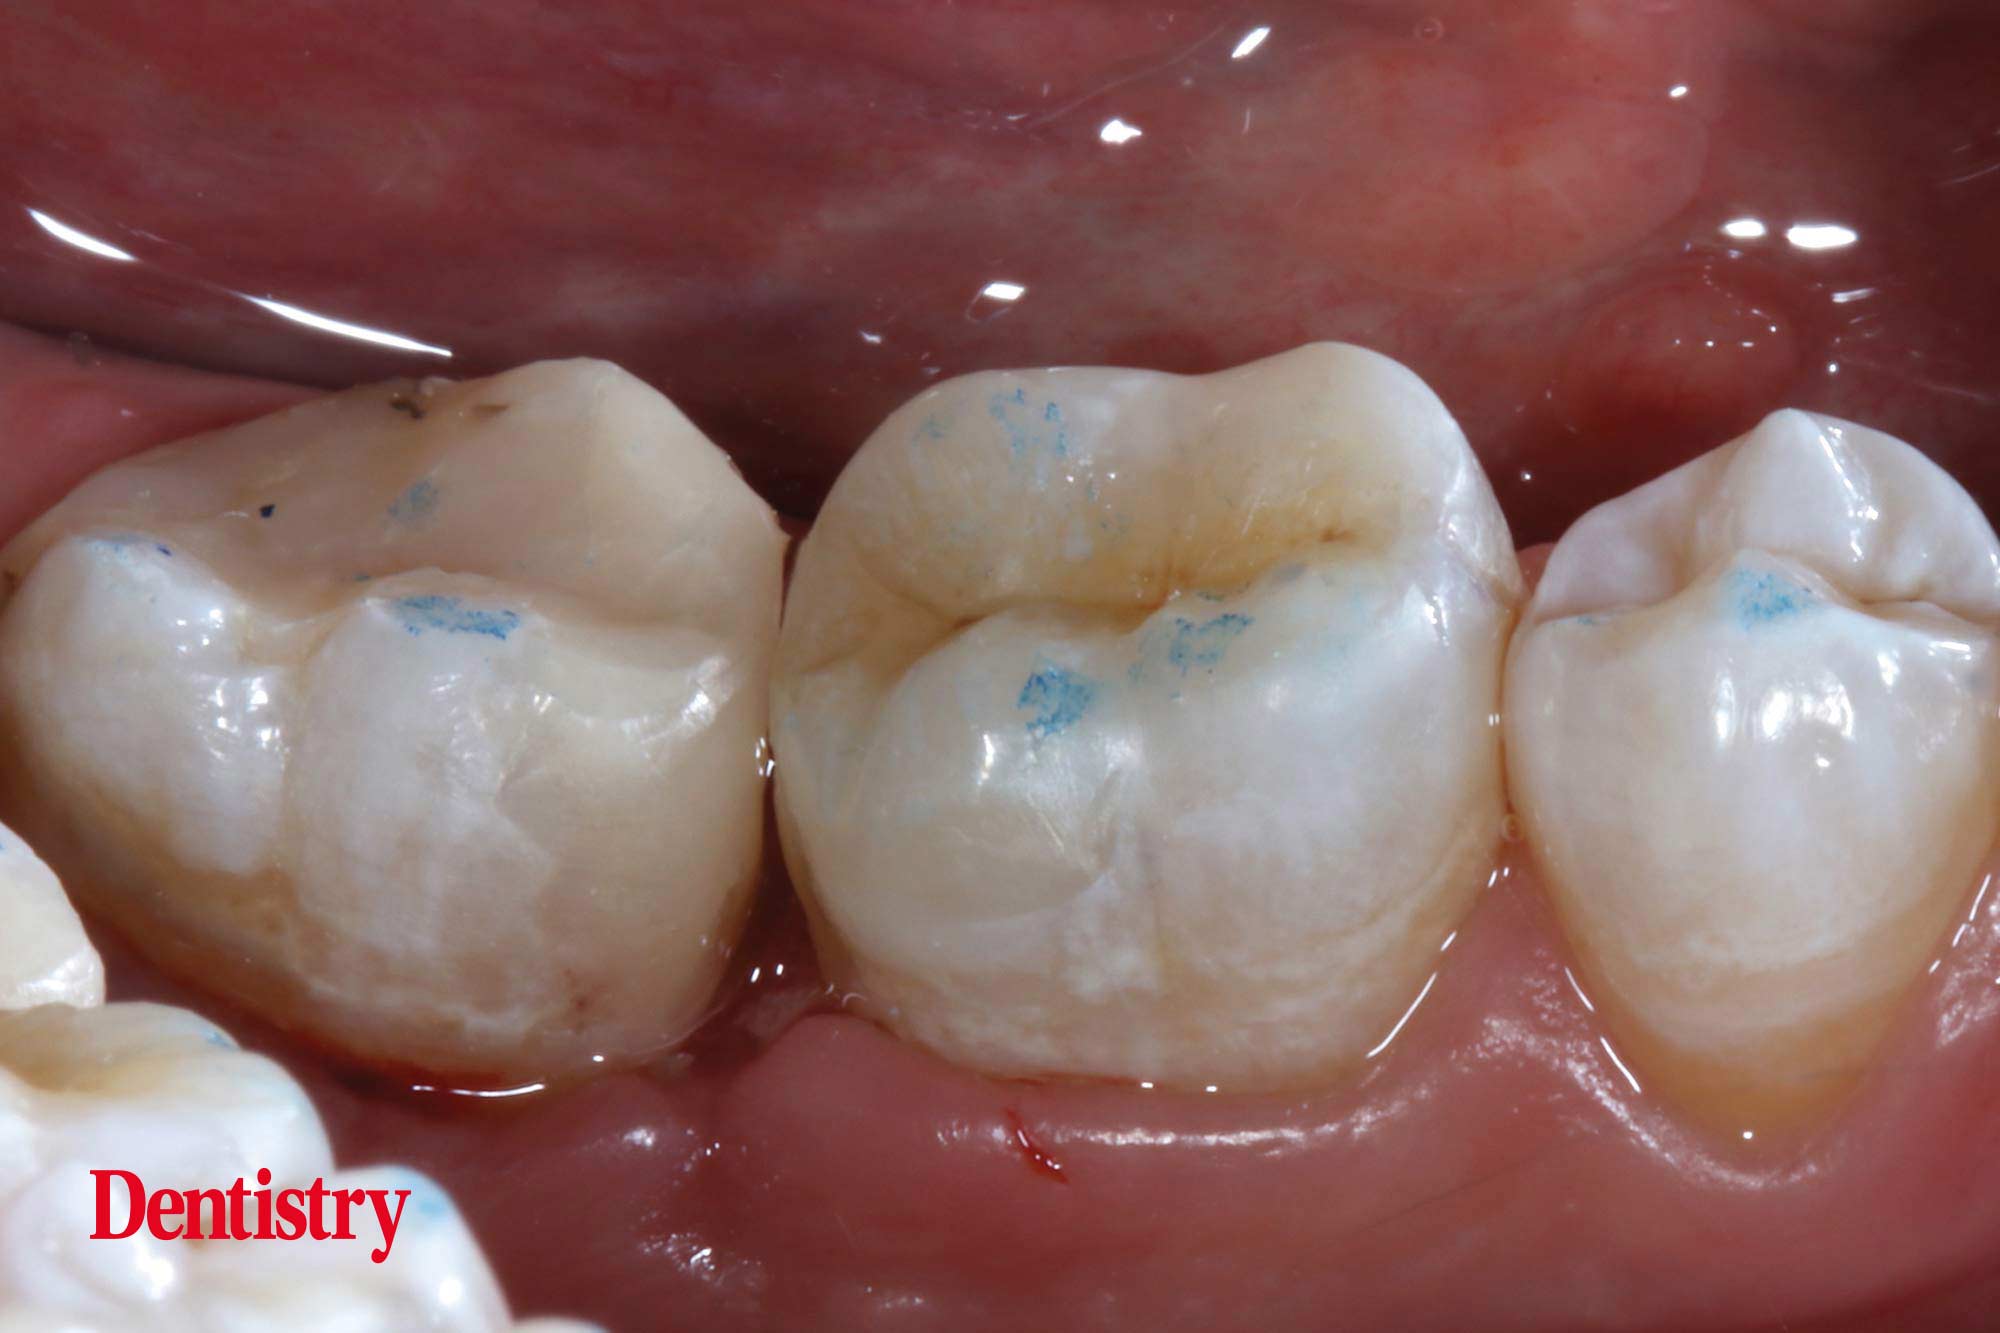
The GC Cerasmart onlay was cemented, and a perfect shade match and aesthetic harmony was achieved (Figures 16 and 17).
Conclusions
This article outlines a simple protocol that instructs on how to CAD/CAM fabricate a highly aesthetic GC Cerasmart onlay.
For dentists, the onlay restorative option provides a more conservative preparation approach than would a conventional crown.
Follow Laboratory on Instagram to keep up with all the latest dental news and trends.

