As many of you know, shade taking is one of the hardest components of aesthetic dentistry. Whether it is for direct or indirect restorations. In this article, Dr Suril Amin, Sensational Smiles practice owner, shares his tips on how to improve your shade communication with your dental laboratory.
Before we get started, let us briefly describe the three components of colour:
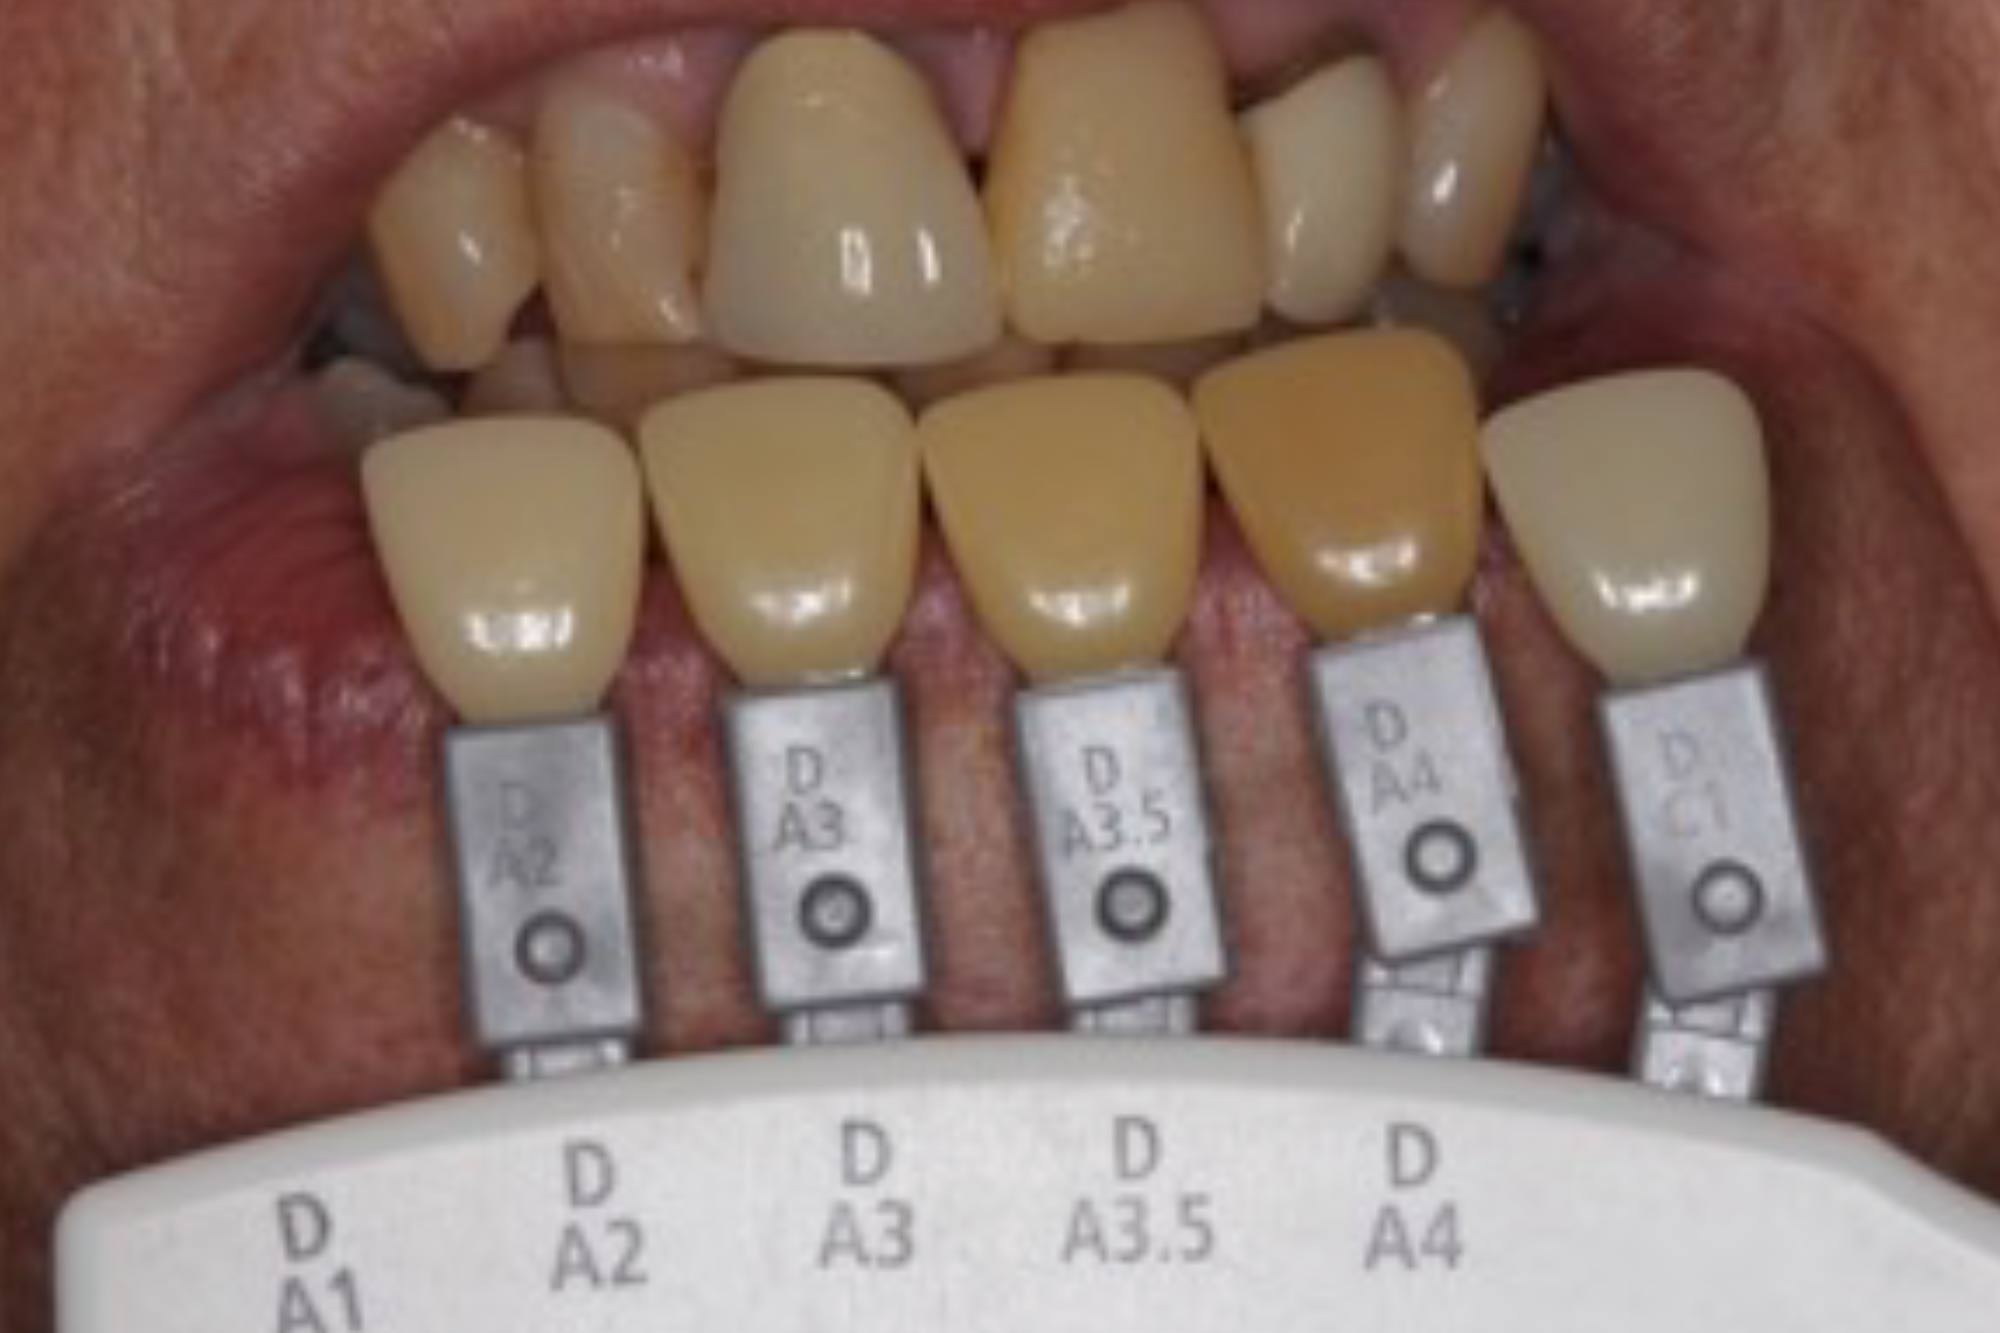
Hue – this is the actual colour of the tooth. The Vita shades are:
- A – reddish brown
- B – reddish yellow
- C – grey
- D – reddish grey.
Chroma – this is the intensity of the hue.
Value – this is the light to darkness.
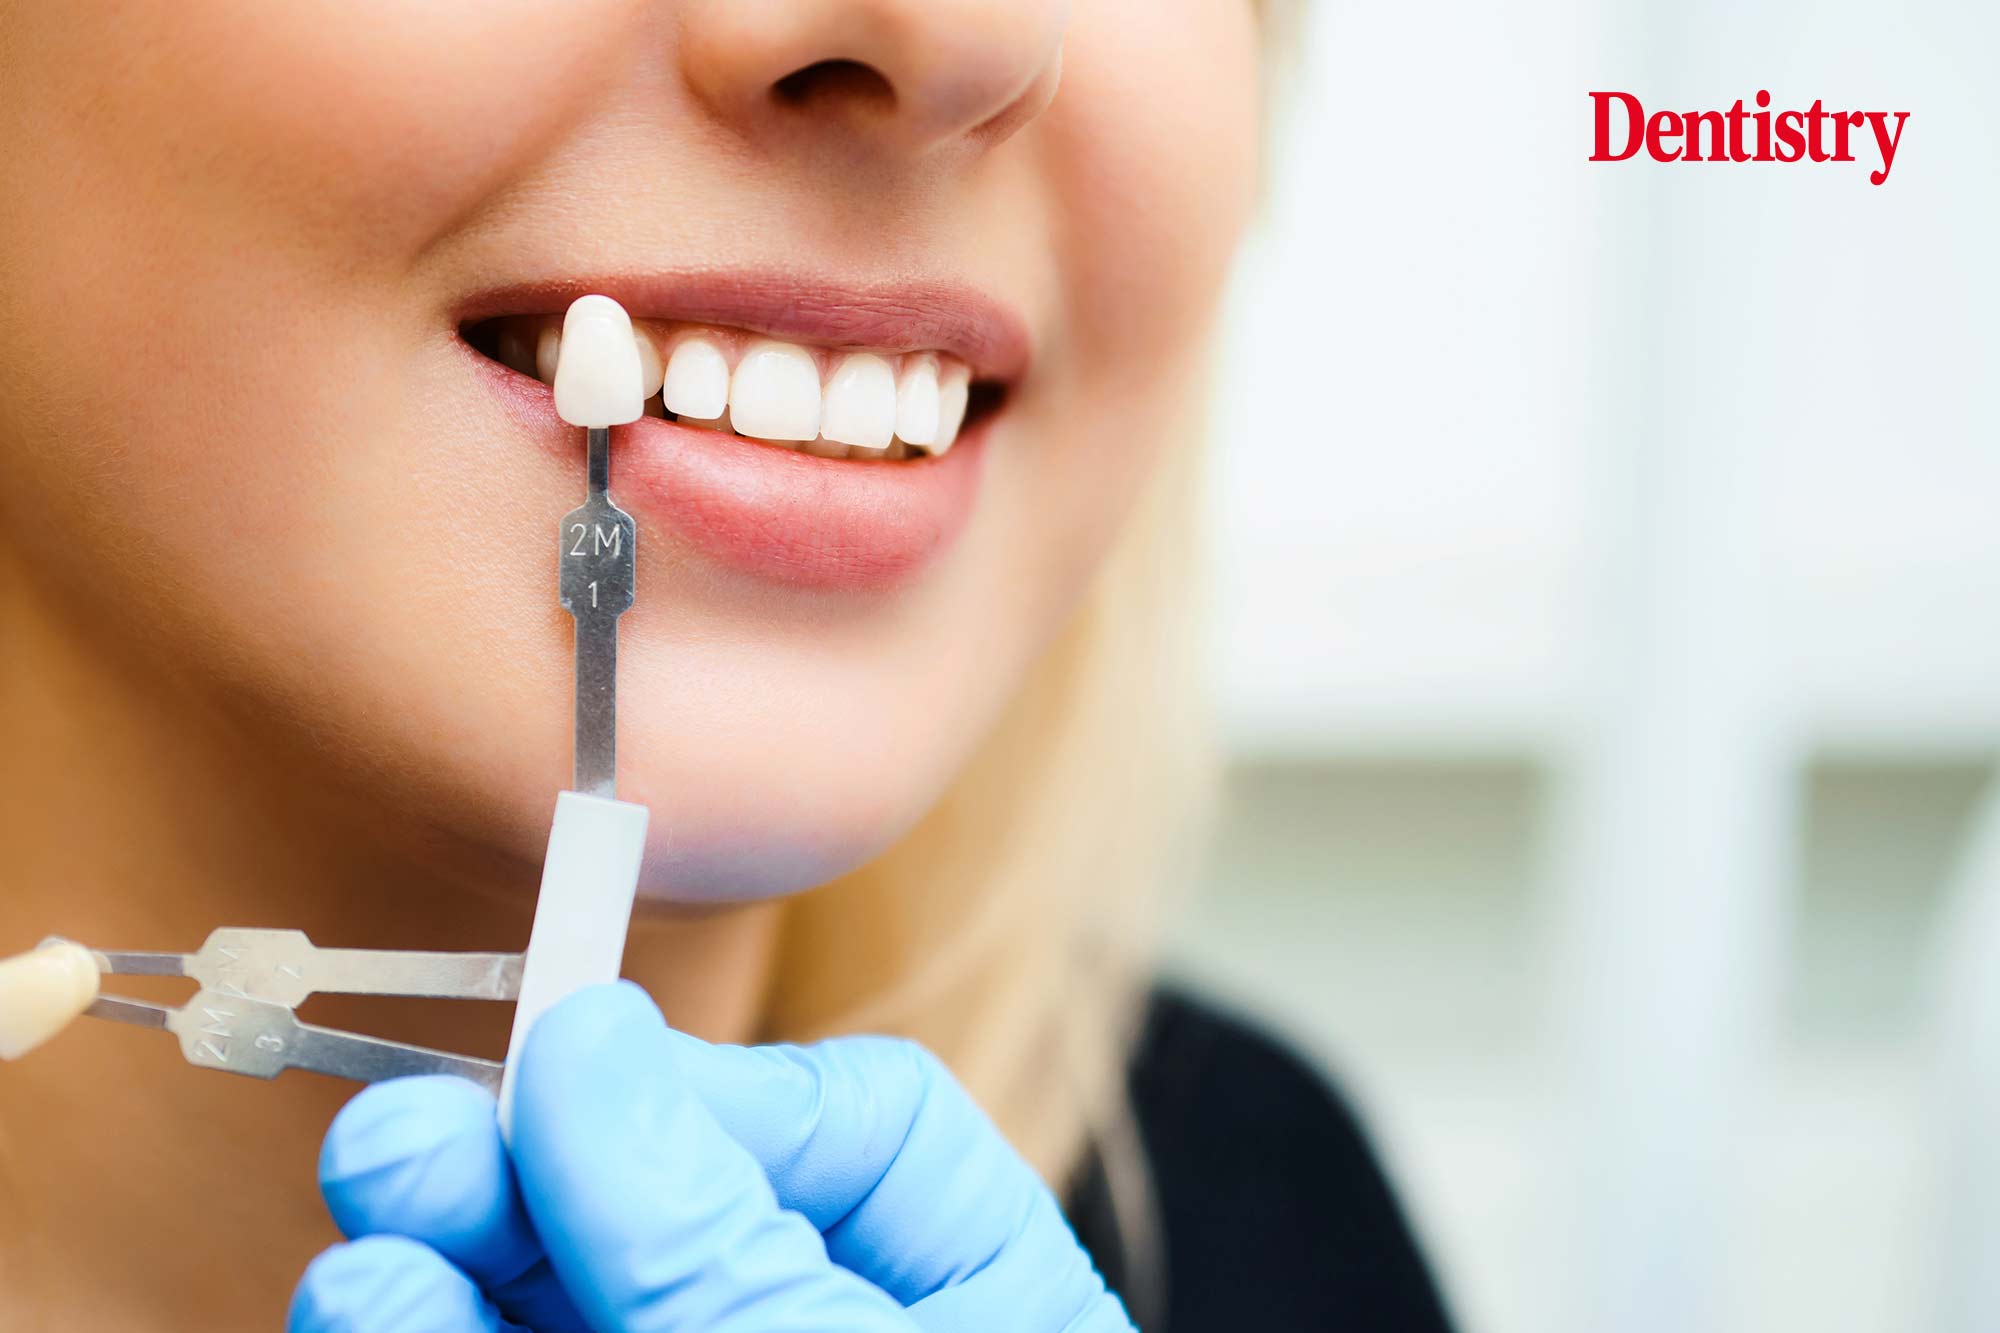
1) Shade guides
There are many different shade guides to use. It’s important your laboratory is familiar with the one you have.
The most common shade guide dentists use is Vita Classical A1-D4. It is simple to use but limited due to the options available.
Some people like to order your shade guide according to value. Value is one of the most important factors. Others, like to sandblast them to take the glaze off, and grind the tips down.
I personally don’t find these adjustments too helpful, but some dentists do.
Always look at the body of the shade tab, this is the true colour. The incisal tips are usually more translucent and will sometimes make it harder for you to determine the correct colour.
2) Always take shade first
Always take the shade at the start of the appointment when your eyes are fresh.
If you stare too long at a colour your eyes acclimatise to it. You will have less chance of differentiating between similar colours. If you stare at it too long you can focus on another colour for a half a minute to help ‘reset’ your eyes. Blue is a particularly good colour to do this with.
If you take the shade after you’ve done a crown prep your eyes are not only tired, but the adjacent teeth is dehydrated. Therefore, the crown you get back is likely to be lighter in shade.
3) Squinting helps to select the correct value
If you squint your eyes, this will allow less light into the eyes, which means the retinal rods are activated more helping to select the correct value.
4) Use a camera for better communication with your lab
Once you have selected a few shade tabs, I normally take a photo next to the tooth. It’s important to get the whole tooth into the picture along with the whole shade tab, plus the marking of which shade it is.
Try to get a few of the shade tabs together in the same shot and as near the tooth as possible.
The angulation is also important too. Try to place the shade at the same angle. Taking multiple photos will help the technician.
5) Illumination
The two most common flash systems that are used to illuminate teeth close up are ring flashes or twin flashes.
Twin flashes are generally better as the light is more diffuse. Ring flashes, although very easy to use for most dental photographs, can produce harsh illumination, which makes it harder to take a good shade picture for the laboratory.
Therefore, a twin flash system is often preferred. Please bear in mind any flash photography is likely to alter the shade slightly. So don’t rely solely on your lab choosing the shade.
6) Utilise the cross-polarisation lens
The cross-polarisation lens helps massively in determining the shade needed. In fact, I use it for every indirect case I have as it shows the true dentine colour of the tooth.
The procedure I follow is:
- Pick two to three Vita shades that are close
- Take a normal photograph using a DSLR camera
- Use my cross-polarisation lens and retake the same photograph
- Pick the same shade, but this time using the dentine shades and take a normal photograph too
- Take the same photo but this time use the cross-polarisation lens.

7) Ensure lighting is good
Natural daylight is the best light to use when selecting the shade. Ensure your light bulbs are 5,500K degrees.
8) Shade mapping
It’s always a good idea to draw a picture (or edit a digital photograph) to show the laboratory the different areas of shading on a particular tooth.
As you are probably already aware, teeth are generally not monochromatic – they will have different shades, translucency, stains etc.

Follow Dentistry.co.uk on Instagram to keep up with all the latest dental news and trends.

