
Aligner Dental Academy explains the challenges that upper lateral incisors present in aligner therapy and how they can be controlled with precision.
‘Why will it not rotate?’
I am sure there are many of us who have agonised over that one brat of a tooth… the lone wolf… the one and only… lateral incisor!
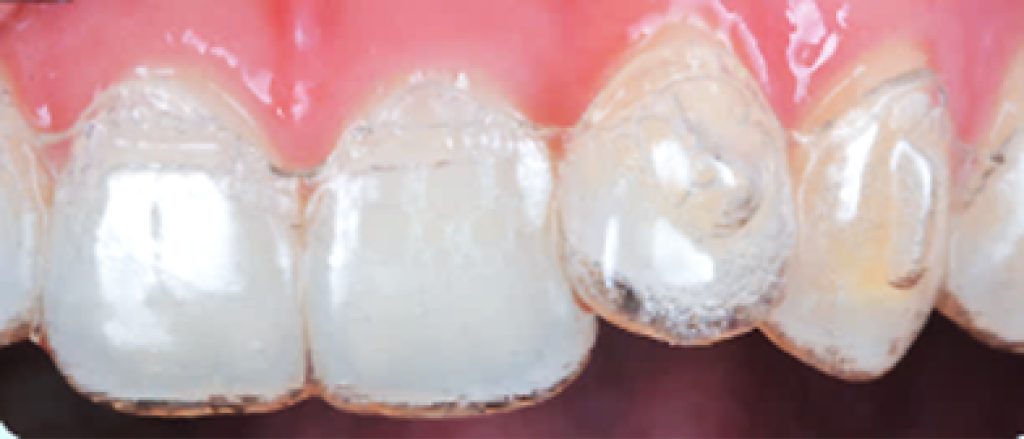
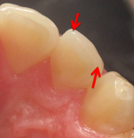
Among all teeth managed through clear aligner therapy, the maxillary lateral incisors have earned a notorious reputation. Their small size, conical shape, and position between dominant central incisors and canines make them particularly resistant to predictable movement.
In the world of aligner biomechanics, they are the ‘nemesis’ teeth: elusive, rebellious, and demanding a strategic, over-engineered approach.
This article explores the reasons behind these challenges and offers evidence-based strategies to overcome them.
Why are upper laterals so challenging?
Contributing factors include:
- Limited surface area: the small crowns offer minimal contact for aligner force application
- Conical morphology: reduces retentive undercuts, making the aligner grip less effective
- Proximity to adjacent teeth: increases the risk of contact binding and limits space for movement.
Strategic planning for common tracking issues
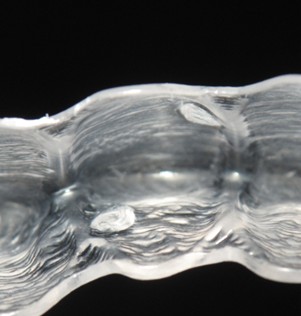
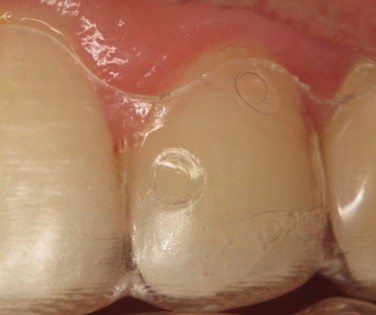
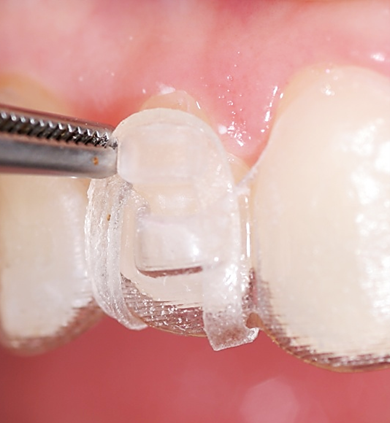
1. Optimised attachments
Rotating rounded teeth without proper attachments often leads to failure. For rounded laterals, use the largest available optimised rotation attachment greatly improves force application and ensures broad surface control with anticipated force vectors. If unavailable, a vertical rectangular attachment provides effective surface engagement. On the Aligner Dental Academy platform, you can watch a demonstration on how to modify a ClinCheck.
2. Separation of movements
Attempting simultaneous rotation, extrusion, and torque can lead to tracking failure, hence, the tooth movements must be sequenced. For example, in a retroclined incisor, first plan proclination, followed by intrusion, then retraction. Separating these movements reduces the load per stage, improves material efficiency, and allows for controlled force application.
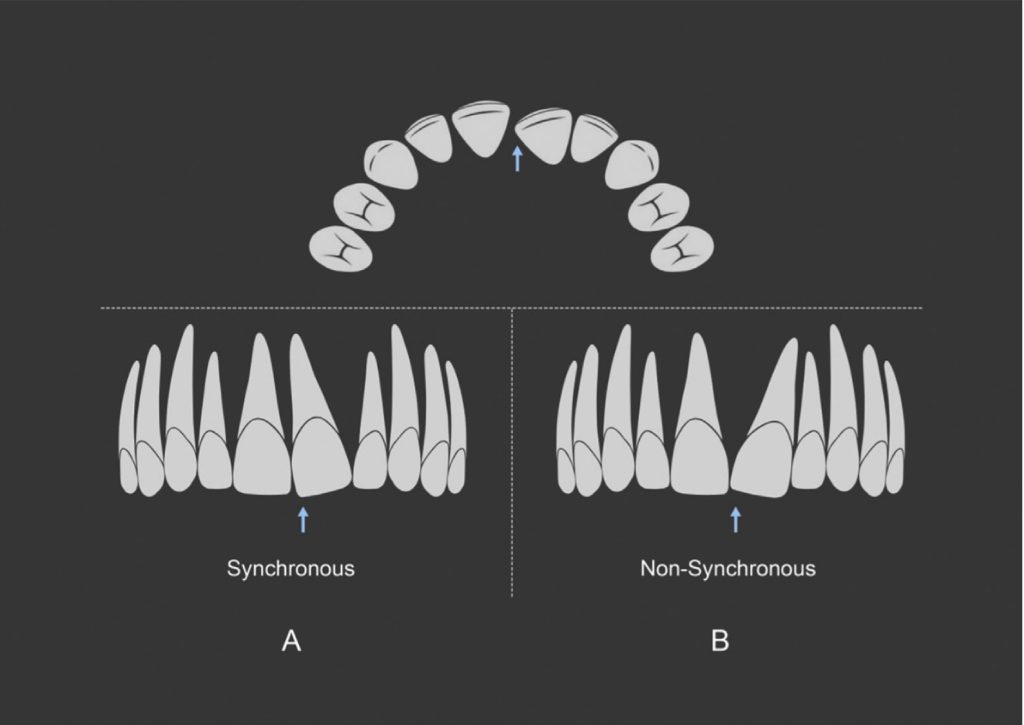
3. Rotation dynamics
Synchronous rotations, like mesial-in rotations, help guide the crown into alignment while encouraging favourable root angulation, supporting more controlled and stable outcomes. In contrast, non-synchronous rotations, like mesial-out rotations, can increase the risk of crown tipping and uncontrolled root movement, reducing long-term predictability (Aminian et al, 2024).
Plan root-driven movements to guide both crown and root predictably, reducing the risk of tipping and improving long-term stability.
4. Over-engineering movements
Upper lateral incisors often require complex movements such as extrusion and rotation, which are among the least predictable with clear aligners. Studies indicate extrusion accuracy as low as 29.6% and rotation correction around 30% (Jain et al, 2023).
If 1mm of extrusion is needed on an upper lateral incisor, plan for 1.3mm extrusion instead, adding approx. 0.3mm of overcorrection, since 30% of the movement may not fully track.
5. Space creation to avoid contact blockage and tipping
Space creation is essential. Use interproximal reduction (IPR), or in the digital plan, create space via early proclination of central incisors or distalisation of canines. Clearance of interproximal surfaces reduces friction and tracking loss.
When a force doesn’t pass through the centre of resistance, it causes unintended rotation and translation, often pushing teeth into adjacent ones and causing contact blockage. Aligners grip well buccally and lingually but poorly mesially and distally, reducing mesiodistal control and increasing the risk of unplanned rotation and tipping, causing contact blockage and loss of tracking (Aminian et al, 2024).
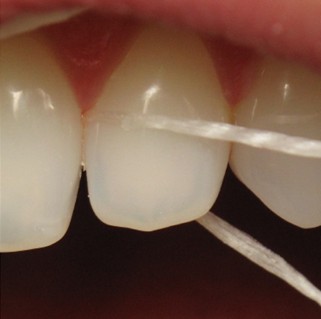
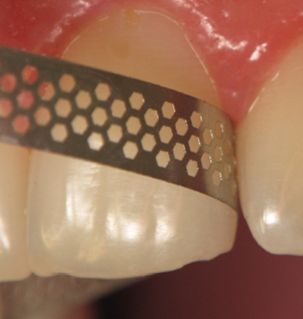
At each recall, check interproximal contacts around upper laterals with floss to confirm space. If contacts are tight, use a yellow-coded IPR strip (0.08mm) to relieve them. Without space, movements are likely to stall.
6. Regular treatment monitoring
Use virtual monitoring to review patient progress weekly and catch early signs of tracking issues. Schedule in-person checks more frequently during critical movement phases to ensure teeth are following the planned path. Always include planned refinements in your initial treatment protocol, rather than relying on them only to fix problems.
How to manage tracking issues
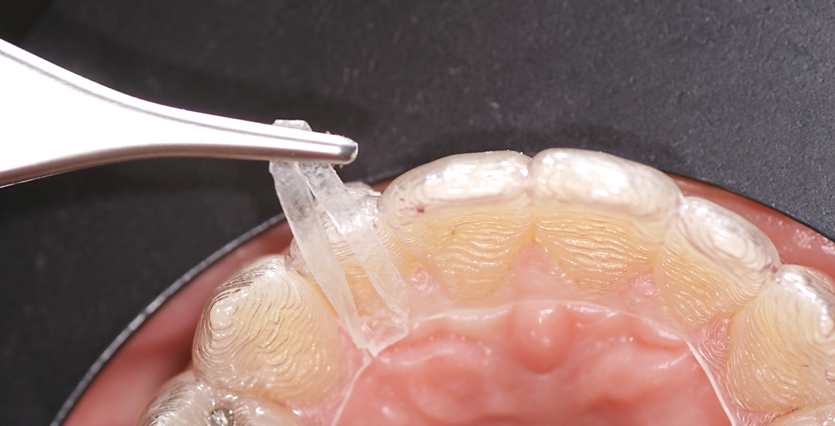
Detailing plier
If rotation isn’t tracking, you can continue with the same aligner by using a detailing plier. For example, for mesial in rotation, create dimples mesio-buccally and disto-lingually on the aligners. These indentations generate a force couple to aid de-rotation. Reinforce the dimples with a thin layer of bonding agent and light cure to prevent them from popping out. Always check and relieve tight interproximal contacts to support proper tracking.

Auxiliary technique
A valuable auxiliary is the slingshot elastic protocol if extrusion stalls mid-treatment. Place labial and lingual buttons on the lateral incisor, connecting them with an elastic (1/8”, 3.5oz) to generate a continuous downward force. This targeted extrusion force improves vertical control beyond what aligners alone can offer.
On the ADA platform, you can learn more about how to troubleshoot tracking issues.
Takeaway: mastering the nemesis tooth
Upper lateral incisors demand more than a bespoke ClinCheck plan, they require a fusion of biomechanics, clinical judgment, and proactive strategy. With movement separation, strategic space creation, optimized attachments, and overcorrection, these once-dreaded teeth can be managed with confidence.
With the right approach, upper lateral incisors will no longer be your nemesis – they’ll become a testament to clinical precision and biomechanical mastery.
The Aligner Dental Academt invites you to join its Professional Certificate course designed to help you master treatment with Invisalign, enhancing your clinical confidence and outcomes.
This article is sponsored by Aligner Dental Academy.

