Andre Gaul RDT gives a step-by-step overview of the design and fabrication process of printed occlusal splints.
In case you’re wondering, each of these splints is worth around $5.10/scan in resin.
Figure 13 shows the printed models. Normally, I would print models like these flat on the plate but, apparently, I have a big mouth and I couldn’t fit them both in a flat position. So I angled them slightly.
These models were printed hollow with a shell thickness of 2mm, and together amount to roughly $6/scan in resin.
To test the difference in the adaptation, I also poured a set of models in dental stone. My initial prediction was that, since 3D printable resin shrinks a bit and dental stone expands, the splint would fit snuggly in my mouth, fit perfectly on the printed model and fit too tightly on the stone model.
Was I right? We’ll find out soon enough.
Post-cure
Next up was removing the parts from the plate, cleaning them in 99% isopropyl alcohol and post-curing them. The post-curing step is particularly critical for medical devices to ensure that any residual monomer is eliminated.
In addition, the splints were submerged in glycerine during the post-curing. The reason behind this is that the curing of this type of resin is inhibited by oxygen. The glycerine acts as a barrier which allows the surface of the parts to fully cure under the ultraviolet light. If you’ve ever worked with polyester resin, commonly known as ‘fibreglass resin’ you’re probably familiar with this phenomenon.
There are other fancier curing chambers that employ a nitrogen blanket, but glycerine works fine.
I used the Eurolight UV LED curing unit. Its tray is large enough to accommodate many parts at once, but since I only had a small container for the glycerine, I cured them one at a time. I also followed Keystone Industries’ post-curing recommendations (Figure 14).
Burring away
With the splints fully cured, it was time to burr away the scaffold leftovers.
To make them more visible, I rubbed some occlusion tape over the surface.
As you can tell from Figures 15 and 16, I used the stone model that I poured as a support base and, low and behold, the fit was great and not overly tight like I had predicted.
There was, however, a very minor give over the 2nd molars, on both sides, and on all three of the splints. This was easily rectified by submerging the splint in hot water for a minute to soften it a bit, placing it back on the model and holding it for a few seconds while it cooled down.
 Figure 13: 3D printed models


Checking the fit
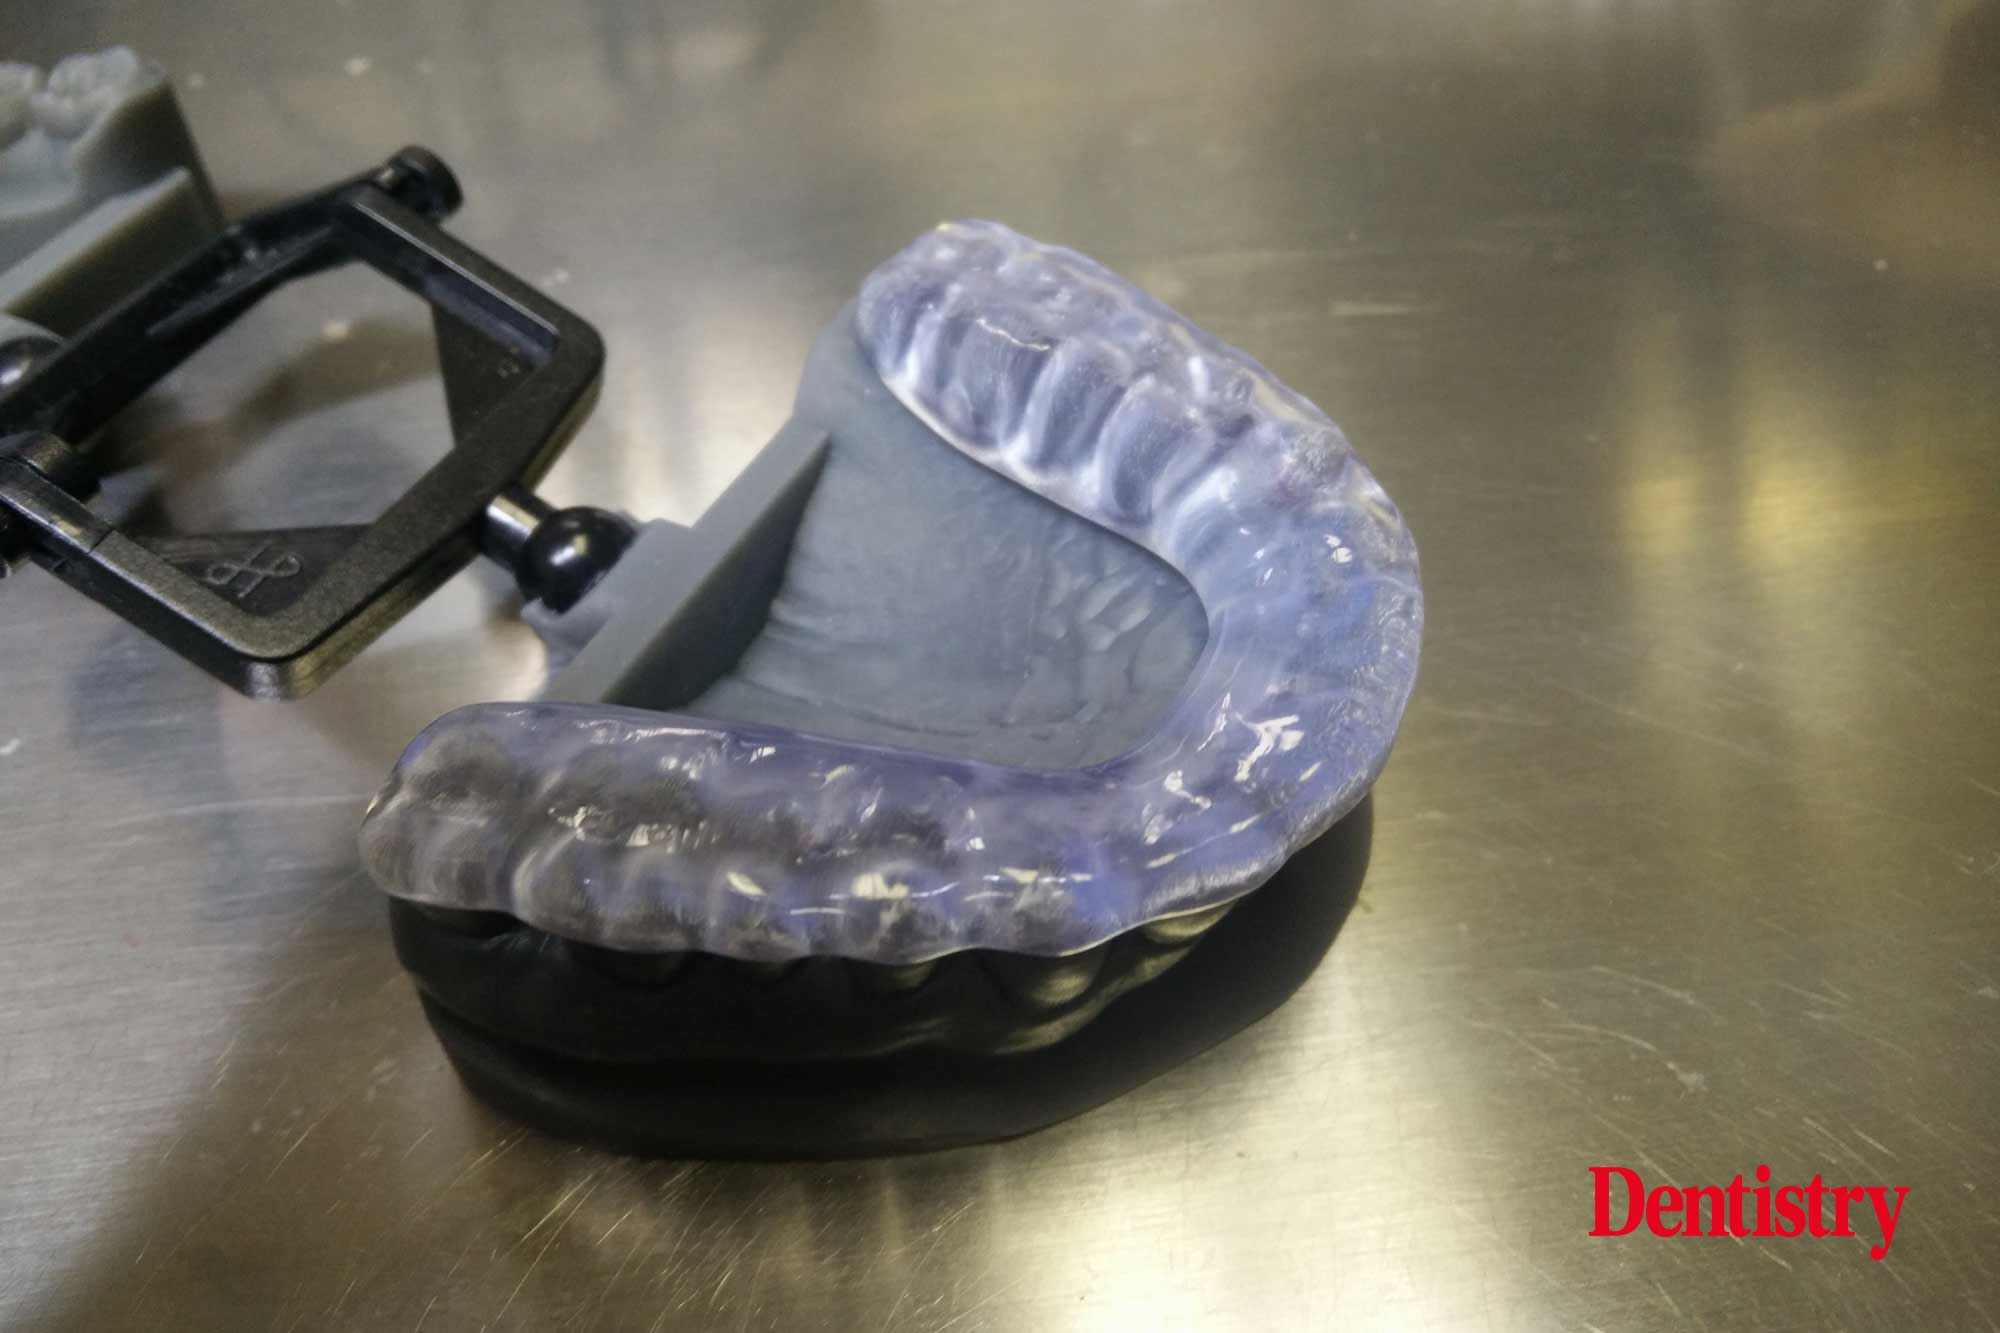
Now to check the contact points. For this task, I used the printed models (Figures 17-18).
How was the fit you ask? Drum roll…like a glove!
One thing to point out here is that, since I used a static disposable articulator to join the models and my bite registration didn’t have the 2mm gap between the 2nd molars, I had to put the models in occlusion with the splint in place before locking the ball and socket joints with glue.
Otherwise, if I did it the other way around, the mandible was slightly off from its correct relation to the splint. Not a big deal really since the models at this stage are only used for final checks. If this is of concern, rest assured that you can mount 3D printed models on a full articulator, if you prefer.
Ready for polishing
In all honesty, I was quite amazed at how little work was needed here – most of which I could attribute to my lack of experience in digital splint design. I reduced some of the stronger contact points, softened some of the contours I didn’t like in my design and the splint was ready for polishing (Figures 19-20).
Any tech that gets to do this daily would figure out how to knock them out much quicker.
The Keysplint Soft printing material is polished the same way as acrylic resin: With pumice, polishing compound and a bit of elbow grease, but since the print surface was smooth to begin with, I expected the polishing to be quick and easy (Figures 21-22).
Oh, and I should point out that despite being called ‘soft’, this material is quite dense. I would say it is similar to lmpak resin.
 Figure 17: Occlusal paper used for marking contact points


The moment of truth
Alright, I have a confession to make. By this time, I had already tried out the splints in my mouth. What can I say, my curiosity had gotten the better of me.
But let’s pretend that this case didn’t need to go out until the following week, so I let the splints sit for four days, just to see if any dimensional changes would occur.
Four days later and the moment of truth had arrived. The fit did feel a bit tighter in the mouth than the first time I tried them, but, after softening in hot water, placing back in and biting down, the fit was once again nice and snug. It has now been an additional five days since doing this exercise and the splints fit just as well.
The digital approach to occlusal splints works! Like any new technique, there is a learning curve to overcome.
If you’re already doing crown and bridge work in CAD, this would be a cake walk. For those who have never worked in the virtual 3D environment, it does take some getting used to, but having mastered the traditional techniques means you’ve certainly seen worse.
Read part one of ‘Are printed occlusal splints worth your time?’
Follow Dentistry.co.uk on Instagram to keep up with all the latest dental news and trends.

