
Dr Walter Denner discusses a natural incisal edge reconstruction with a biocompatible restorative material following trauma.
Injuries to the upper anterior teeth are a common occurrence among children and adolescents. With any luck, it is just a little hard substance that is lost.
Taking a patient case as an example, I will illustrate a special technique which can be used to restore both the shape and colour of the teeth reliably. The technique uses a ceramic-based restorative material without conventional monomers.
Almost one child or adolescent in three will require dental treatment for trauma to permanent teeth, and it is usually the upper anterior teeth which are affected (R Lam, 2016). Therefore, it is a good idea to be well prepared for such cases, for example with a corresponding checklist and a validated treatment concept (J Schmoeckel et al, 2016).
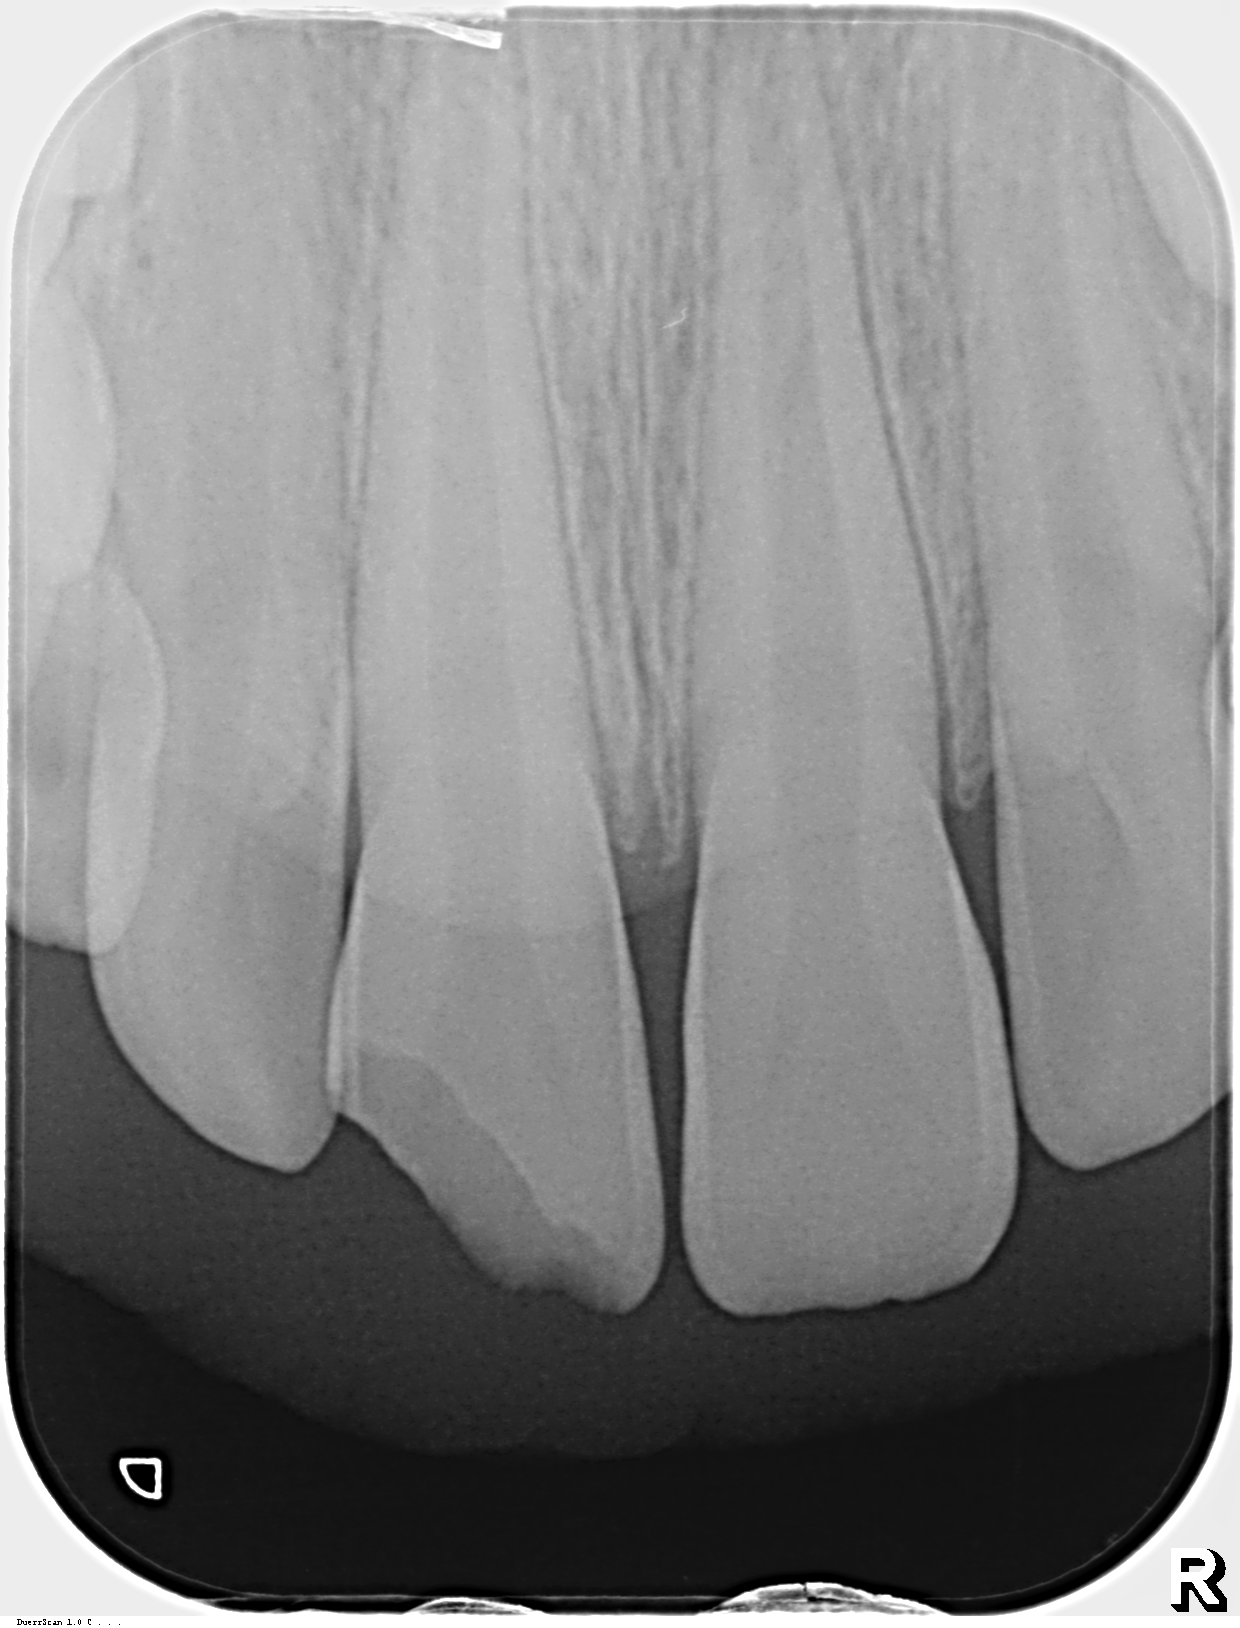
In addition to the patient’s trauma history, the bone and soft tissue situation is always thoroughly examined and documented, with an x-ray if possible.
In cases with an uncomplicated crown fracture without pulp involvement, the first step is to cover the dentine so as to avoid endodontic infections. Pulp necrosis then only develops in 6% of cases at most.
If there is no fragment available for adhesive reattachment, the tooth can be restored quickly with a composite material. Indirect restorations, with preference being given to ceramic veneers or partial crowns, are also possible. The vitality of the tooth should be checked at least once in the year following the trauma.
In children, the direct technique with composites is generally indicated. Renewed trauma is not unlikely and, furthermore, indirect restorations are more time-consuming and more expensive due to the laboratory costs involved.

 Build-up technique with Ormocer restorative material
In the direct build-up technique, as with all tooth reconstructions, the aesthetic impression is determined by the shape and shade. Build-ups only appear natural if both characteristics are reproduced successfully.
The shape can be attained using suitable matrix techniques, which I have described in detail in a textbook written in cooperation with the inventor of the technique, Dr Burkhard Hugo, a professor in Würzburg (W Denner, 2007). The principle consists of reproducing the anatomy of the restoration as precisely as possible using the matrix.
This is done by sculpting it from the approximal exterior surface with a temporary composite. Following curing, the permanent material can be introduced into the resulting negative mould in layers.
If necessary, a ‘back wall’ can be built up palatally or lingually in addition, using enamel restorative material, for example by layering it against a silicone index. The exact procedure and materials used are described in detail in the following case report.
Case report
An eight-year-old boy banged his teeth against a railing when playing tag at school. He turned round while running and didn’t see the railing. He presented in the practice with his mother later that same day.
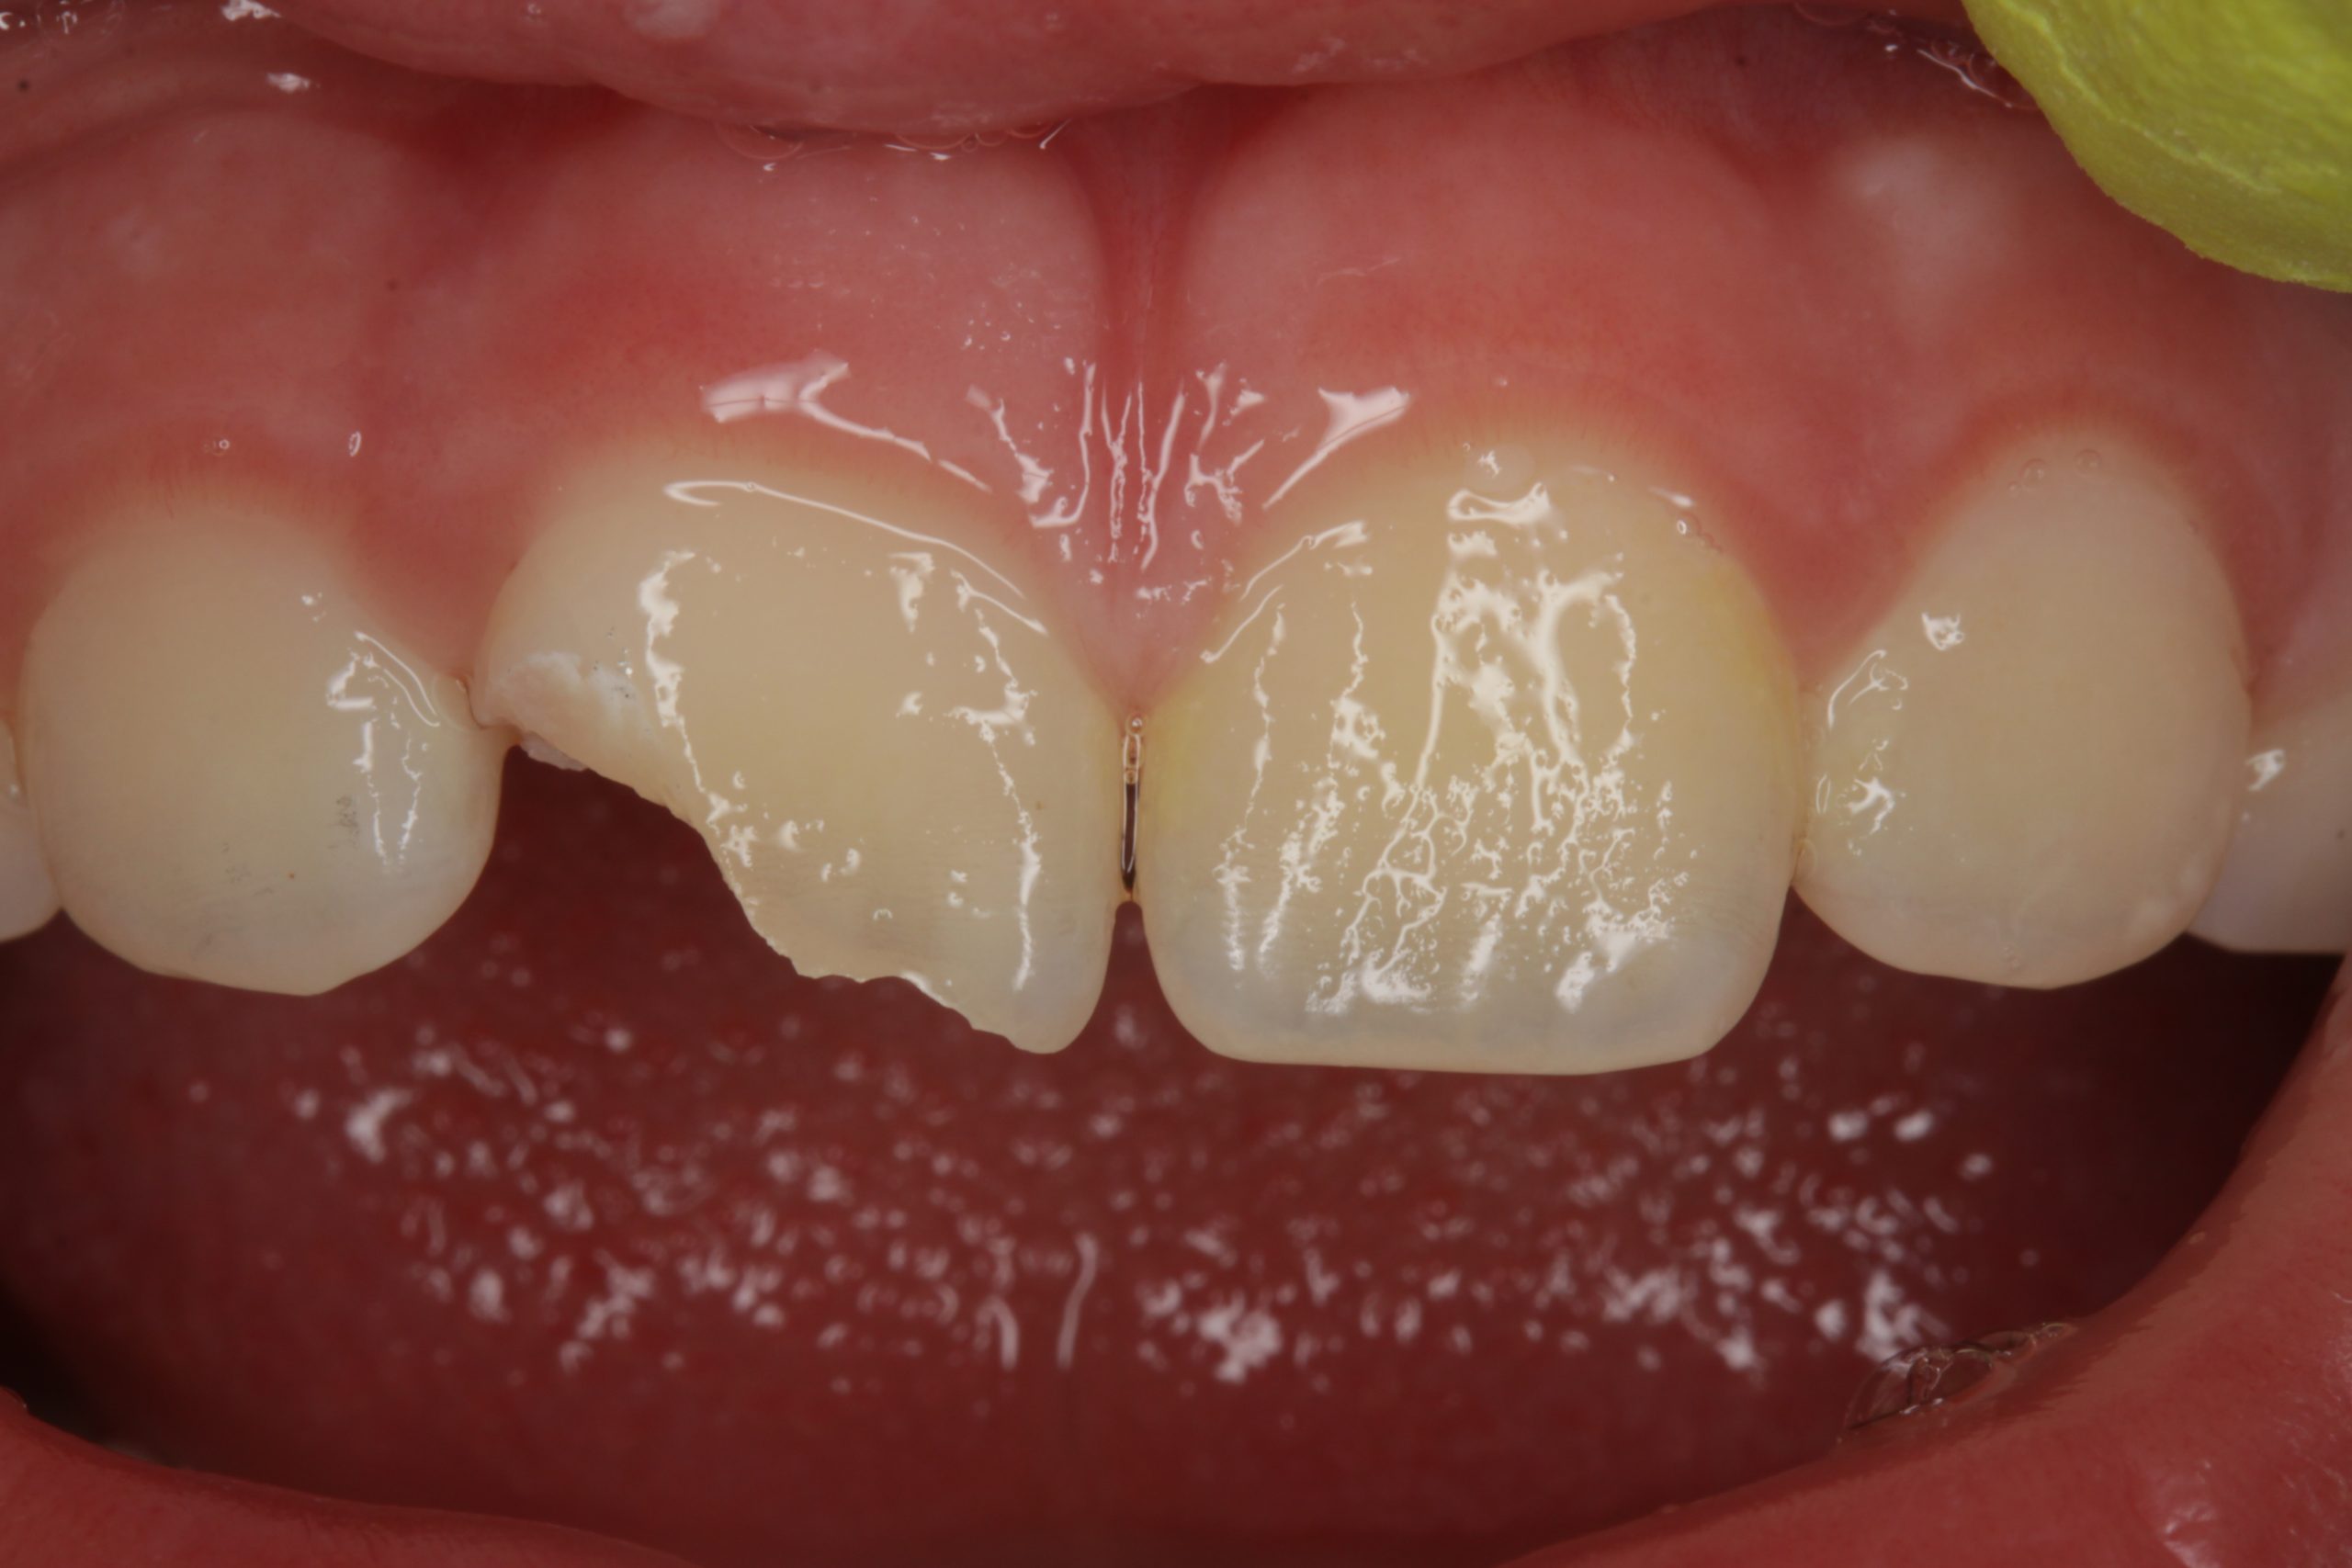
The good news was that the surrounding tissue, including the pulp, had remained intact and the vitality test on the affected tooth 11 (upper right central incisor) was positive (Figures 1 and 2).
The bad news: the fragment was lost in the accident and was therefore not available for the restoration.
With suitable time management (treatment at the end of surgery hours and beyond), we were able to restore the tooth in the same treatment session. Firstly, the dentine shade was determined on the wet tooth by simultaneously holding two similar shades from the shade guide of the nanohybrid filling material used (Admira Fusion, Voco) up to the cervical region of the neighbouring tooth (W Denner, 2006).
As the dentine is going to be covered over with a layer of enamel material (reference: incisal edge), the initial shade should be chosen one step darker.
Due to the supragingival location of the entire defect, it was possible to do without the application of a rubber dam. A lip, cheek and tongue retractor was used instead (Arcflex, FGM).
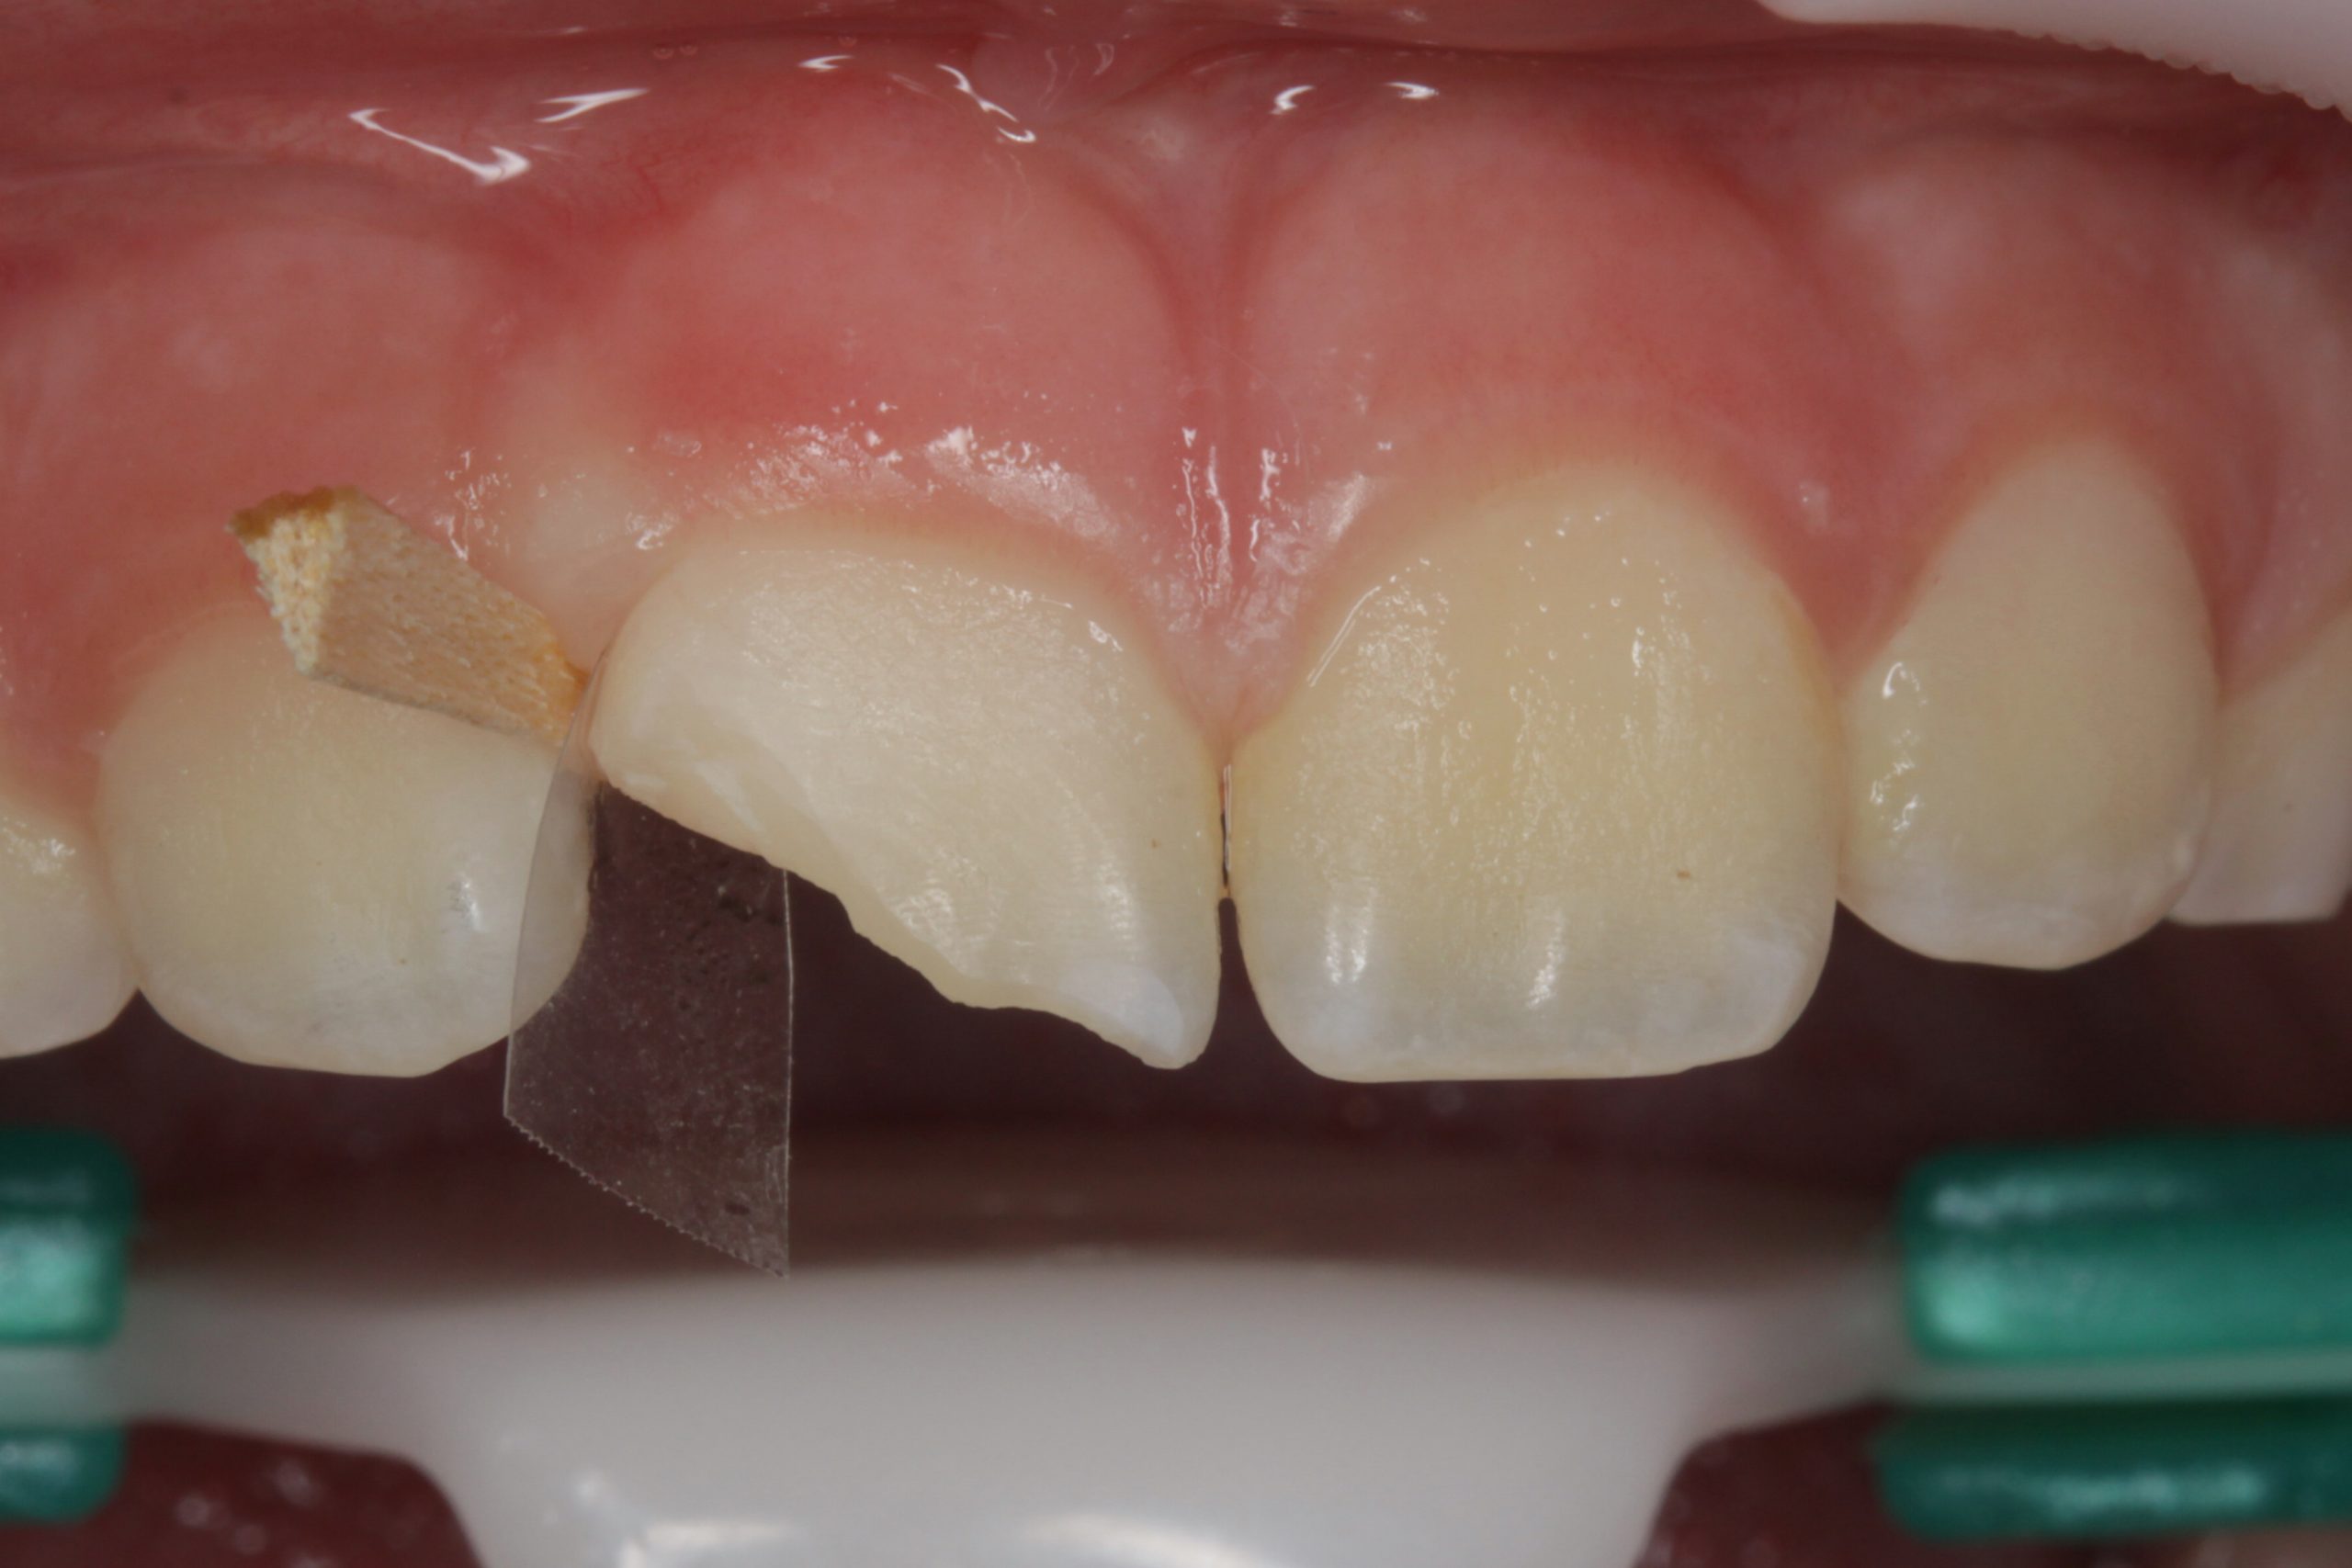
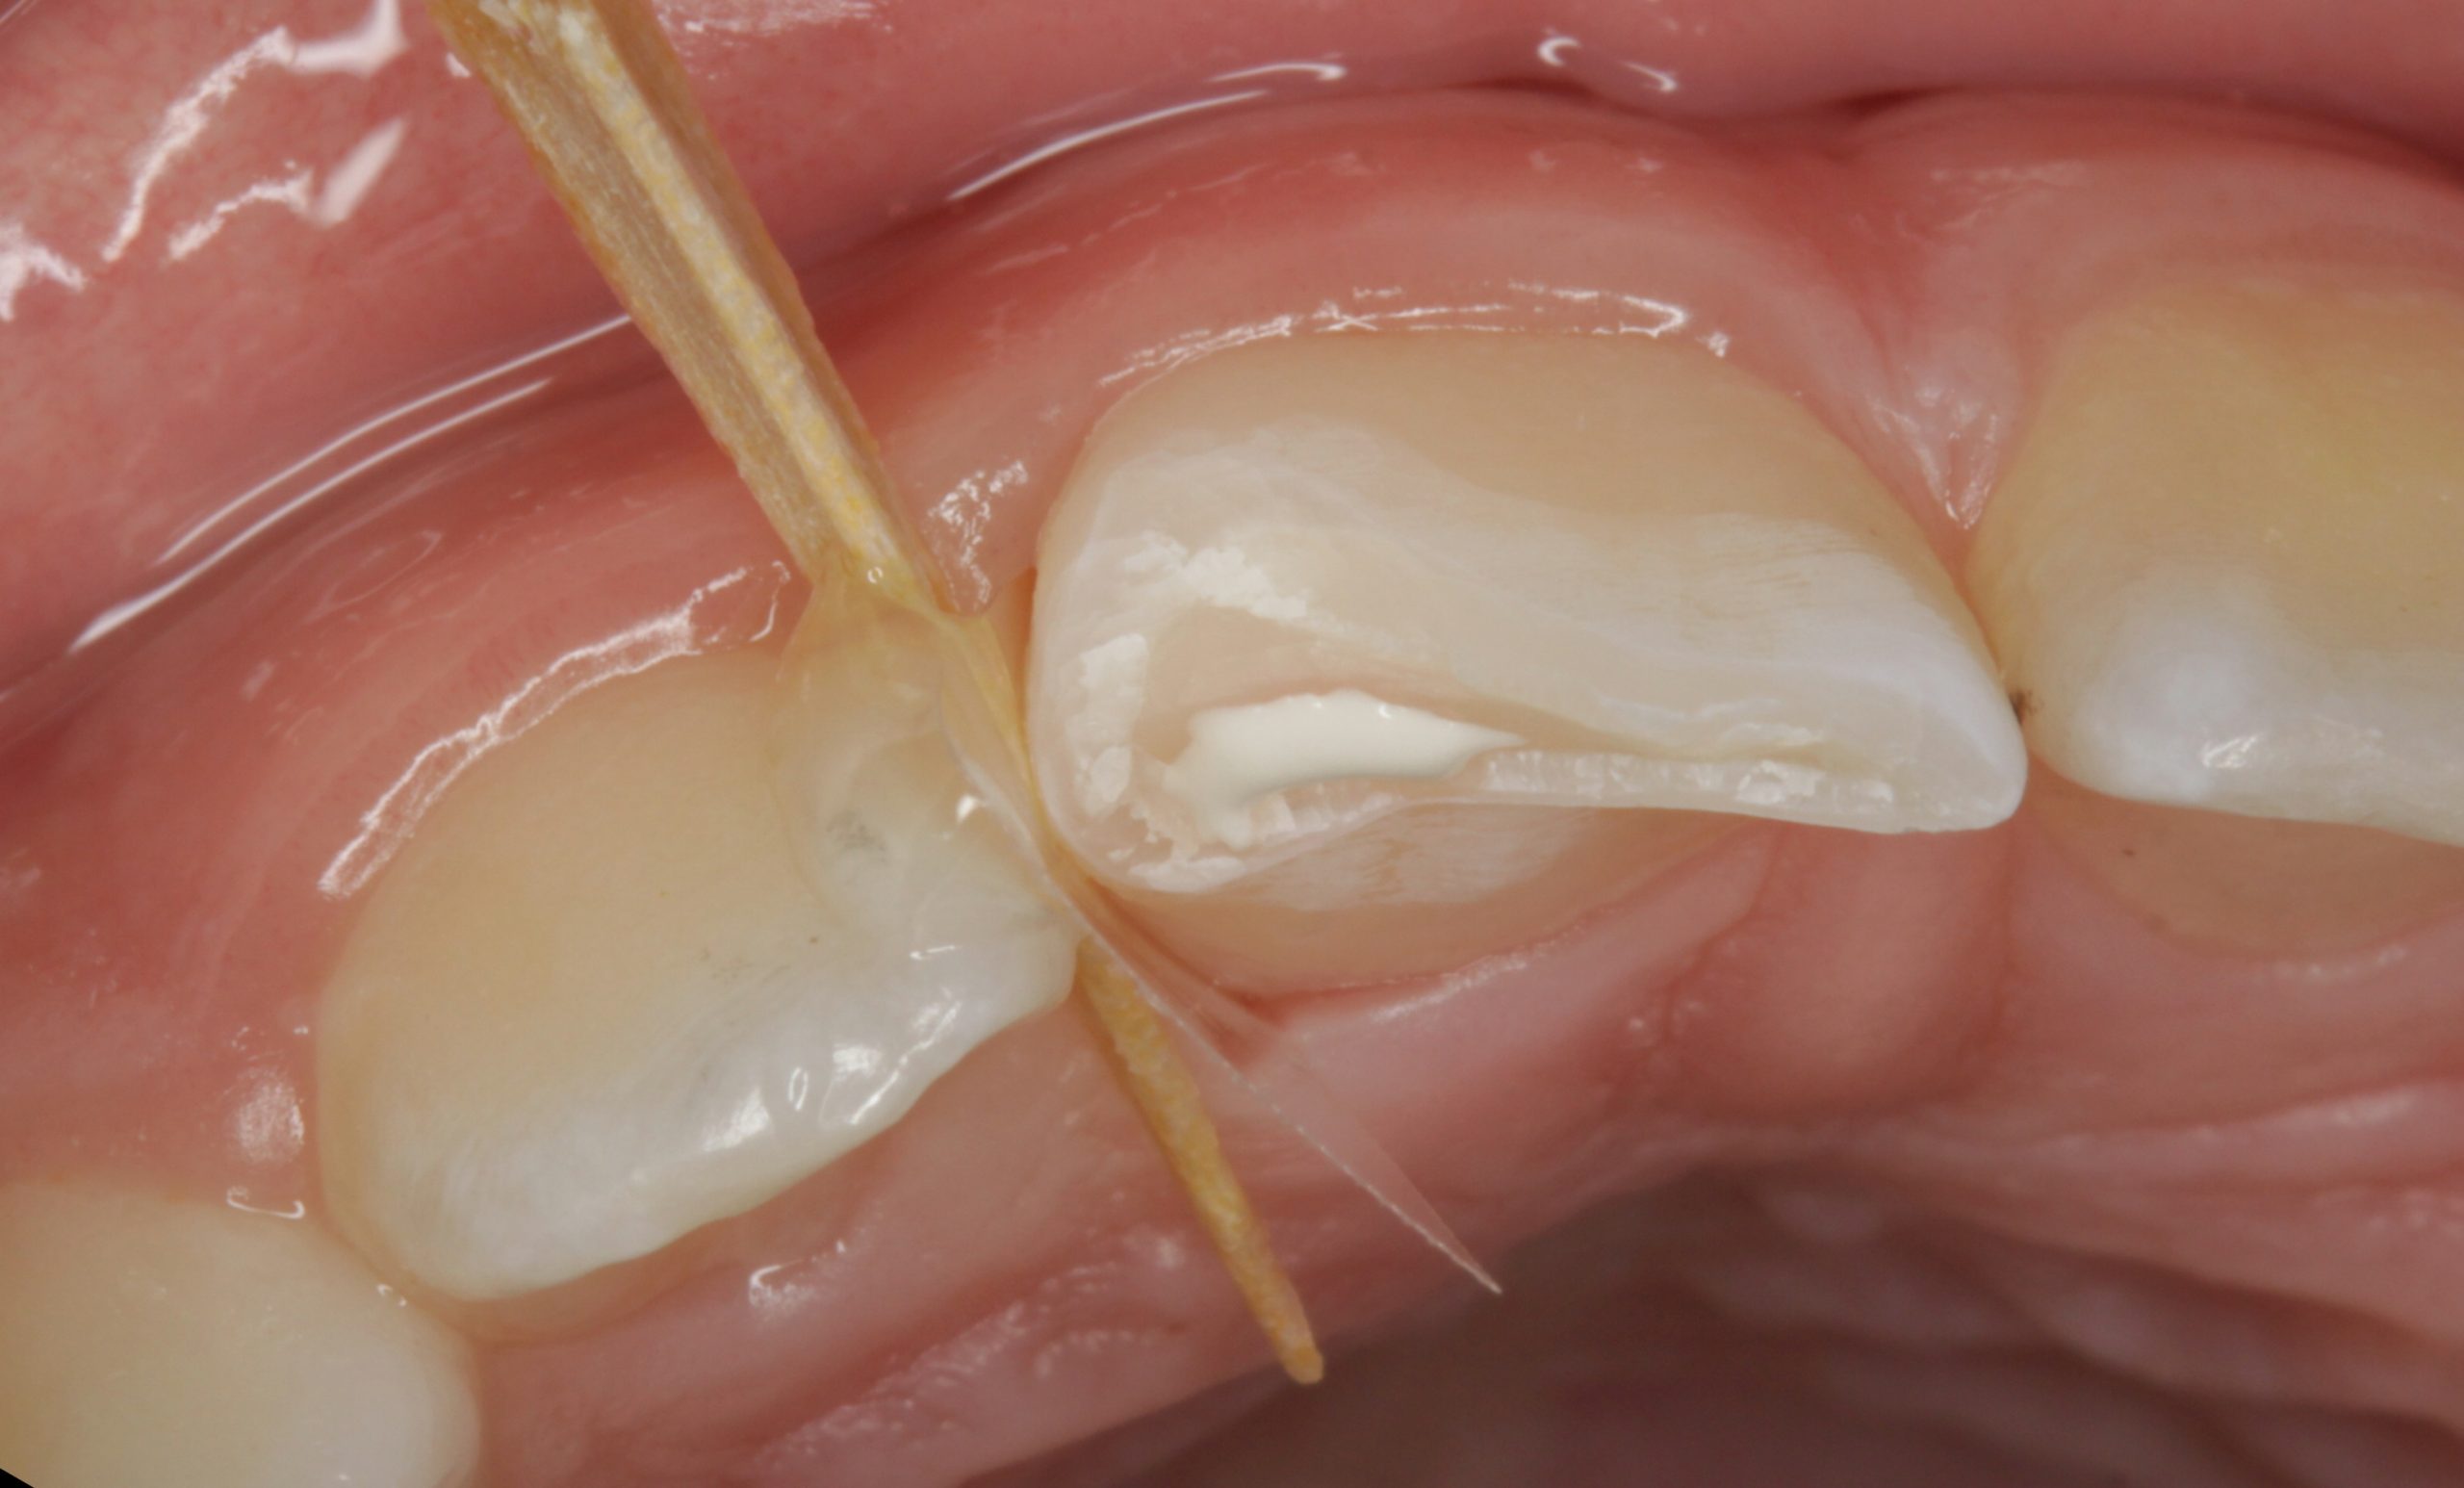
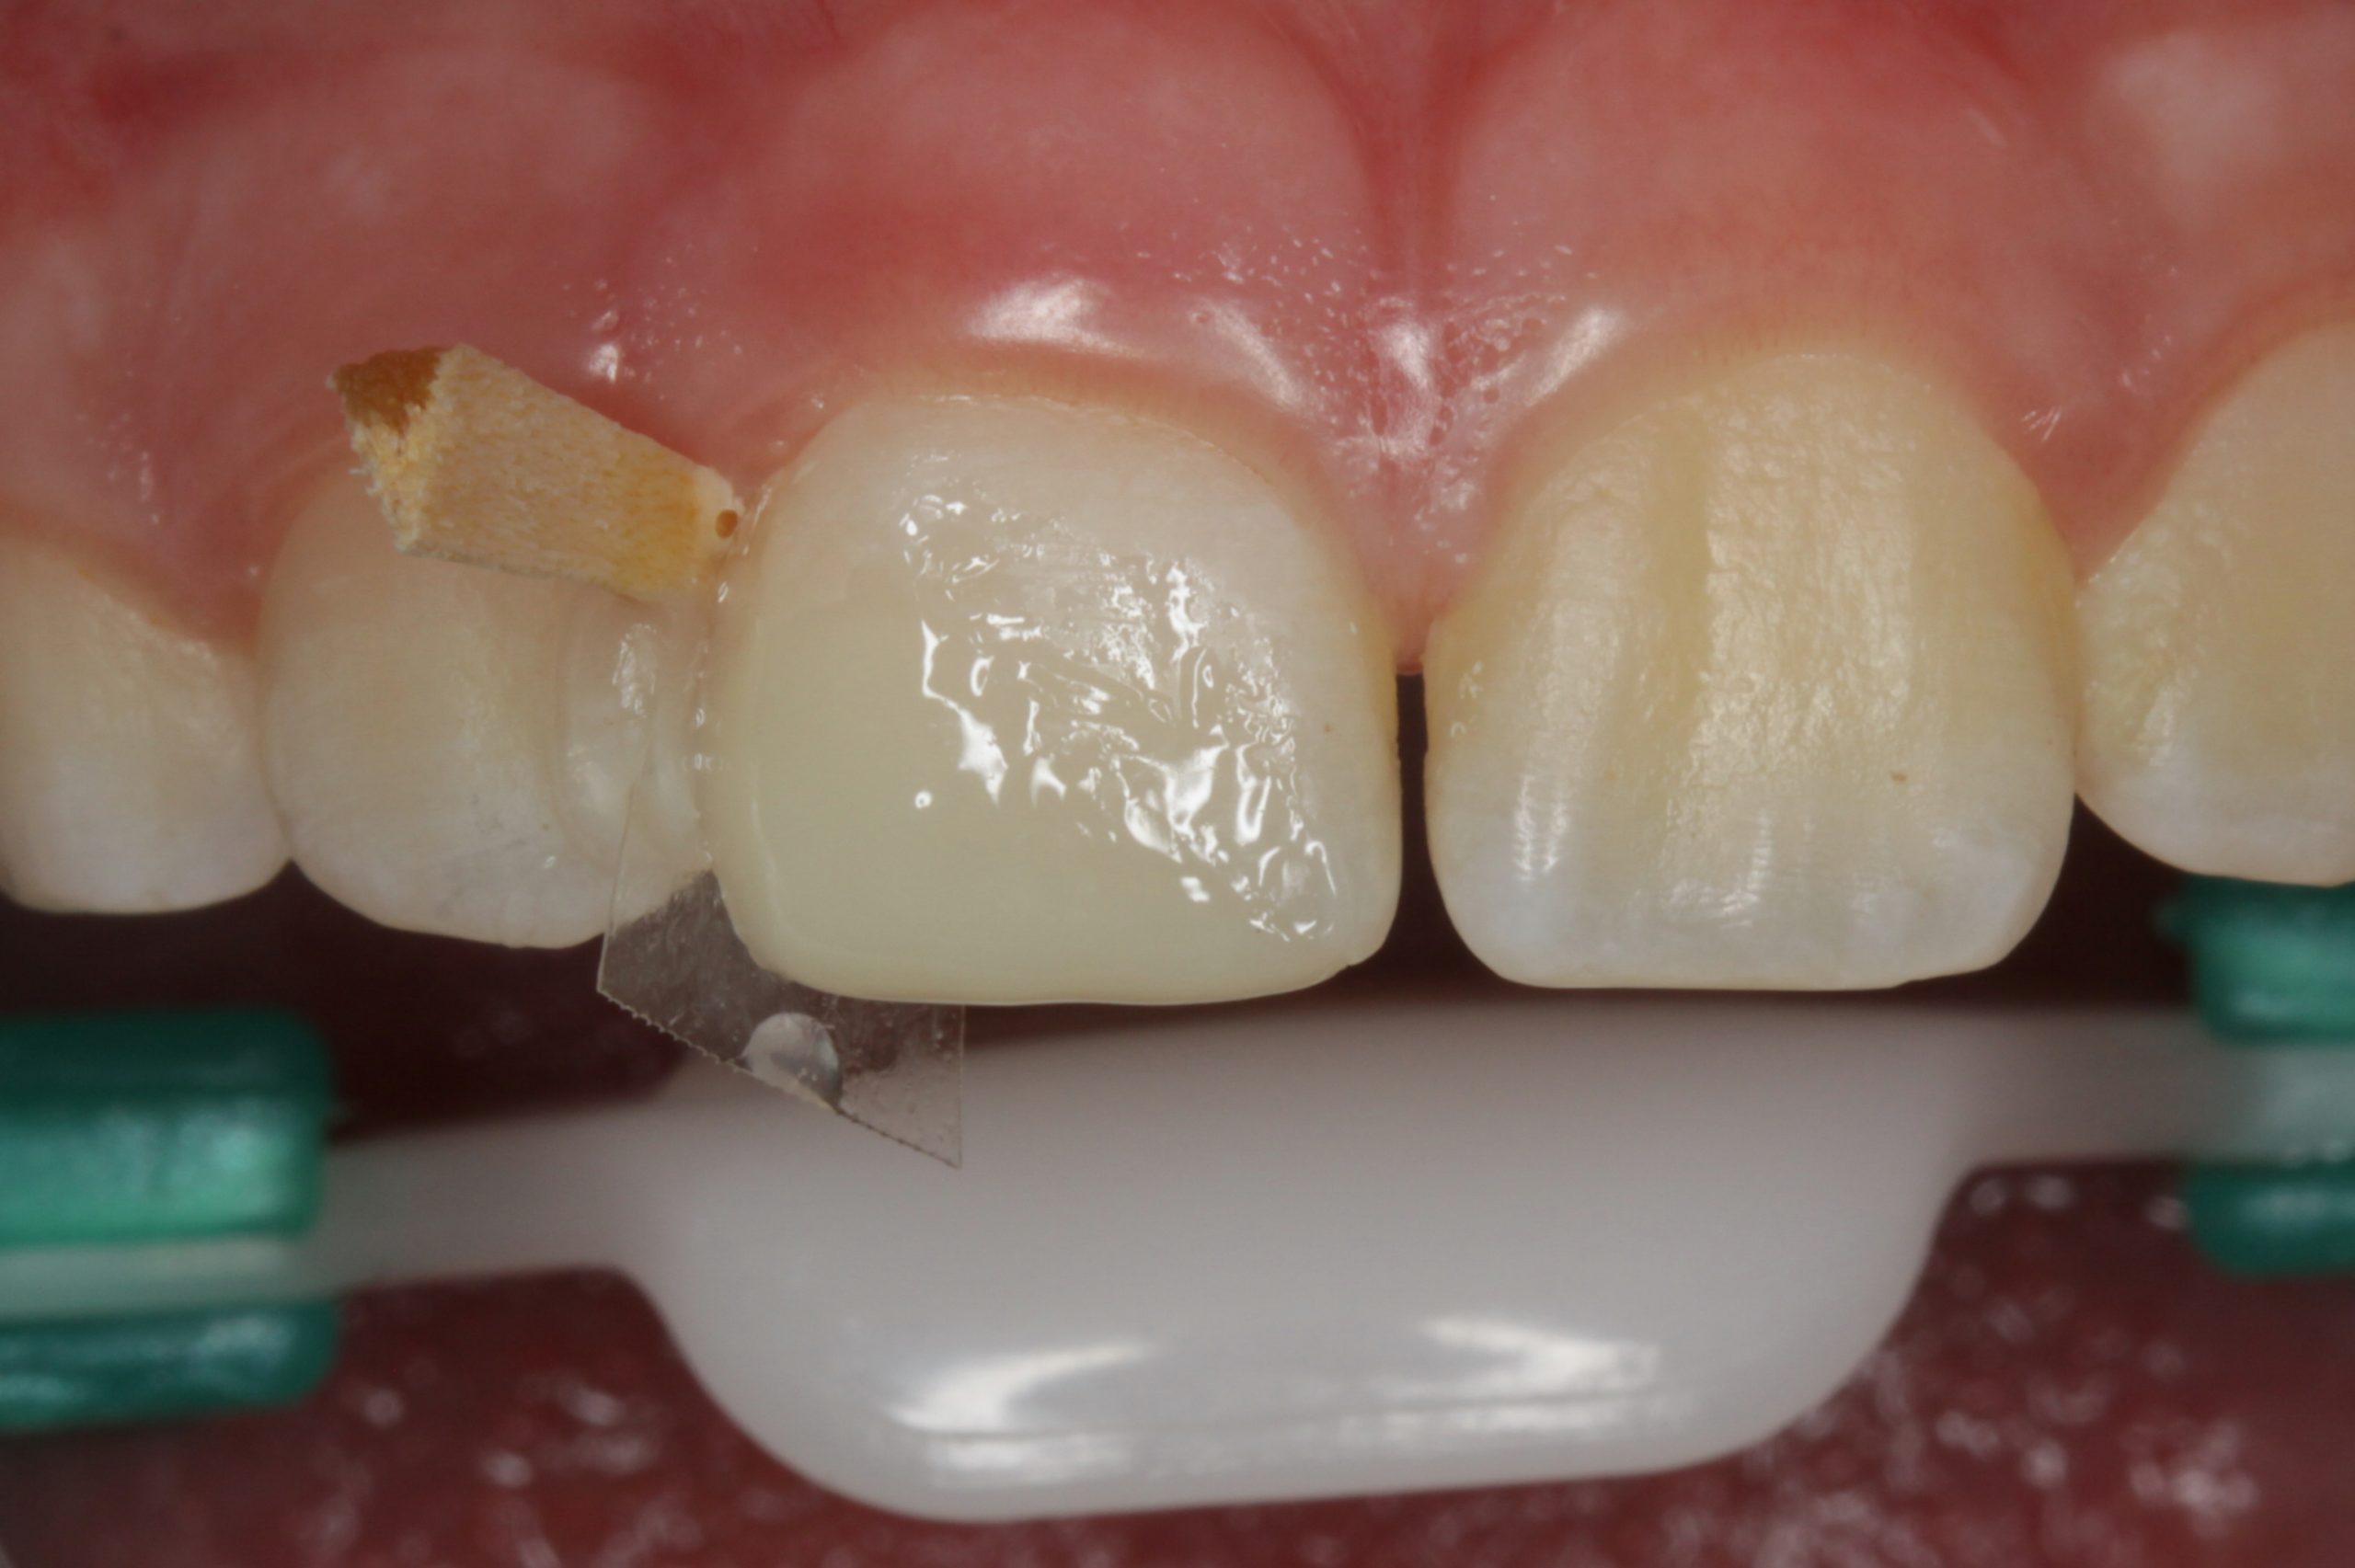
With the patient under local anaesthetic, the exposed dentine in the central section was covered with light-curing calcium trisilicate liner (Theracal LC, Bisco). The enamel was bevelled to a width of approximately 0.5 mm (Figure 3).
A transparent piece of matrix was then fixed vertically in the interproximal space with a thin wooden wedge (Dr Barman’s Anatomical Wedges) (Figure 3).
Matrix as a negative mould
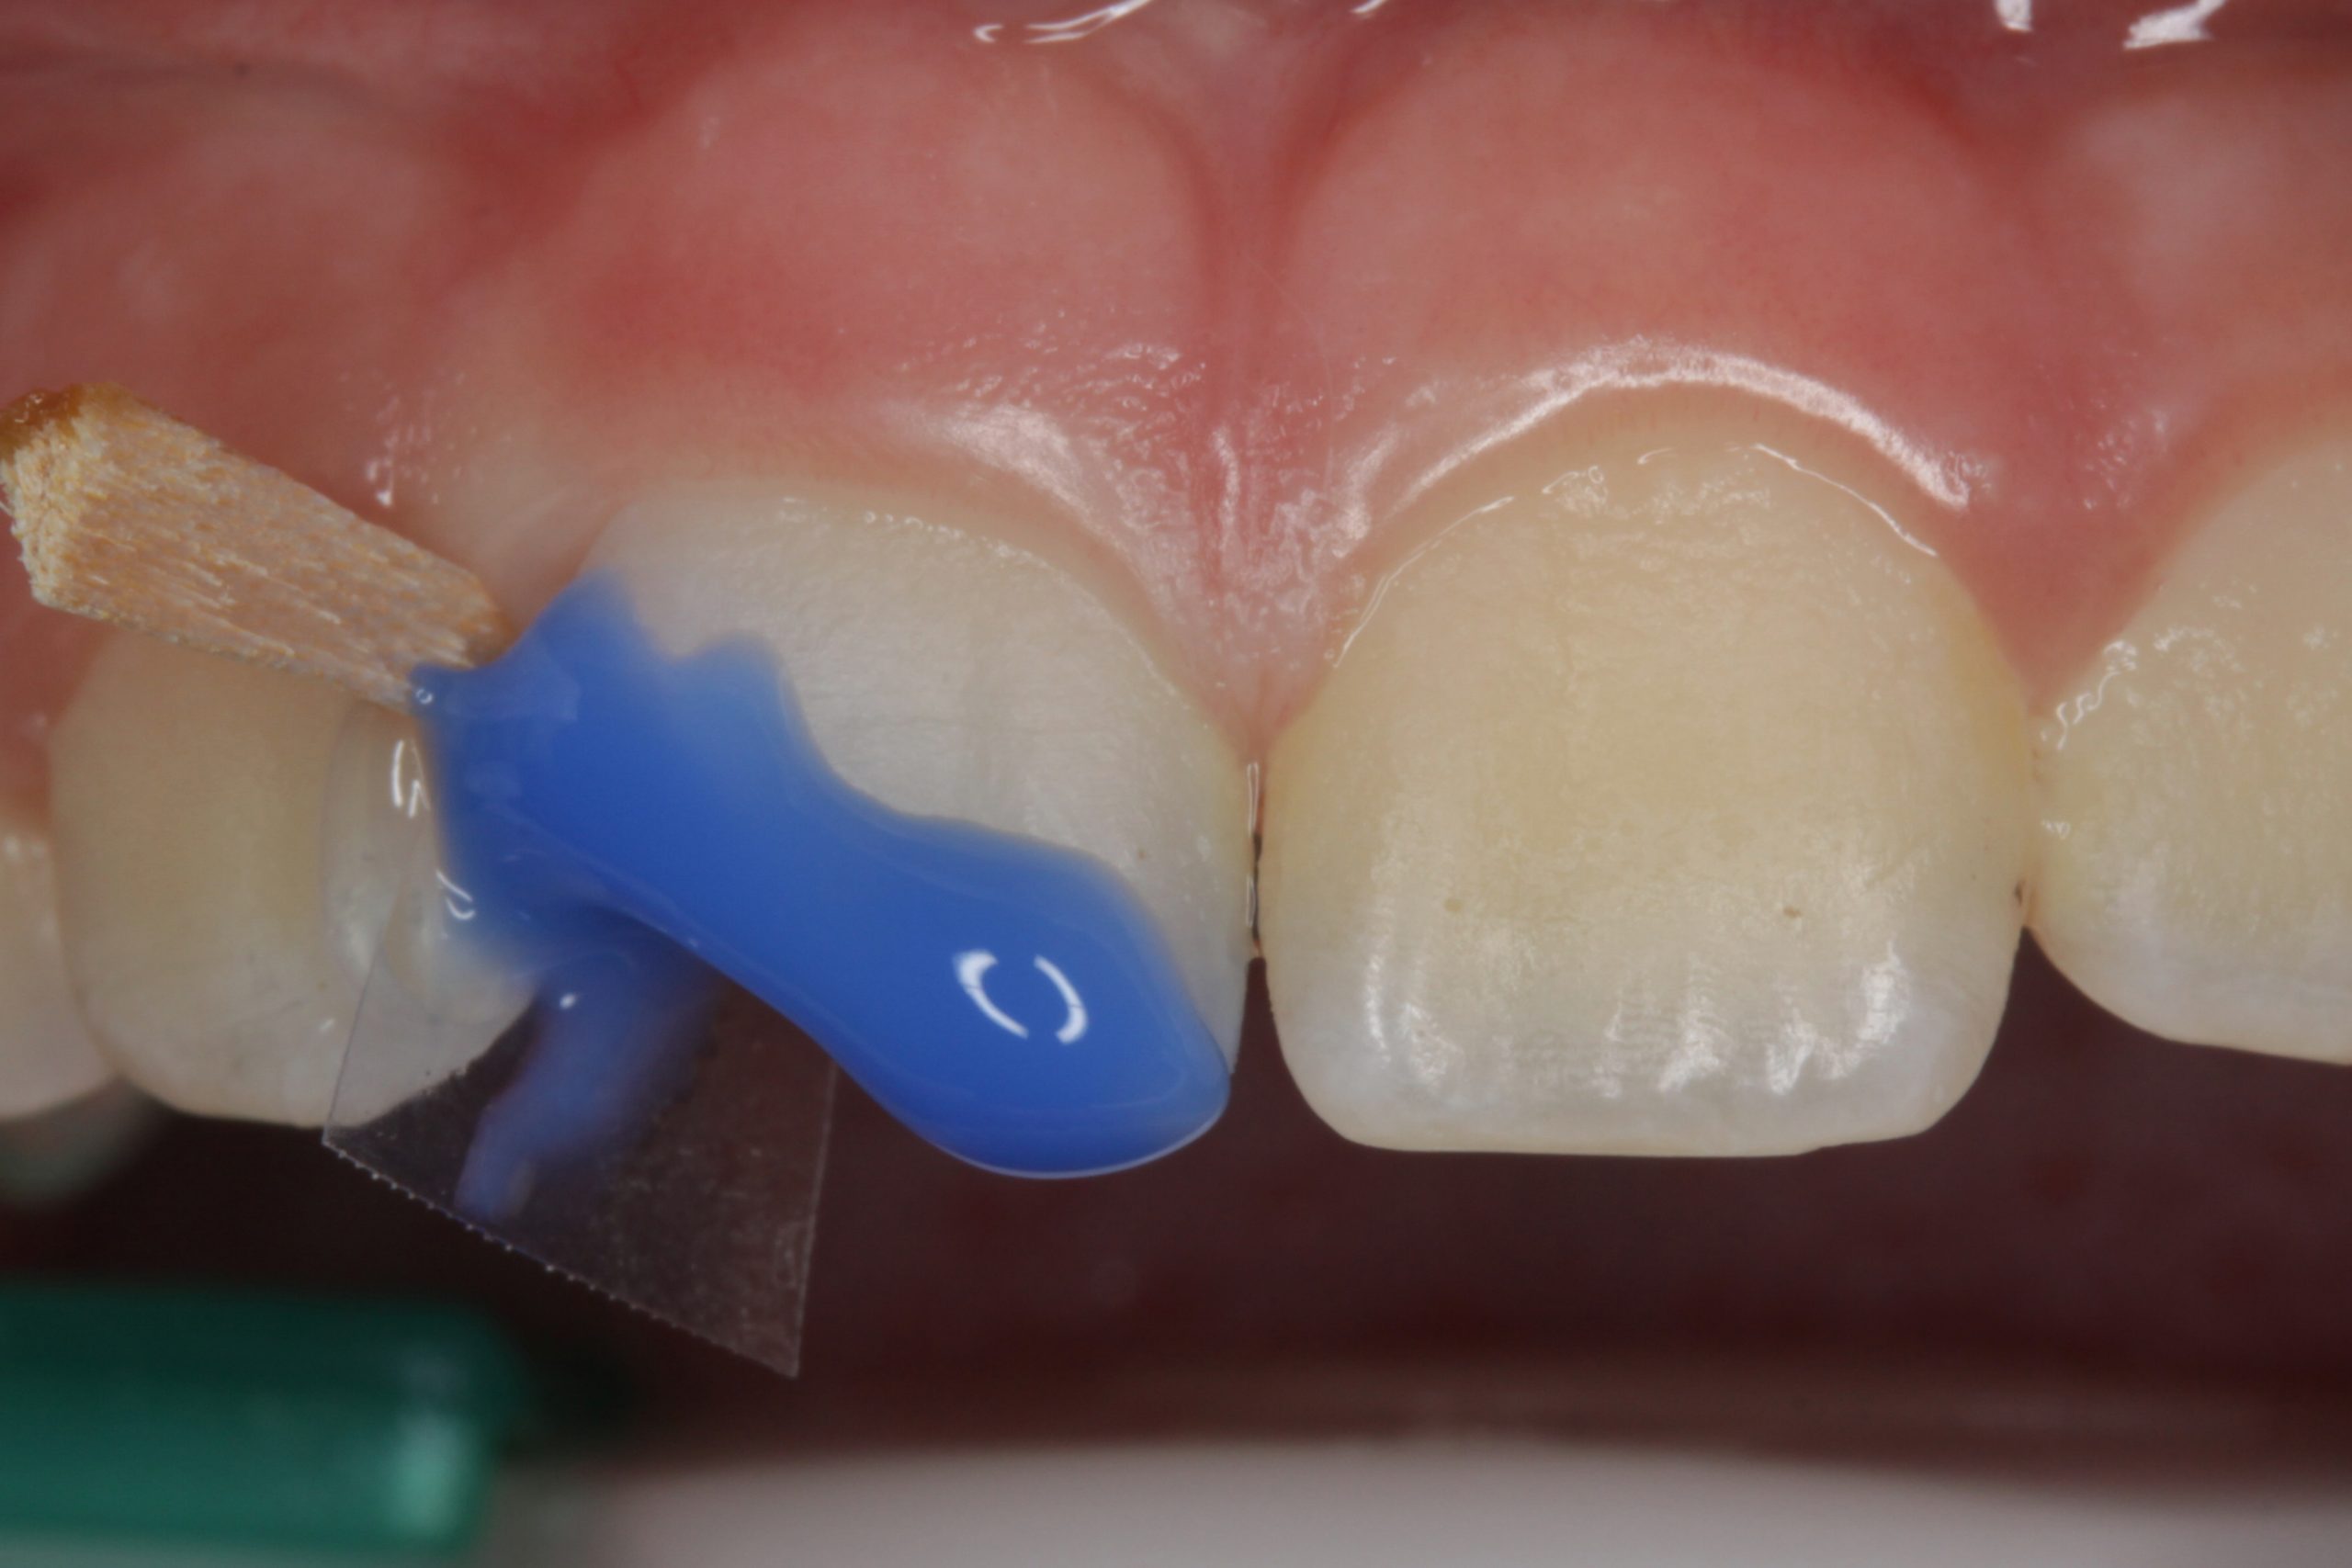
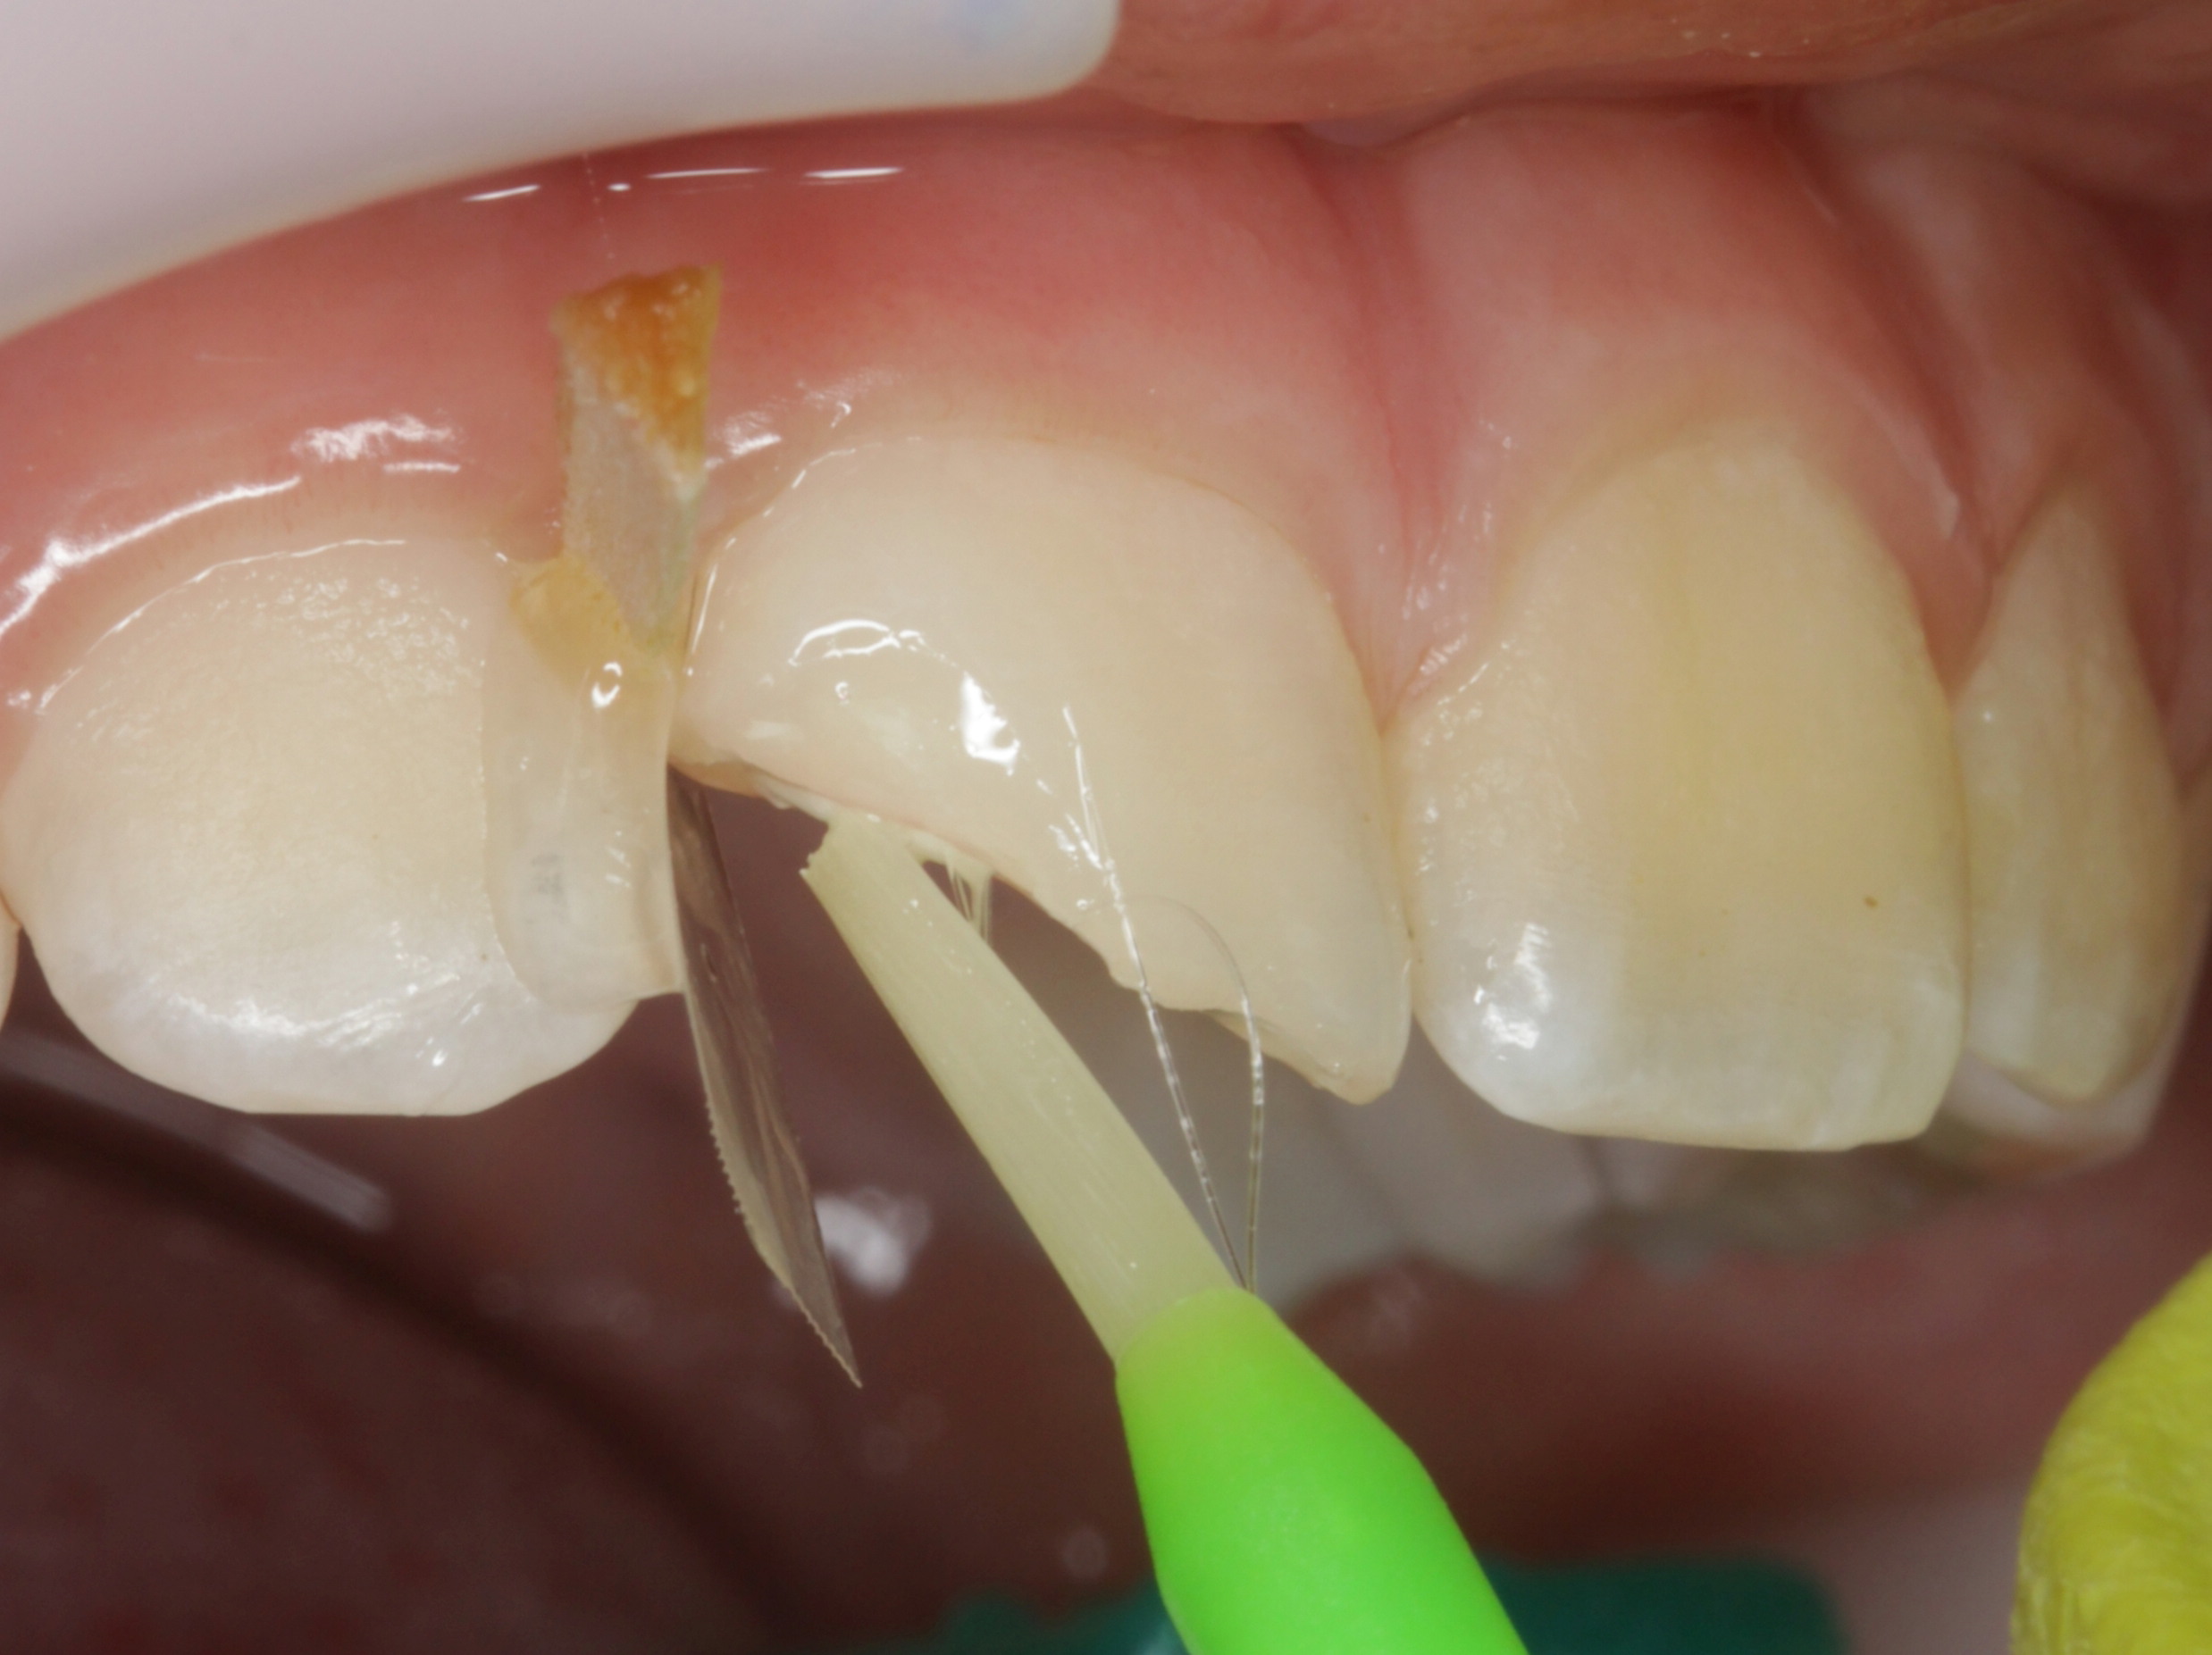
Prior to etching the enamel with 36% phosphoric acid, the anatomically advantageous position of the matrix was ensured with flowable, temporary composite (Clip Flow, Voco) (Figure 4). In this modification of the Hugo method, the material, which flows without application of pressure, is injected into the approximal area against the matrix with a fine cannula.
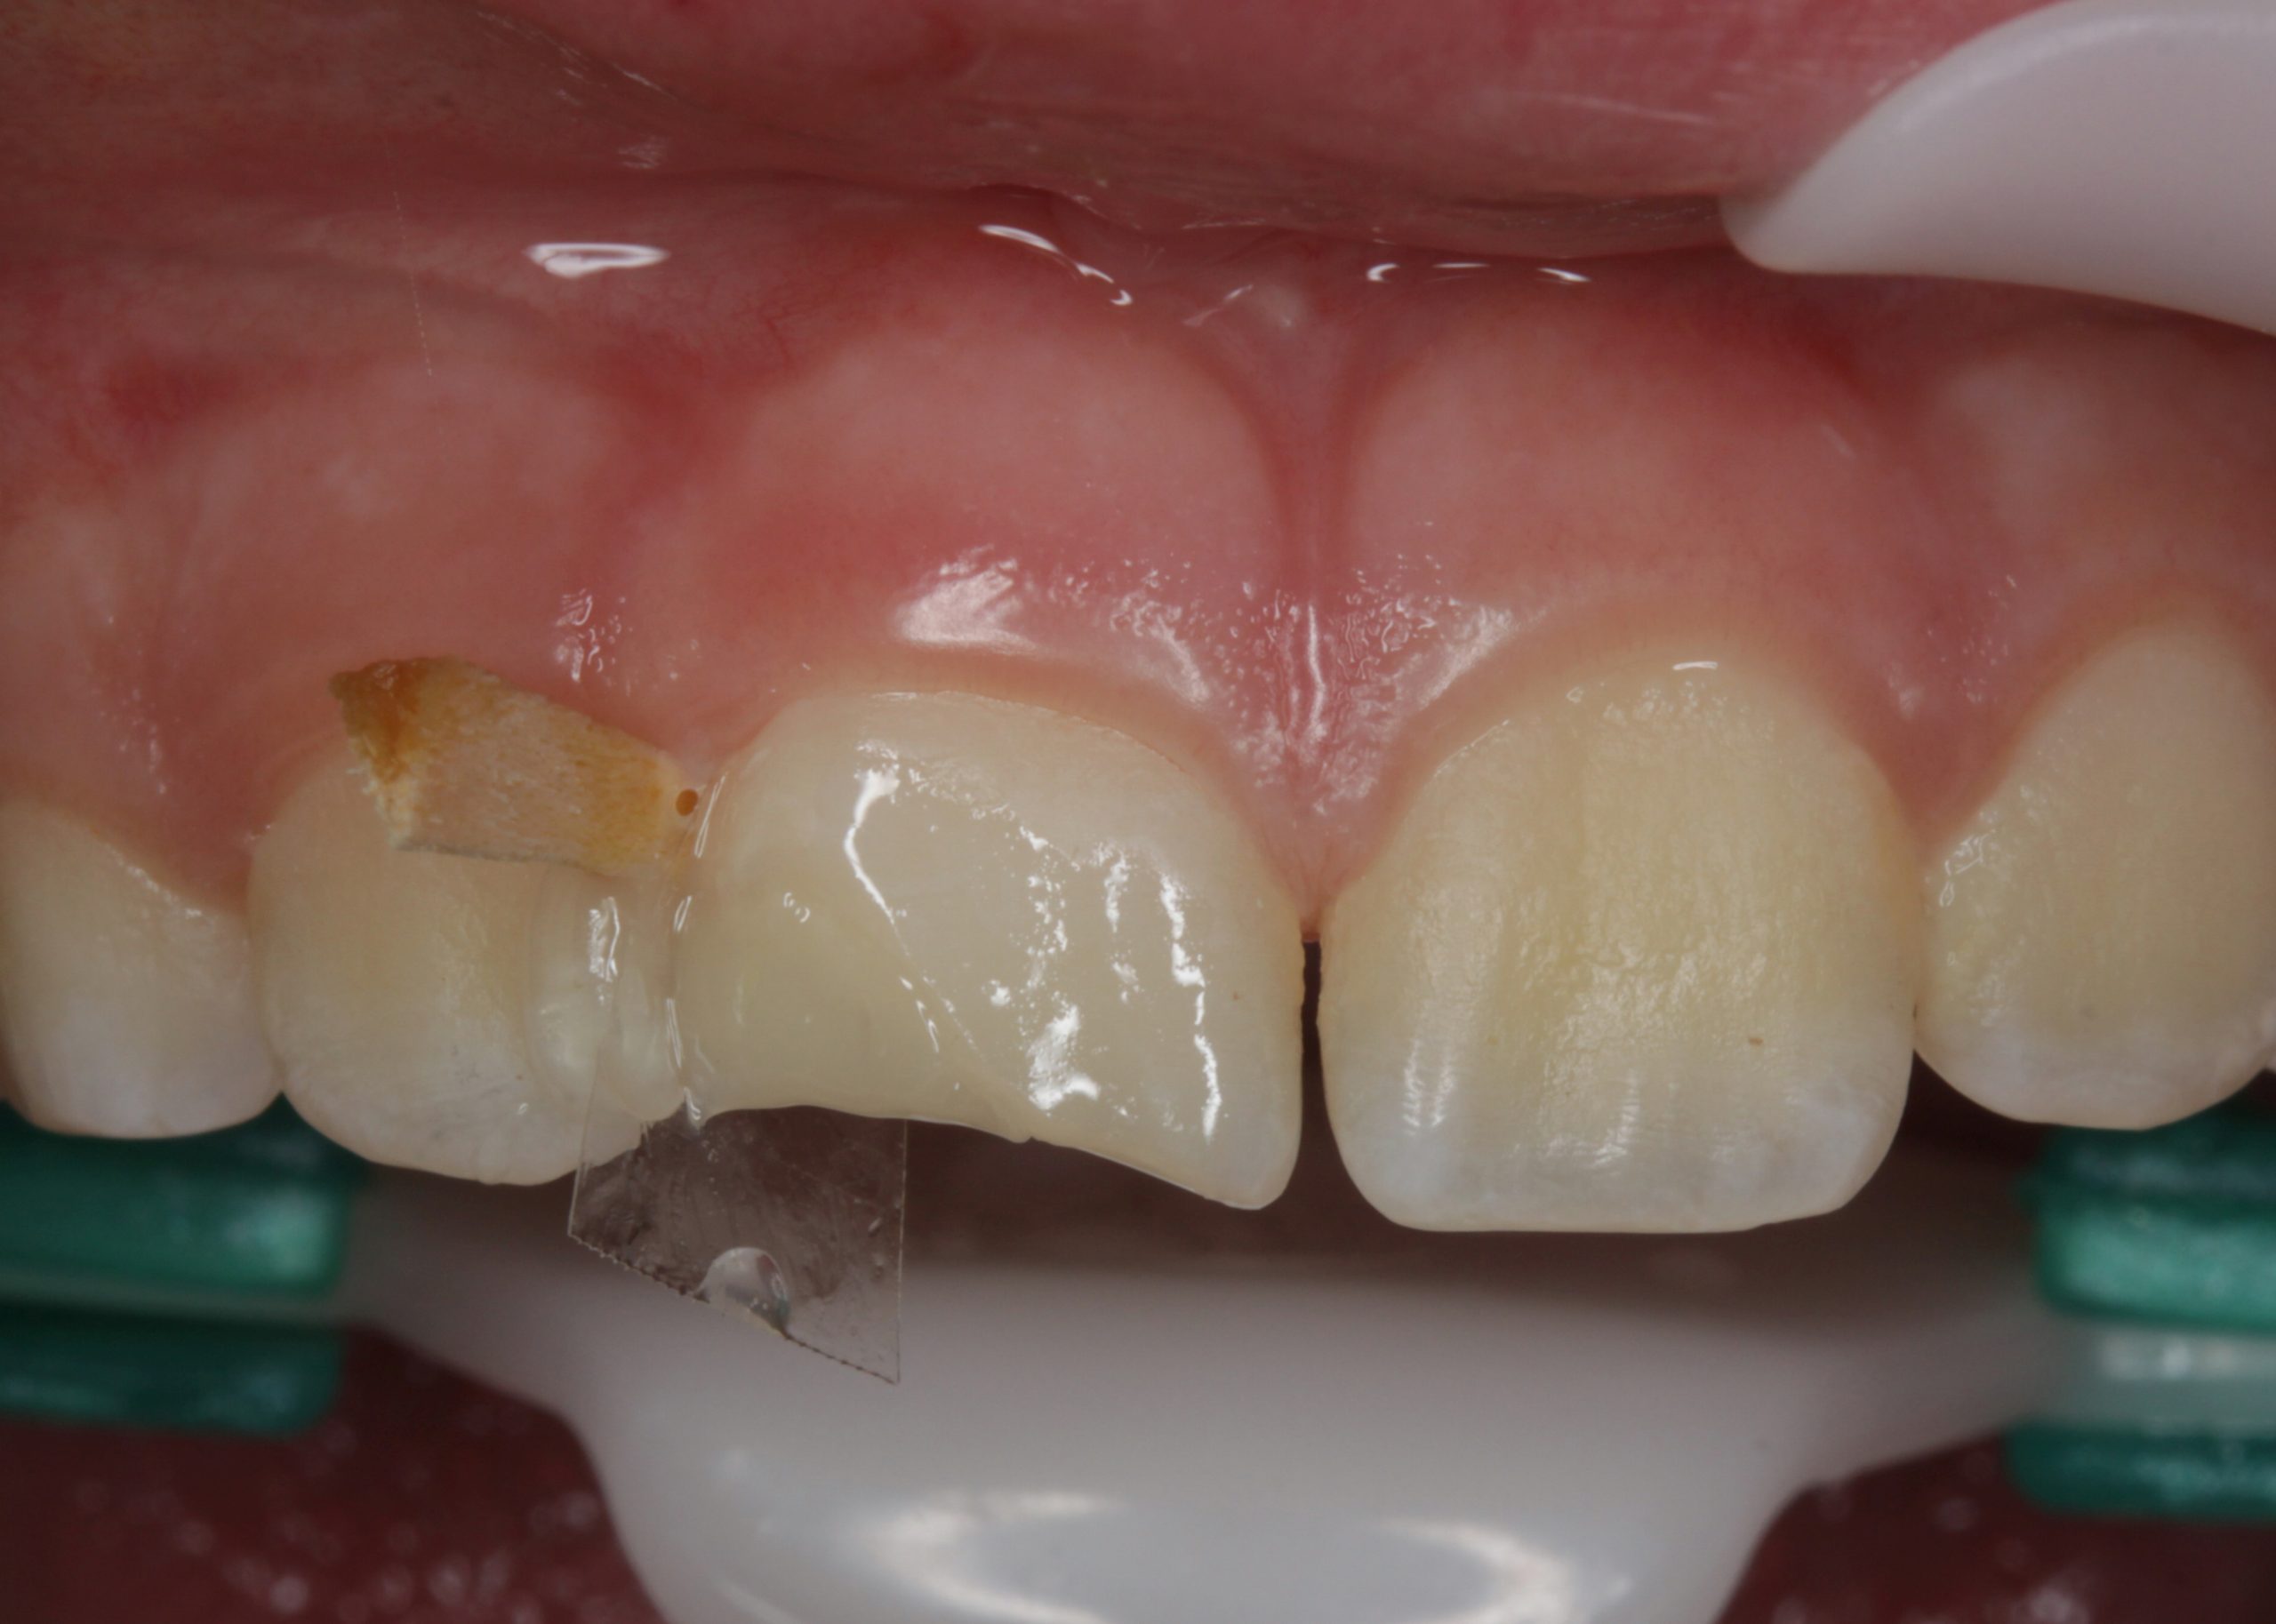
At the same time, the matrix is gently pressed, either manually or using a spatula, palatally and vestibularly against the tooth being restored, and the flow material is cured at the same time. Figure 5 shows the incisal extent of the defect.
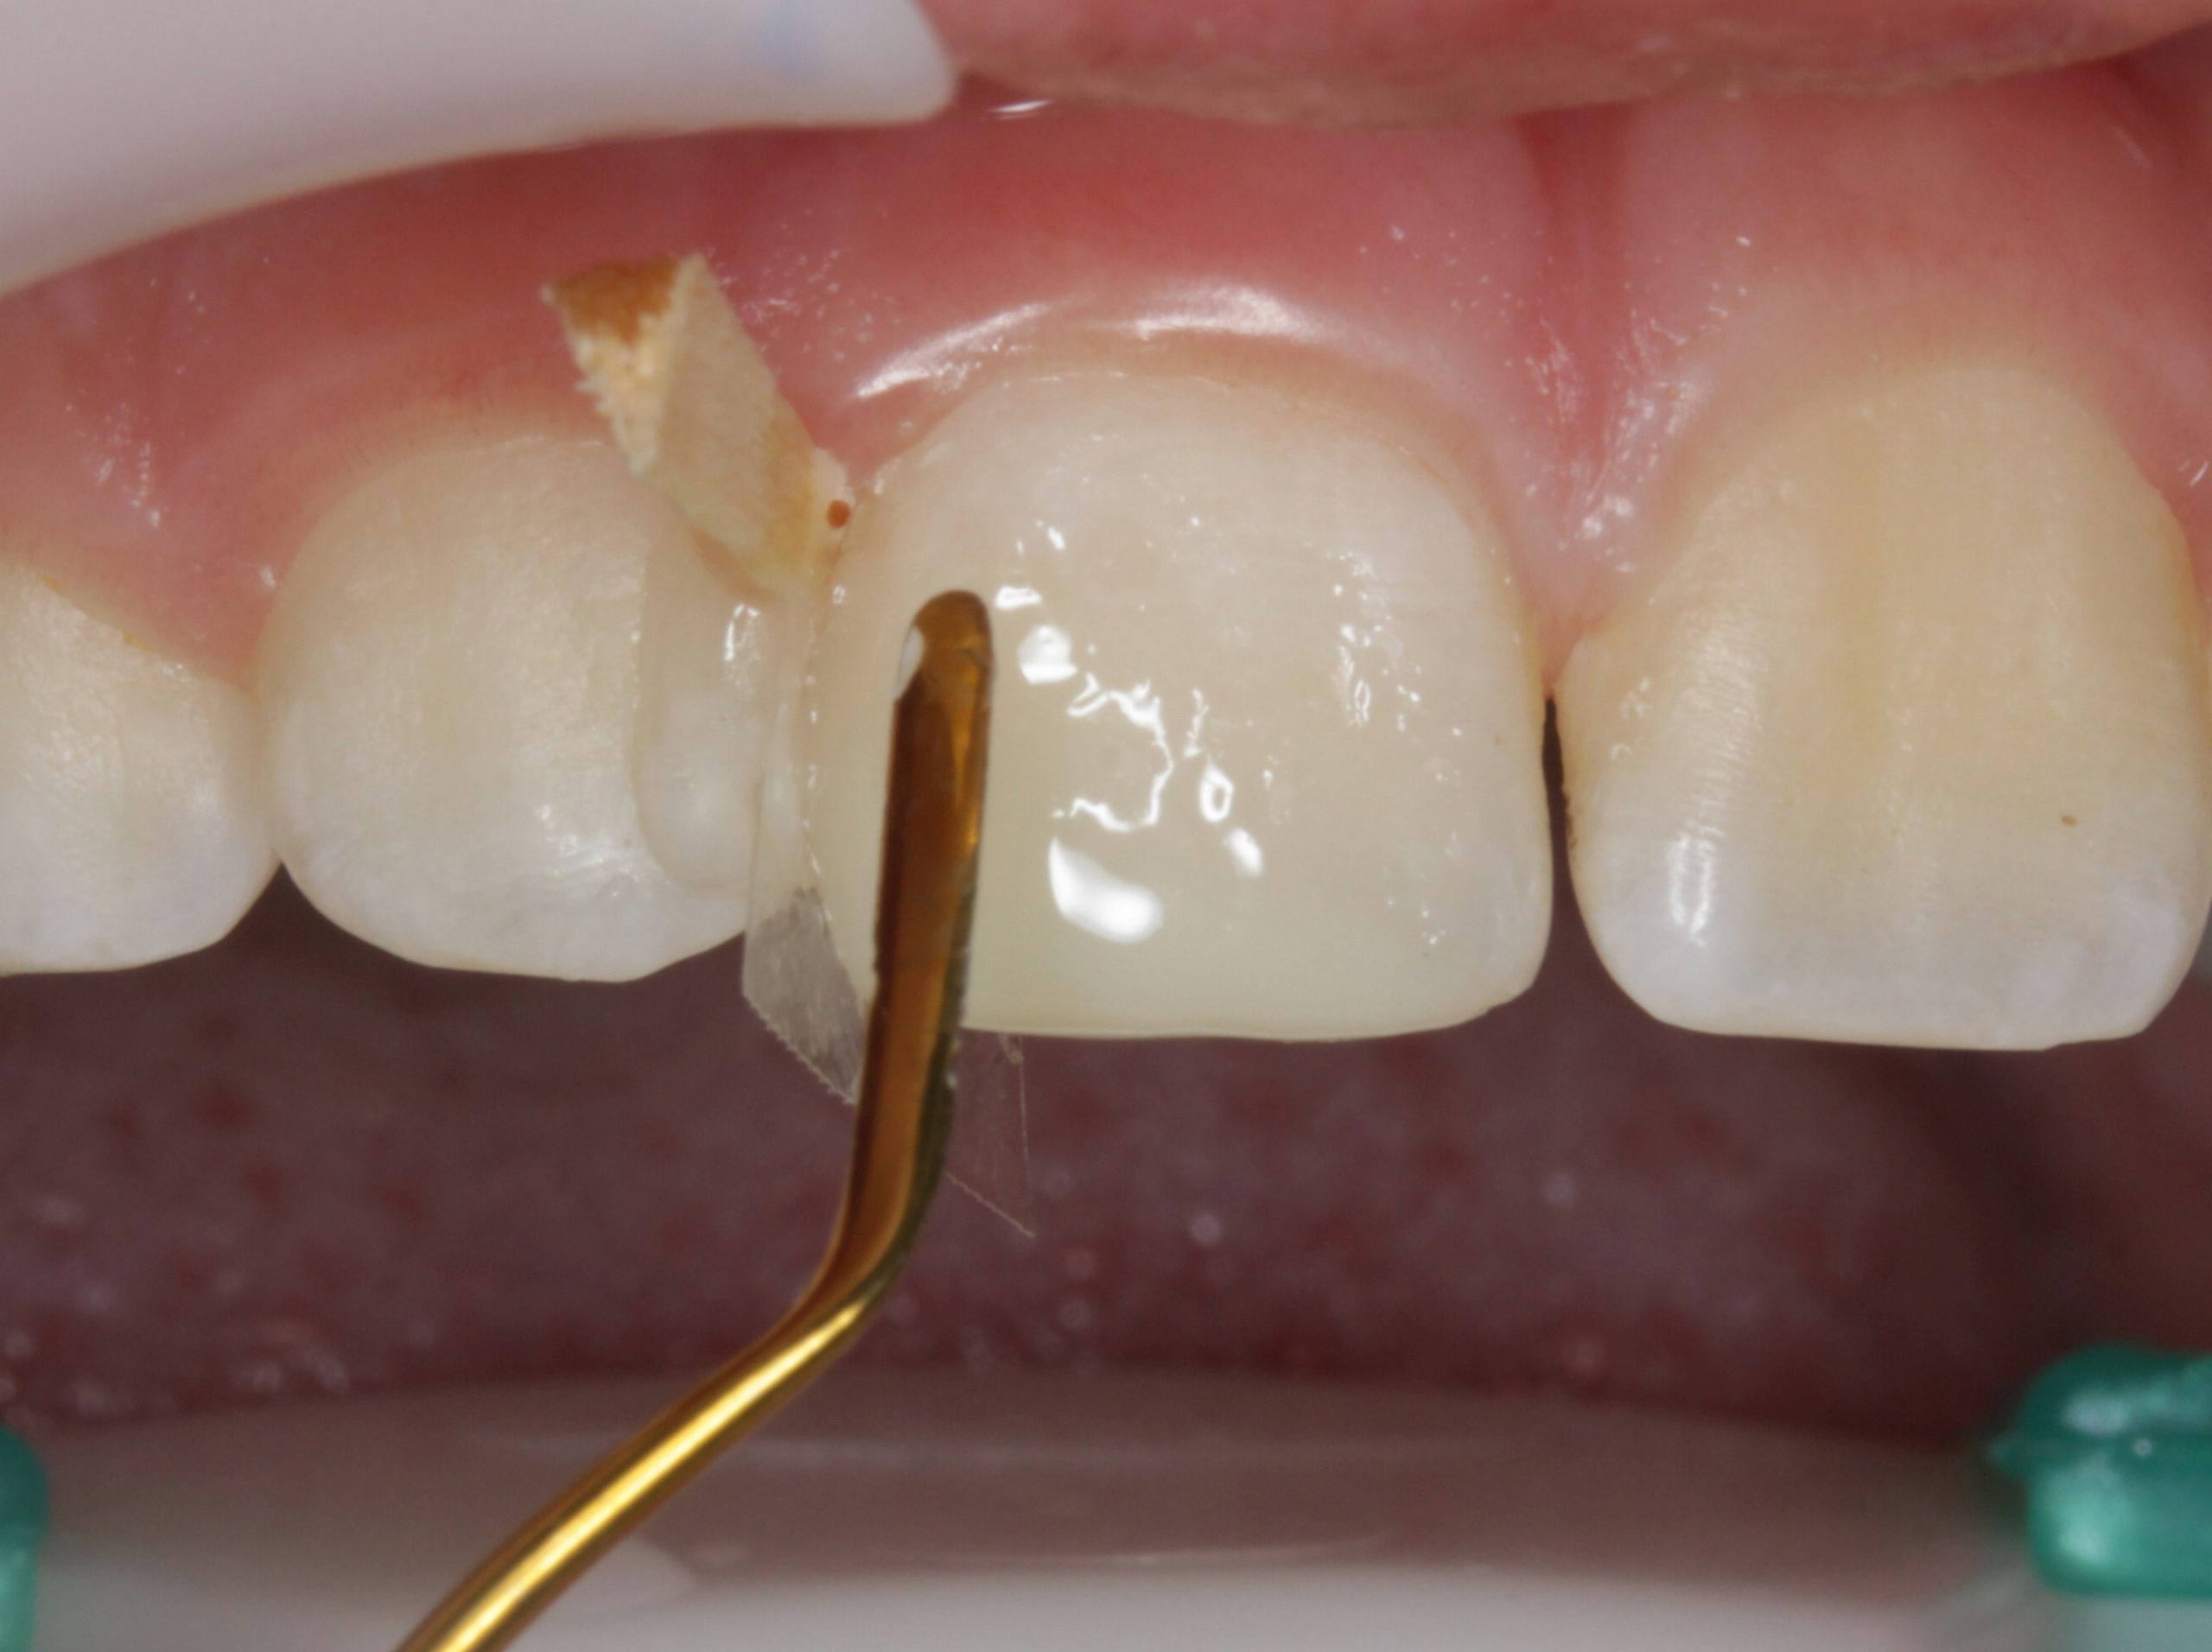
Following the application and curing of the universal adhesive (Futurabond U, Voco) (Figure 6), the dentine core was then sculpted layer by layer with two different shades of the permanent restorative material (Admira Fusion).
Satisfied
To this end, the dentine material in the shade A3 and then A2 was first applied in a ‘roof tile’ fashion, and each was light-cured (Figure 7) (W Denner, 2006).
Cervically, the material was extended over the bevel so as to avoided a discoloured margin in the restoration.
As the final layer, enamel material (incisal) was applied with a thin, slightly elastic sculpting spatula (Composite 4, American Eagle Instruments) (Figure 8). When doing so, it is important to ensure that only the quantity of material actually required is used.
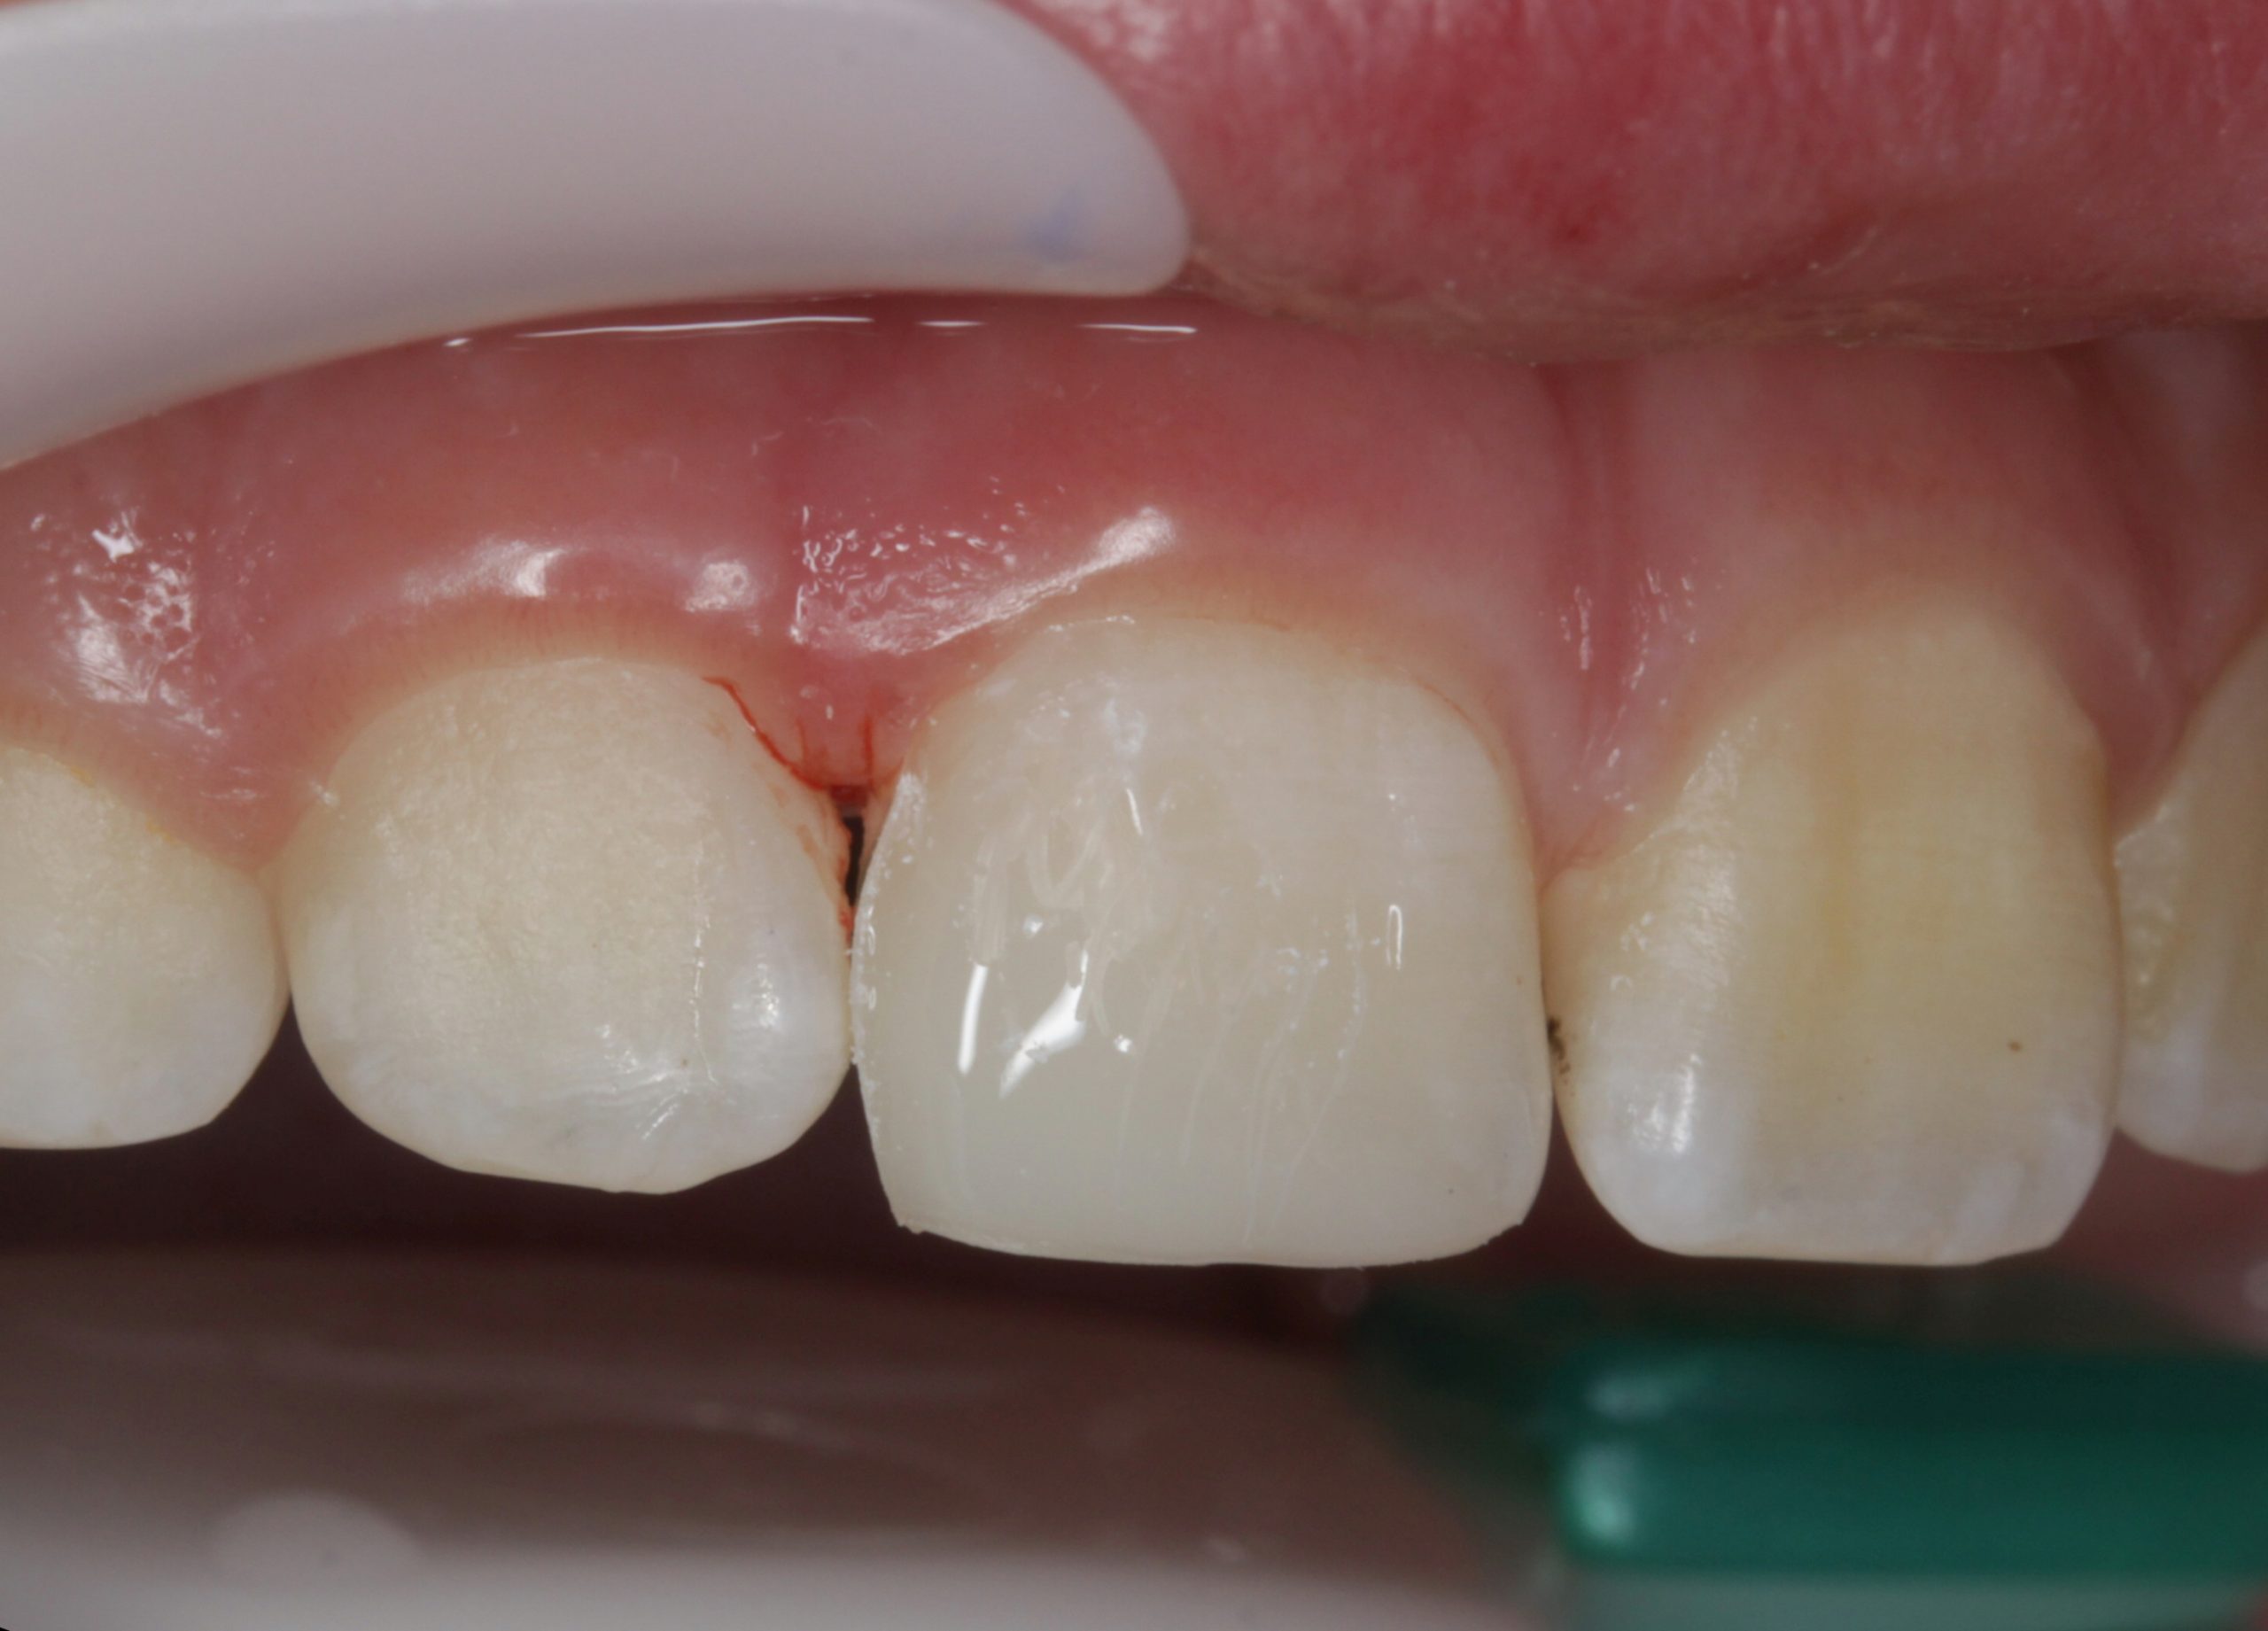
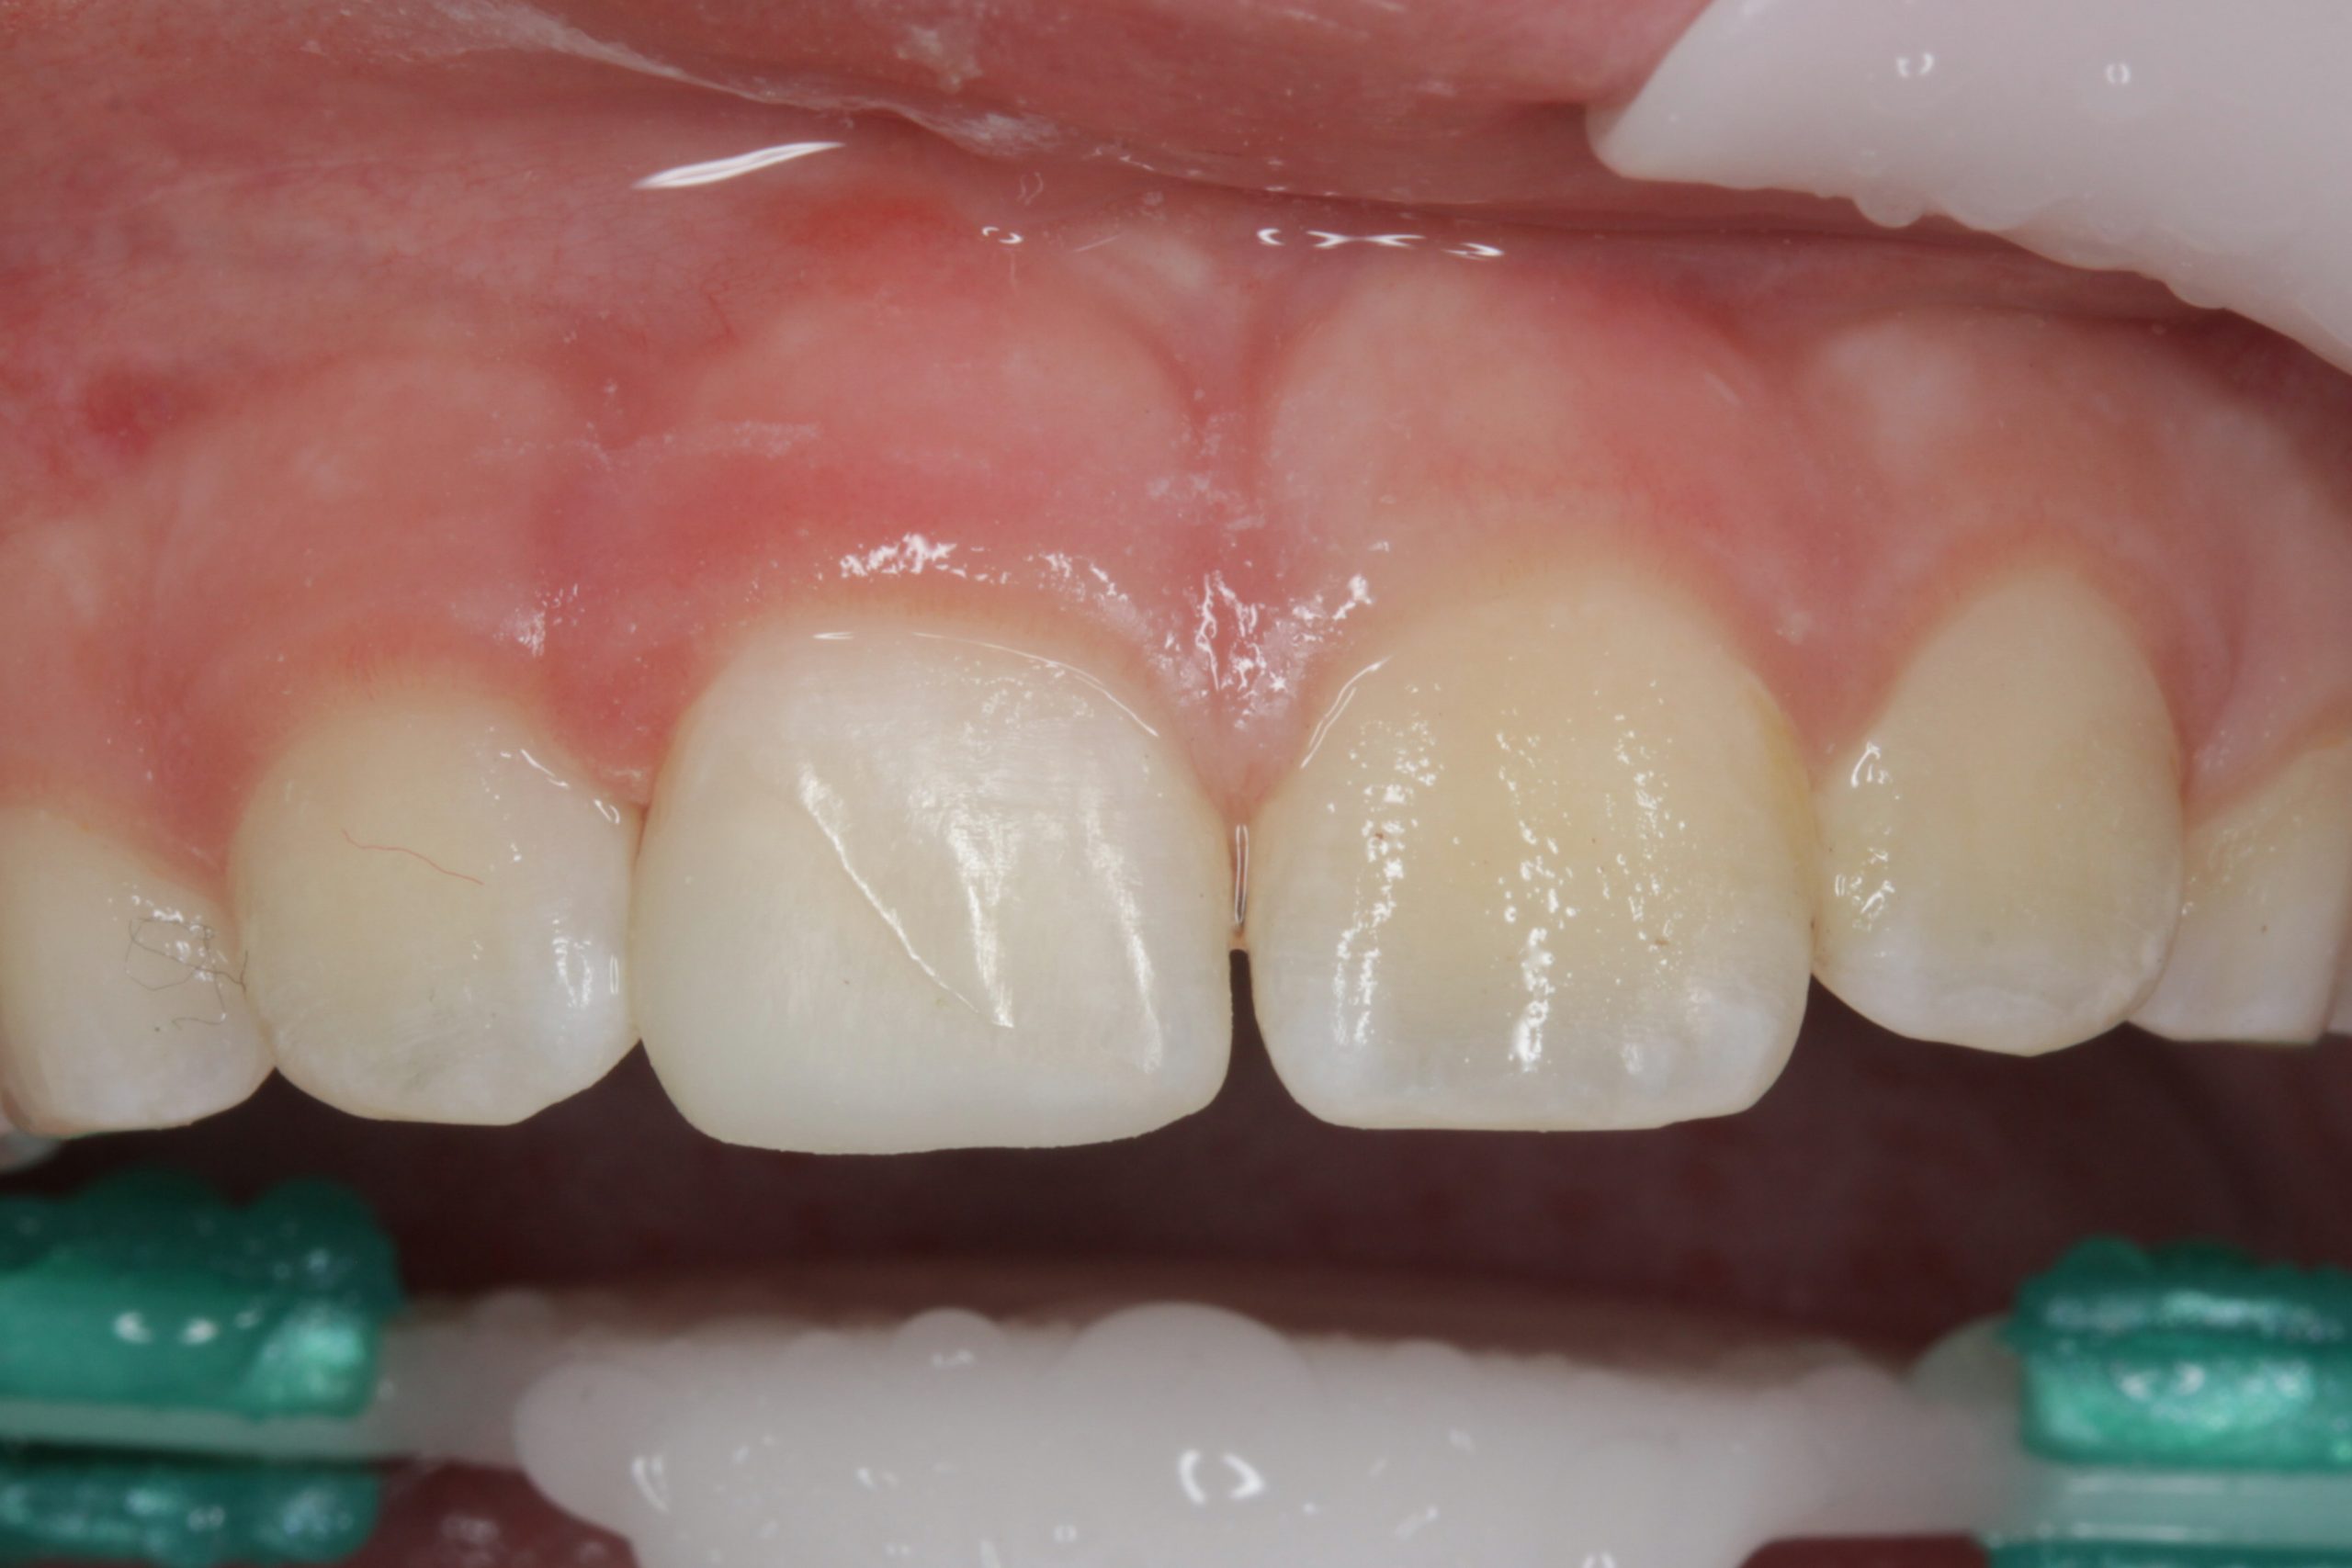
Following light-curing of the last layer (Figure 9) and removal of the matrix (Figure 10), a largely natural shape of the build-up is already visible, including the transitions in the incisal edge region (Figure 11). This makes finishing much quicker than is the case with overcontouring.
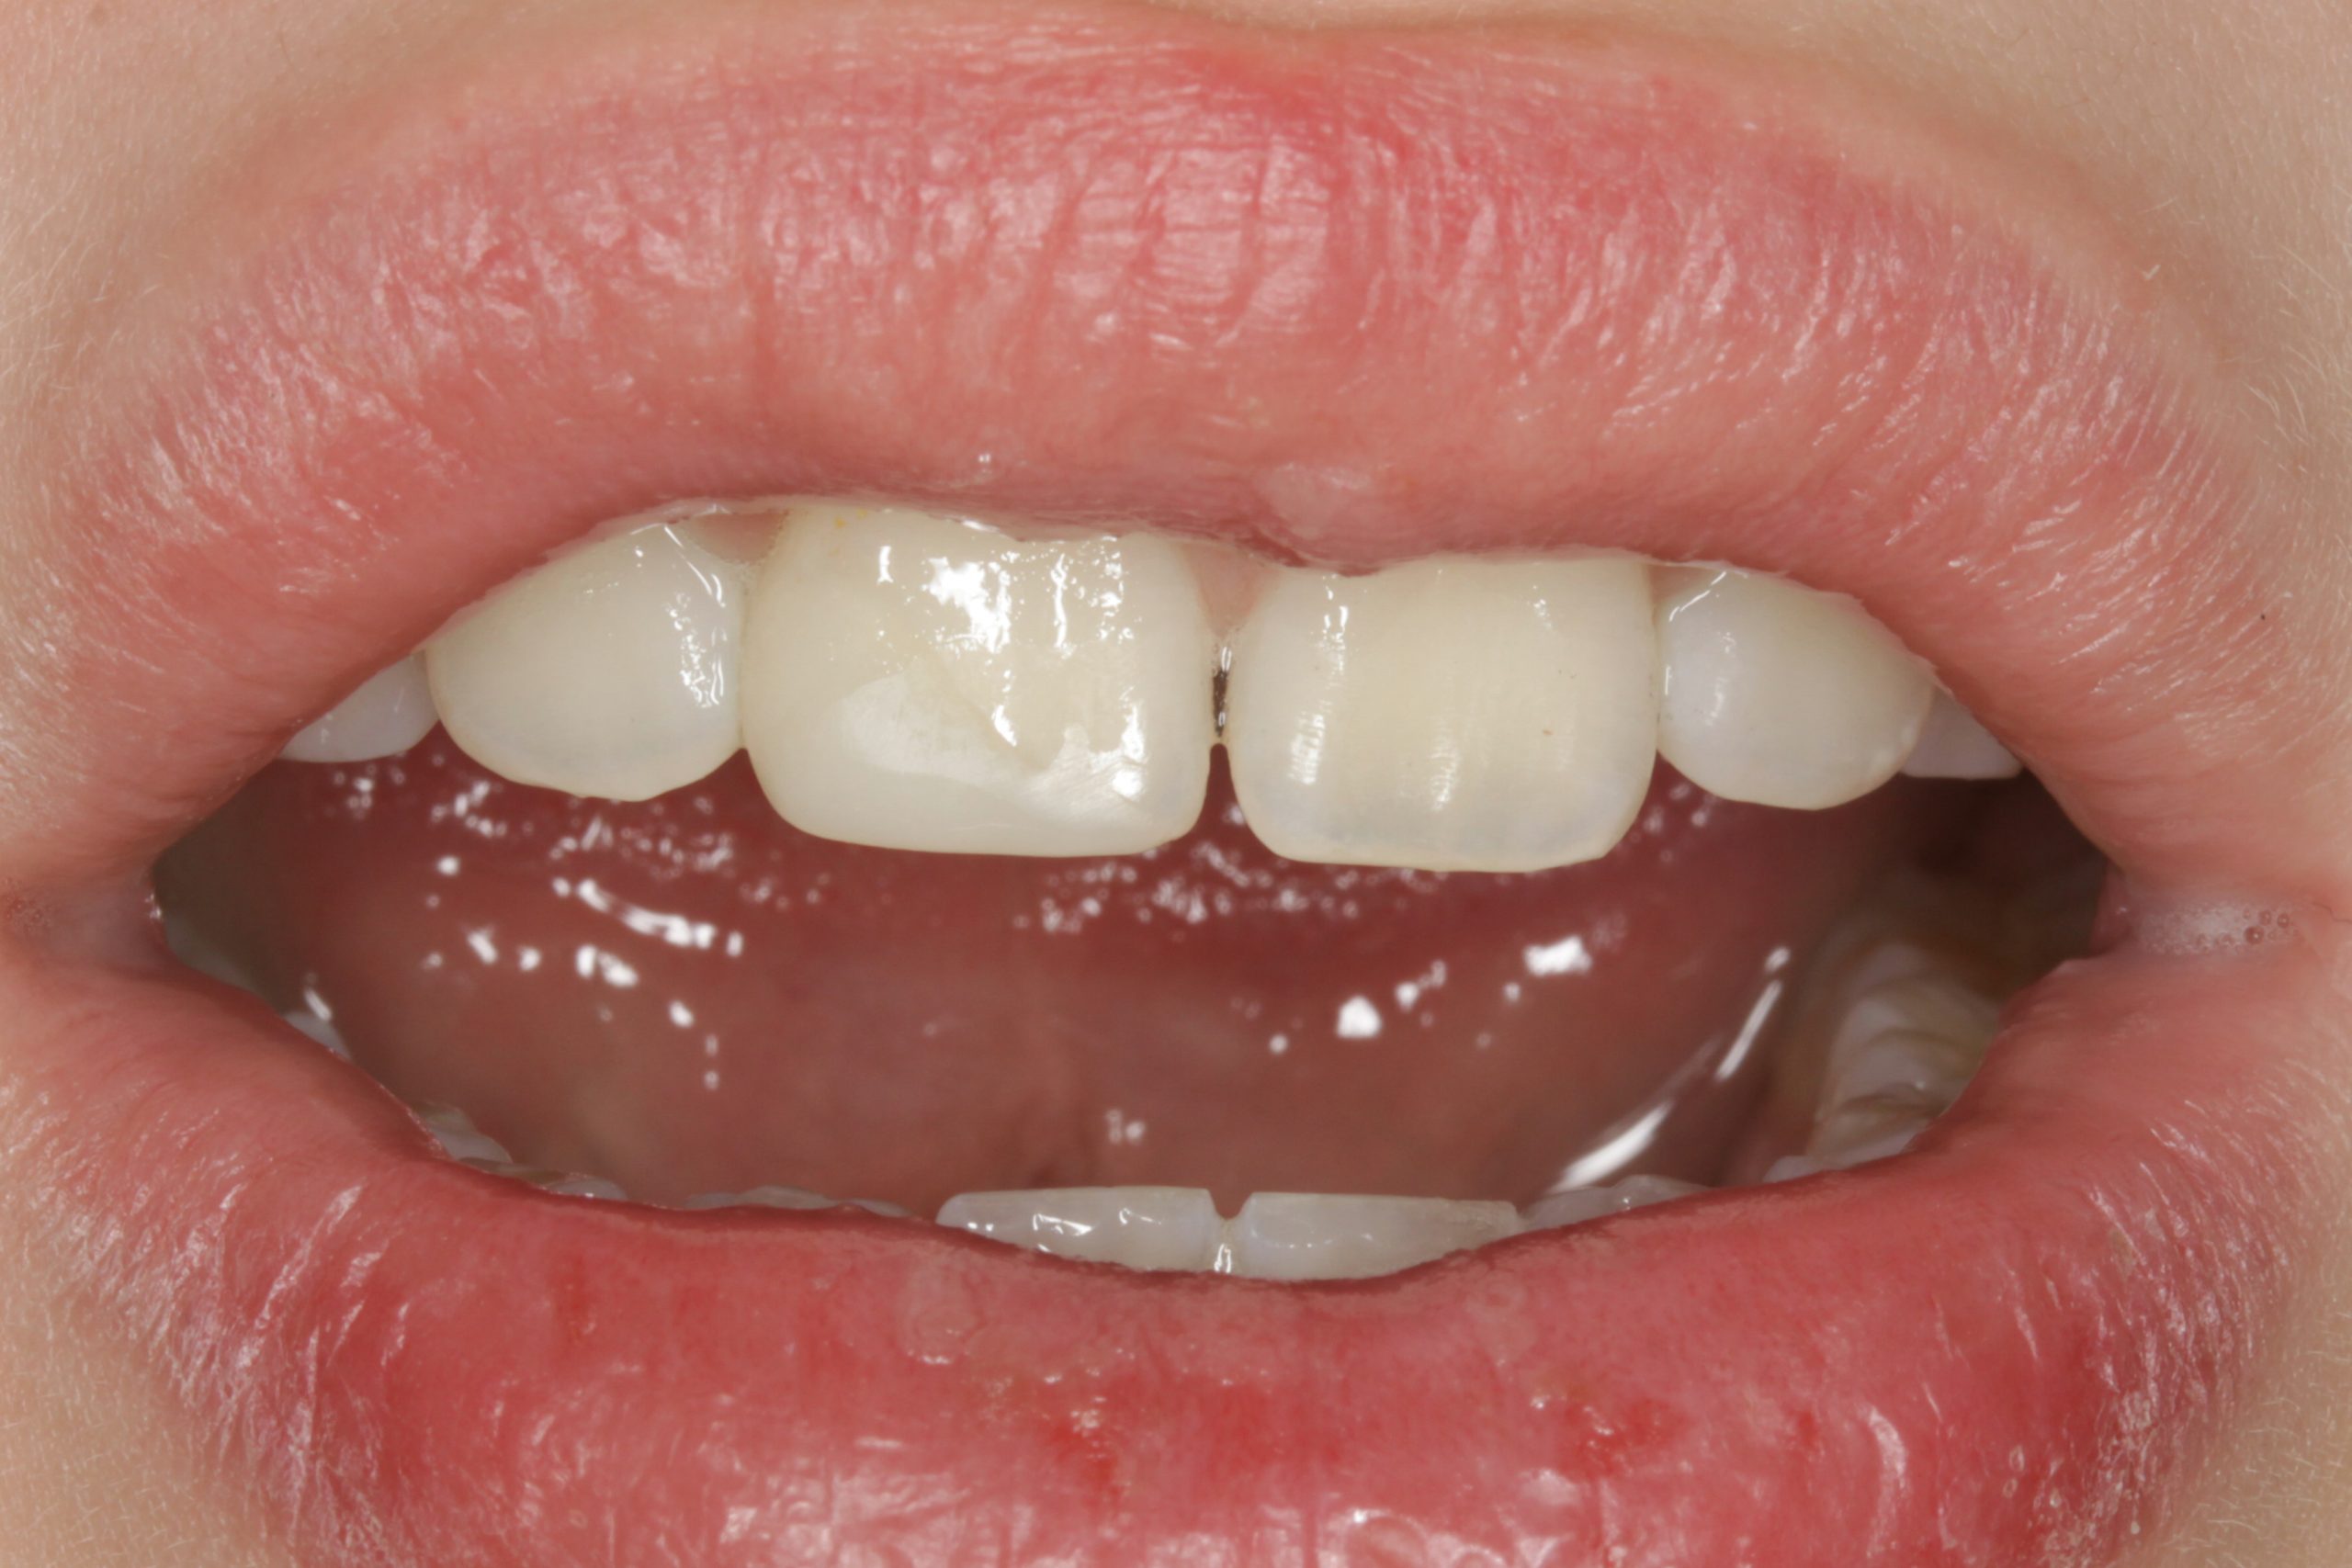
In addition, this procedure reproduces occlusal surfaces regularly and there is practically no excess material cervically either. Both the young patient and, in particular, his mother were very satisfied with the final result, including the shade (Figure 12).
Discussion
Trauma, especially of the upper anterior teeth, is a common phenomenon in dental practices. If, as in the case described, there are no complications in terms of injuries to the bone or soft tissue and no root fractures, then crown defects can be treated quickly with a direct composite.
As in the case of carious lesions, the shade and shape of the tooth need to be reproduced accurately. This is for successful restoration results.
Depending on the specific characteristics of the tooth in question, both tasks can prove very demanding. In the case study illustrated, the desired result was achieved with a modified Hugo matrix technique combined with a relatively simple layering technique (W Denner, 2007, D Dietschi, 2001). The modification consisted in the use of an injectable temporary composite. This cannot be sculpted like temporary materials with higher viscosities (eg clip, Voco).
In the patient described, this was possible because the matrix already fitted very well. No pressure was required for additional anatomical shaping. The matrix lay in very close contact cervically and ensured that it was possible to build up the missing substance parallel to the approximal surface of the adjacent tooth.
For the same reason, it was also possible to do without a palatal silicone index. If you want to make particularly certain, it is also possible to create a direct mock-up in the patient’s mouth or attempt to use an orthodontic model for a silicone index, for example.
Biocompatible restorative material
Appropriate layering of two dentine shades and one enamel shade also made it possible to reproduce the missing substance in a shade very close to the natural one. The Ormocer nanohybrid composite Admira Fusion was used, which contains no monomers associated with allergies, like Hema or Bisgma.
Instead, both the matrix and the glass fillers are based on silicon oxide. This means that it is particularly biocompatible in comparison with other materials. As it behaves like conventional, high-quality nanohybrid composites in all other respects, including extremely low shrinkage, Admira Fusion is first choice in my practice.
Conclusion
The result achieved with the described technique allowed the young patient to relax and smile again after the major fright of breaking his tooth. His mother seemed even more impressed than her son. She had not expected such a speedy and aesthetically pleasing result.
References
- Lam R. Epidemiology and outcomes of traumatic dental injuries: a review of the literature. Aust Dent J 2016;61 Suppl 1:4-20
- Schmoeckel J, Eissa M, Splieth C. Frontzahntrauma – ein Überblick für die Praxis. Wir in der Praxis 2016:25-29.
- DGMKG, DGZMK. Therapie des dentalen Traumas bleibender Zähne. S2k-Leitlinie, AWMF-Register 083-004, issued: 31.05.2015, valid until 30.05.2019, retrieved 13.12.2016
- Hugo B. Ästhetik mit Komposit. Grundlagen und Techniken. Mit Beiträgen von Walter Denner, 2008.
- Denner W. Ästhetik. Minimal-invasiv mit Komposit. wissen kompakt 2007: 39-48.
- Denner W. Direkte Kompositrestauration nach Frontzahntrauma. Quintessenz Team-Journal 2006; 36.
- Dietschi D. Layering concepts in anterior composite restorations. J Adhes Dent 2001; 3:71-80.

