Andrew Wallace describes how, after tooth whitening treatment, a patient was motivated to improve his oral health and further enhance his smile with simple alignment and edge-bonding restorations.
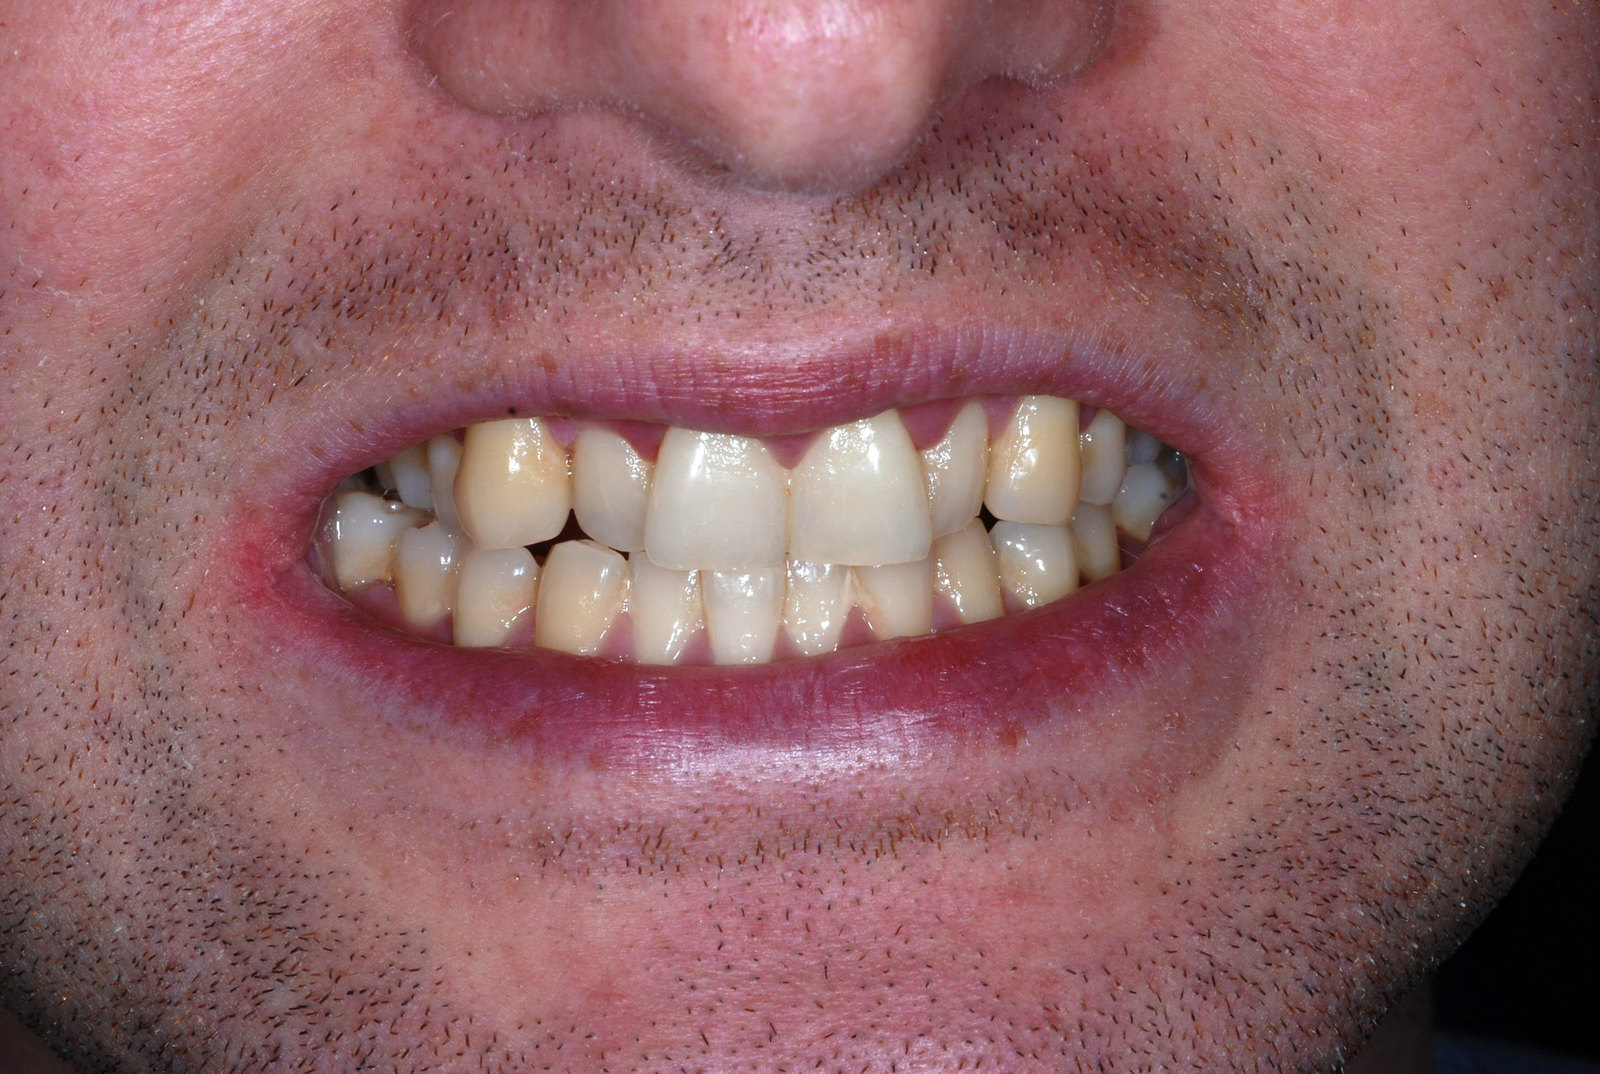
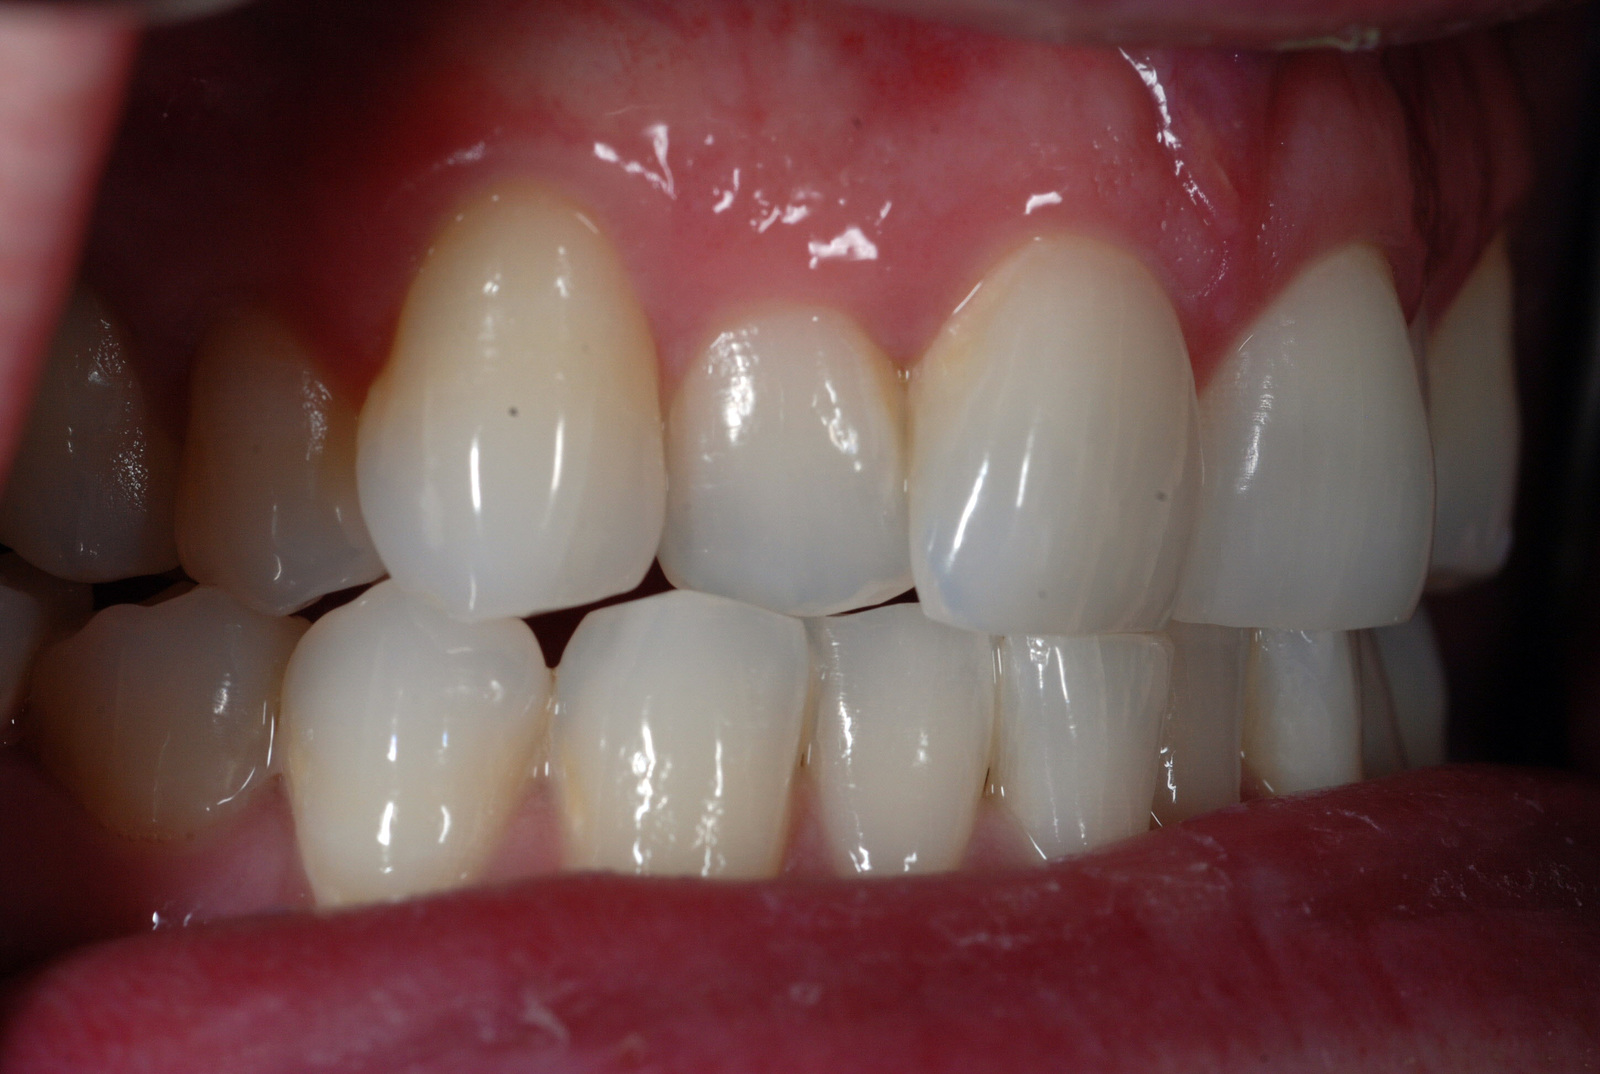
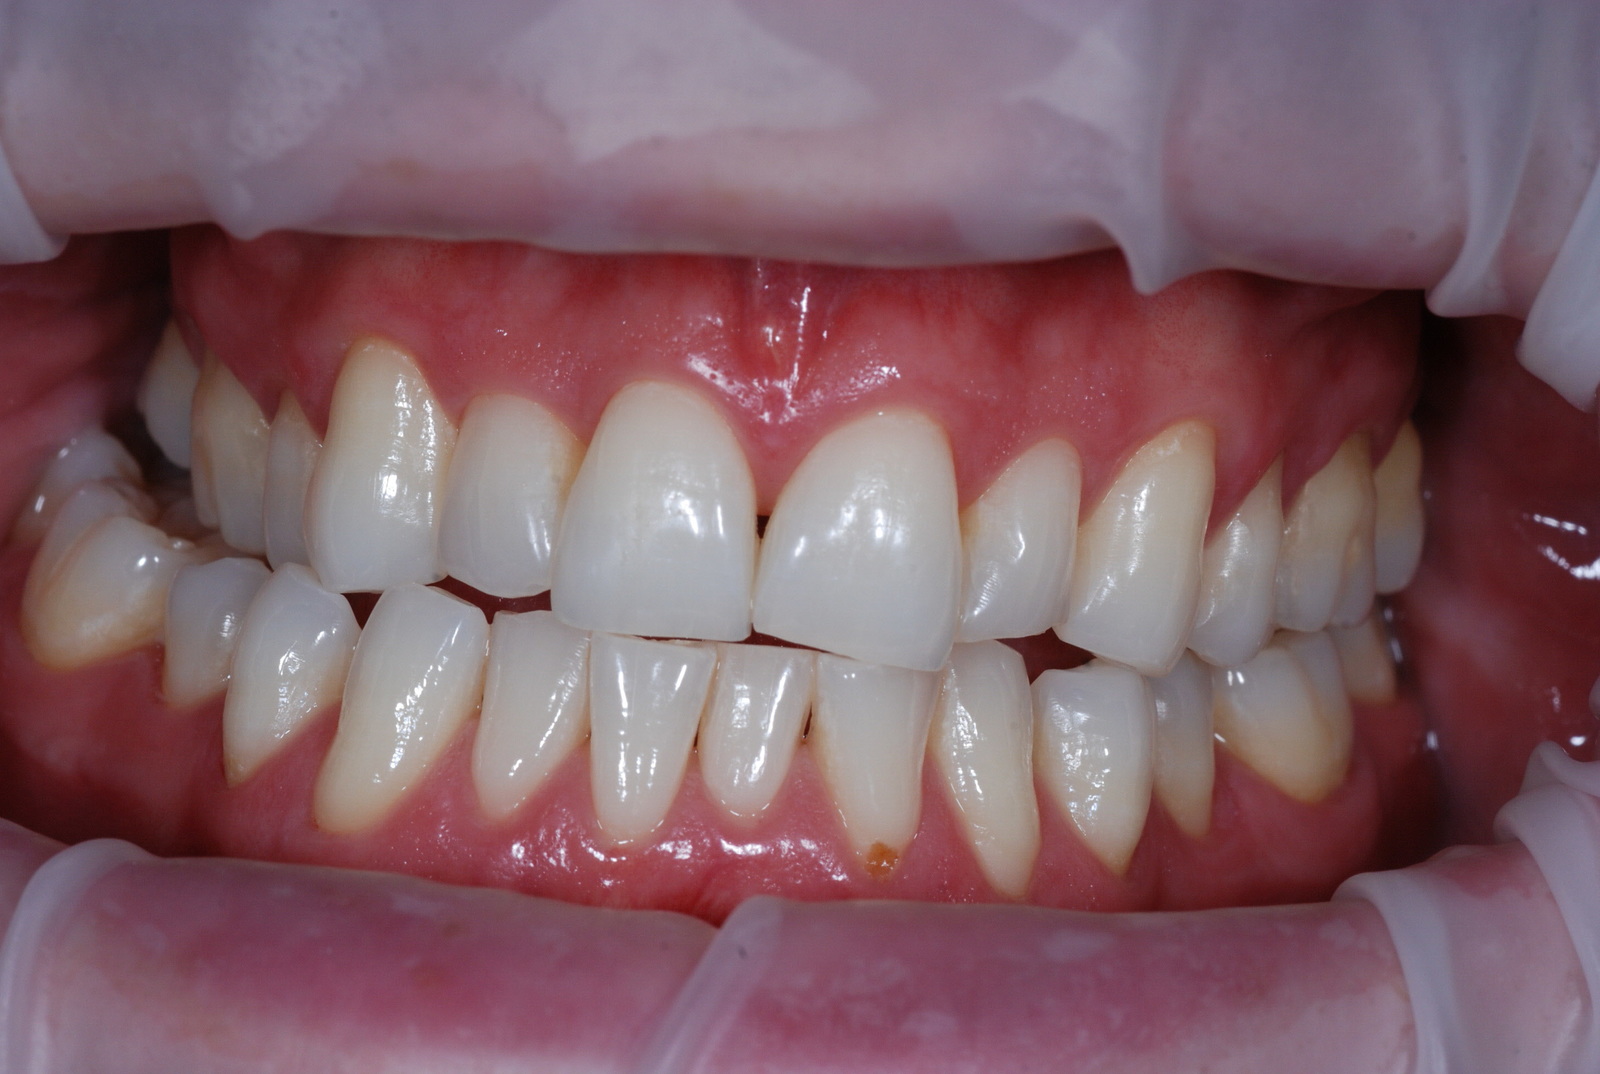
A 38-year-old male patient presented in April 2010 because he was unhappy with the colour of his teeth (Figure 1). His oral hygiene was poor, although his dental attendance was regular.
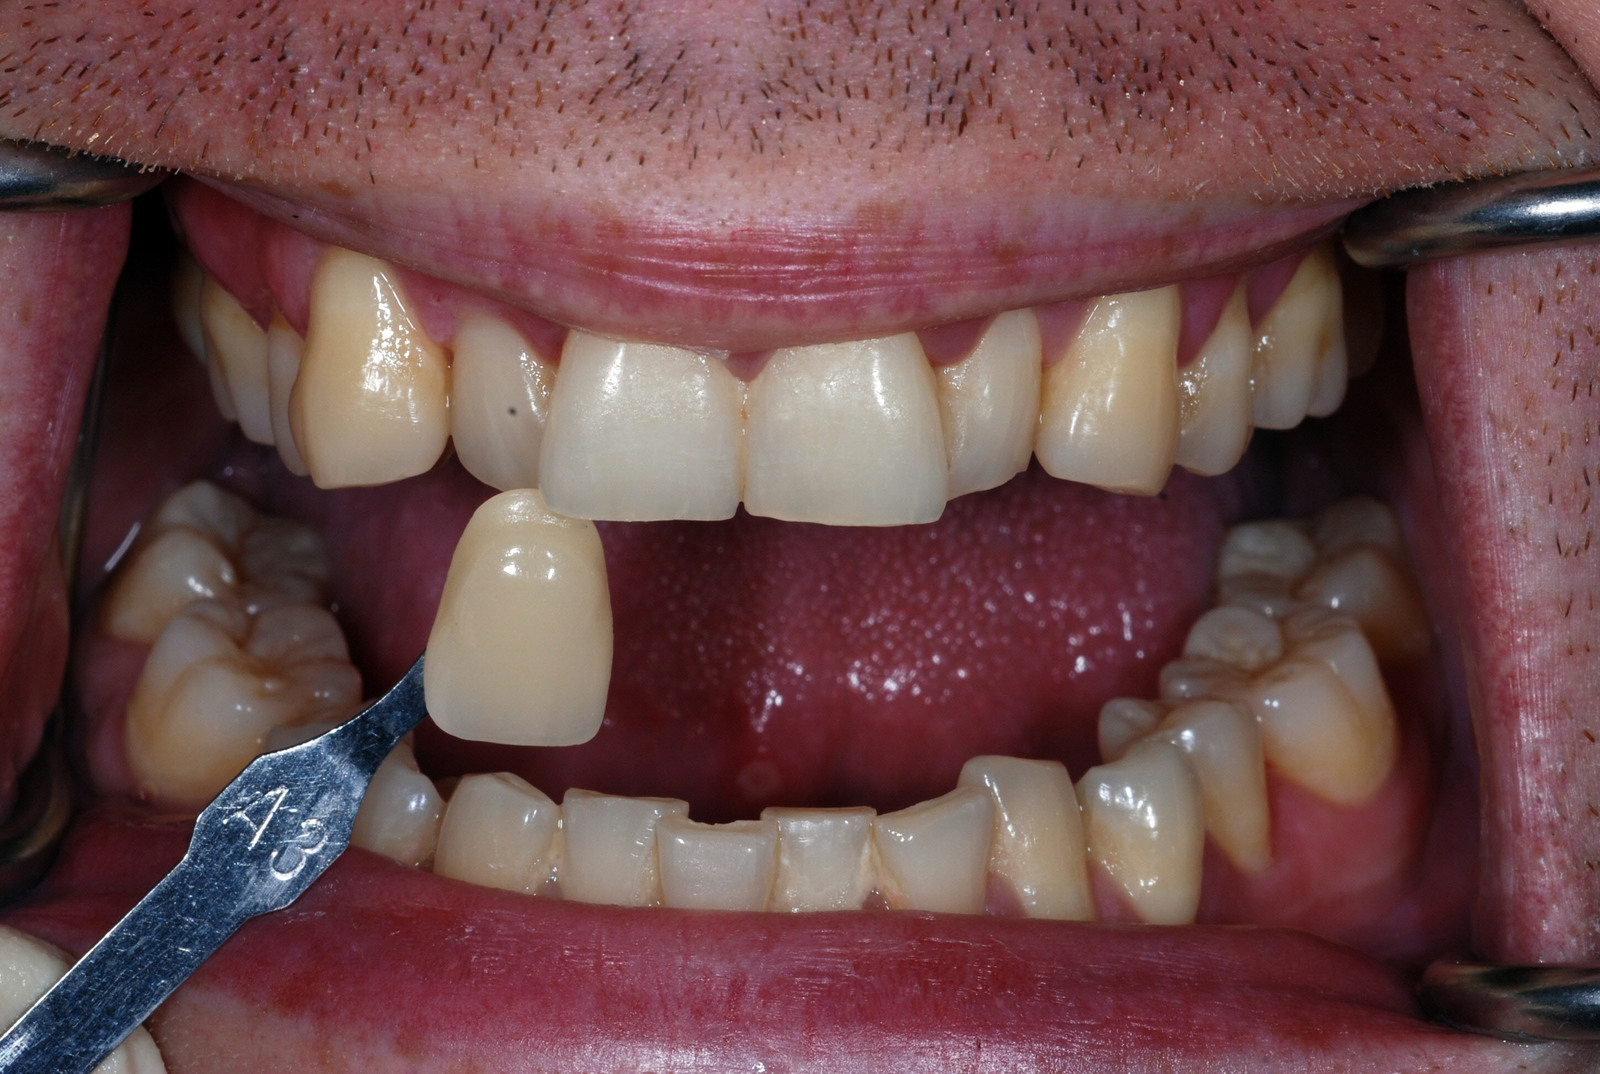
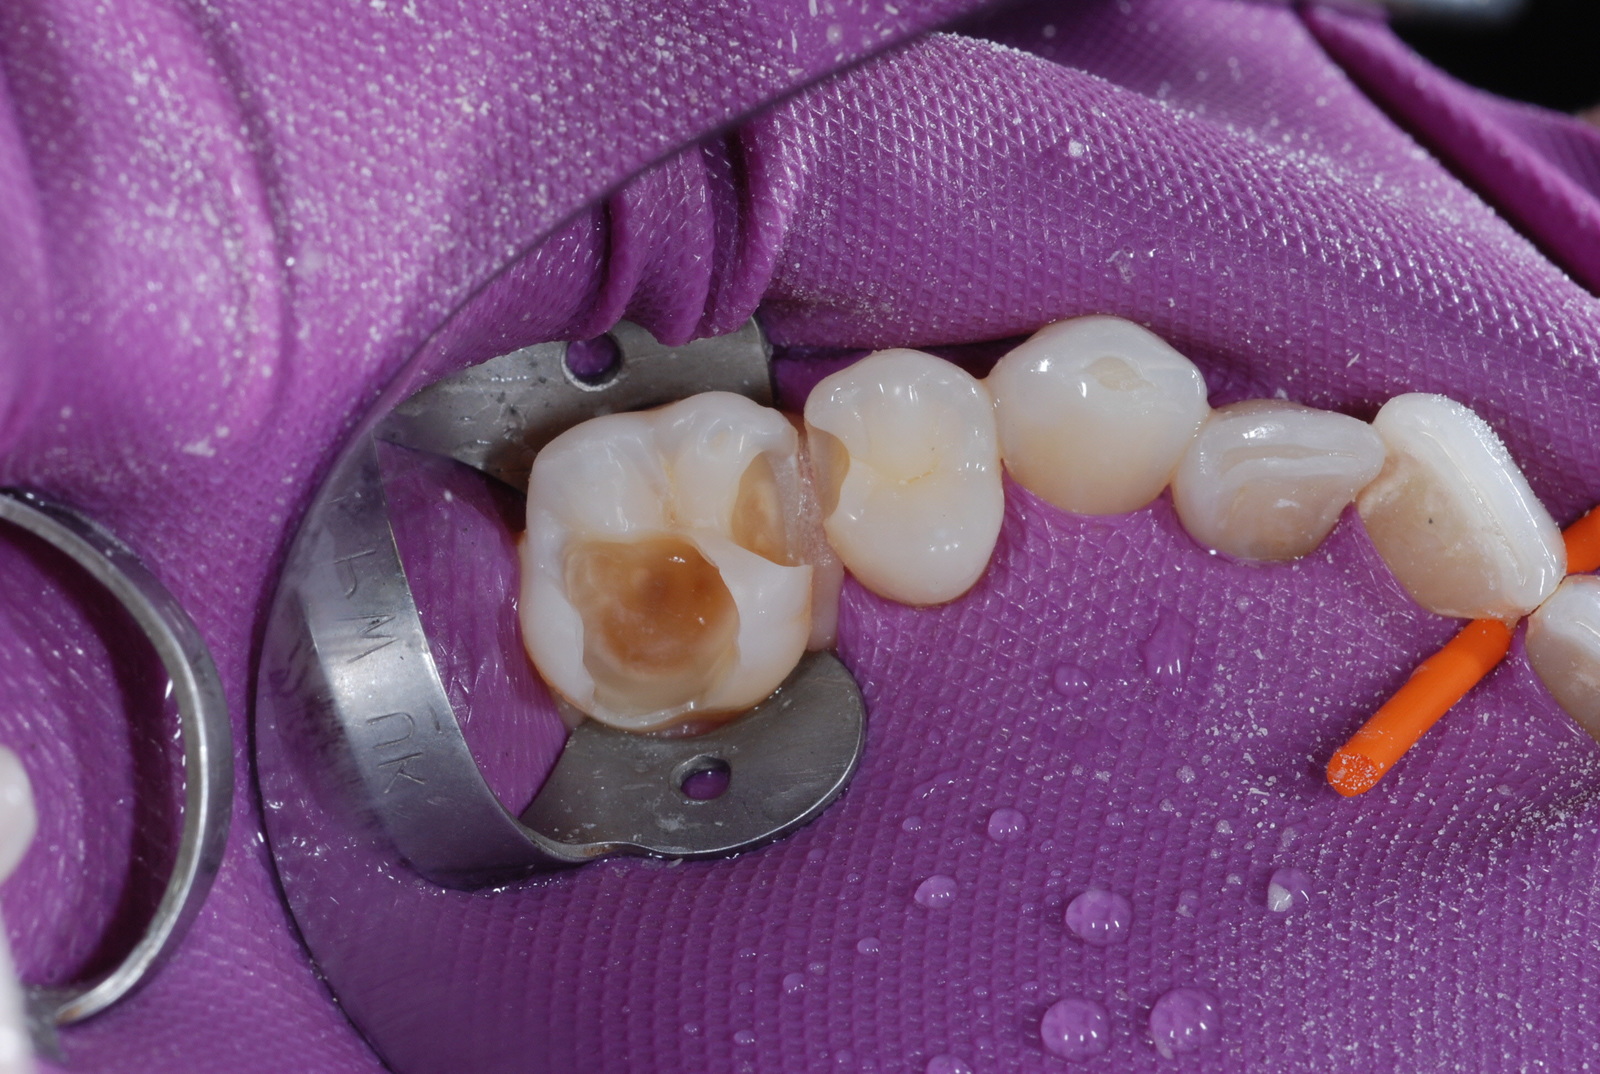
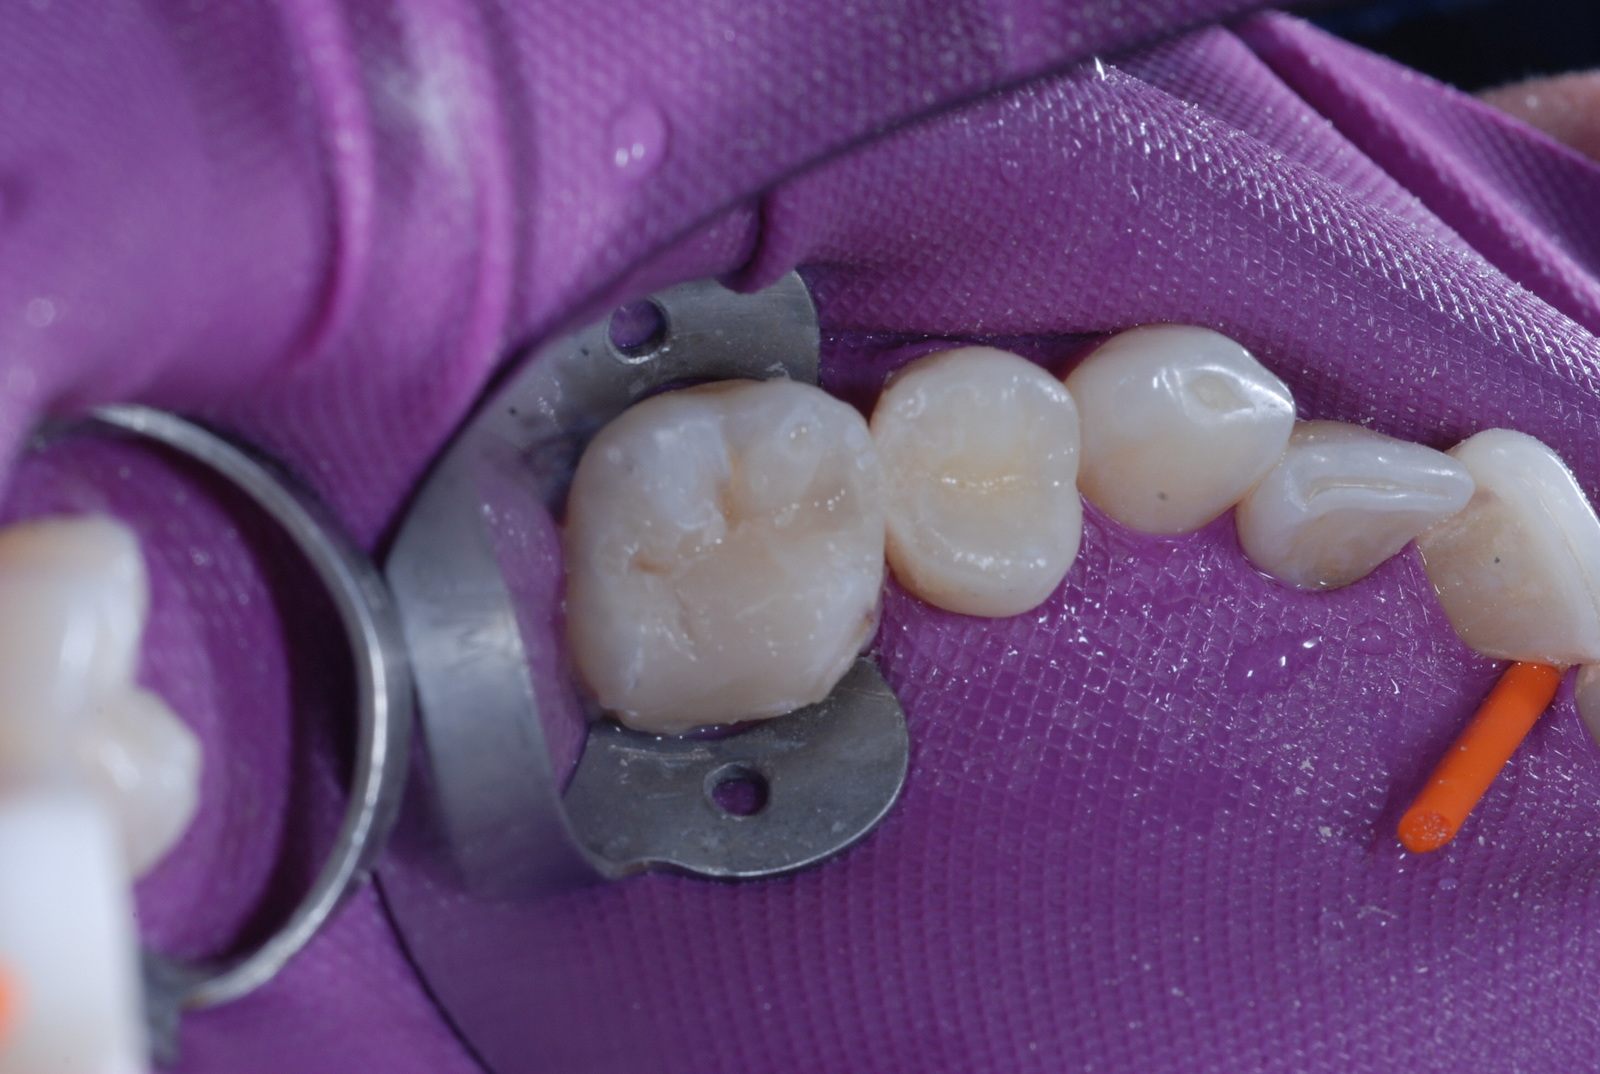
We discussed chairside and home night-time tray whitening. The patient decided on the latter option. His initial dental shade was A3 on the Vita guide (Figure 2). Alginate impressions were taken for the whitening trays. At the same appointment, due to caries, the upper left first molar and second premolar were restored using Kulzer Venus Diamond Opaque Medium (OM), A2 and Clear Light (CL) shades (Figures 3 and 4). I used Venus Diamond because of its strength, wear resistance and wide range of shades.
The upper whitening tray and 10% carbamide peroxide gel were given to the patient at his next visit. He was provided with a standard kit of three syringes and instructed to complete the course. Bleaching instructions were delivered verbally, in writing and via a video guide.
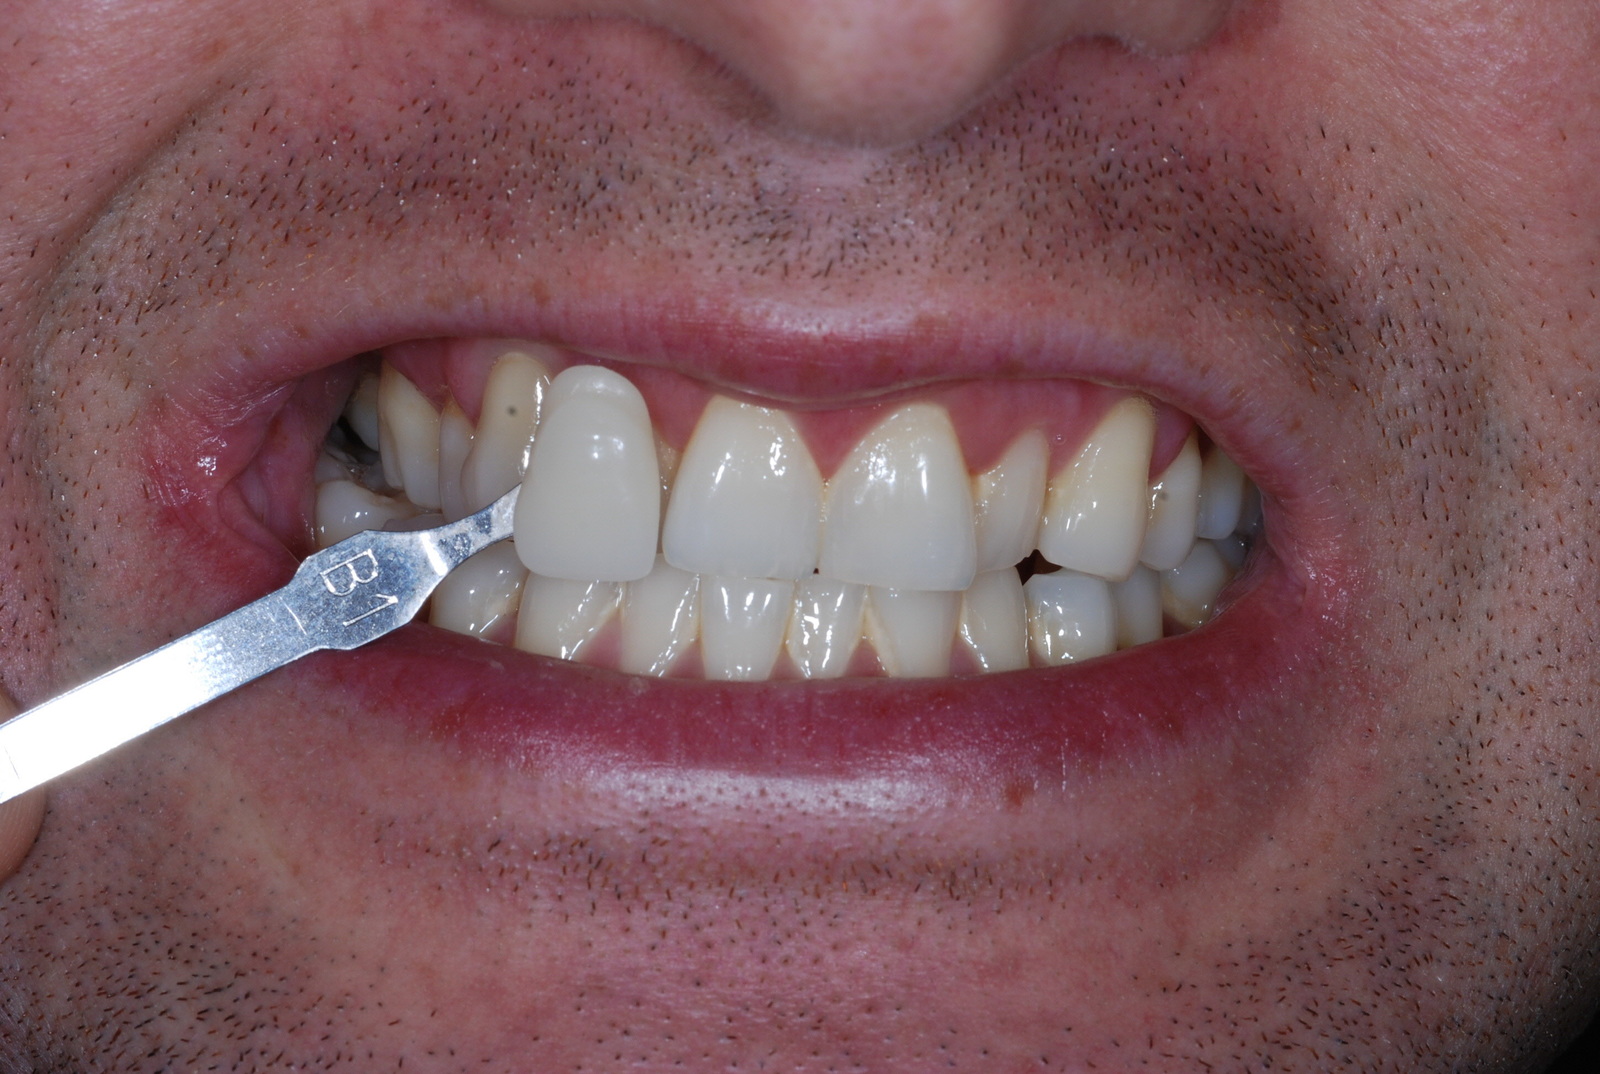
The patient was also supplied with an amorphous calcium phosphate (ACP) product and desensitising toothpaste. After two weeks, he returned for review of his upper teeth and was given the lower whitening tray with another three syringes of 10% carbamide peroxide gel. He did not attend the final tooth whitening appointment, but was seen for an examination five months later and the final shade of B1 was recorded (Figure 5).
Further treatment to improve smile
The patient returned the following year and enquired about how he could further improve his smile. He was interested in straightening his teeth. Options discussed included fixed labial braces, clear aligners, or the Inman Aligner: a modified spring aligner. A full orthodontic and functional diagnosis was undertaken (Figure 6).
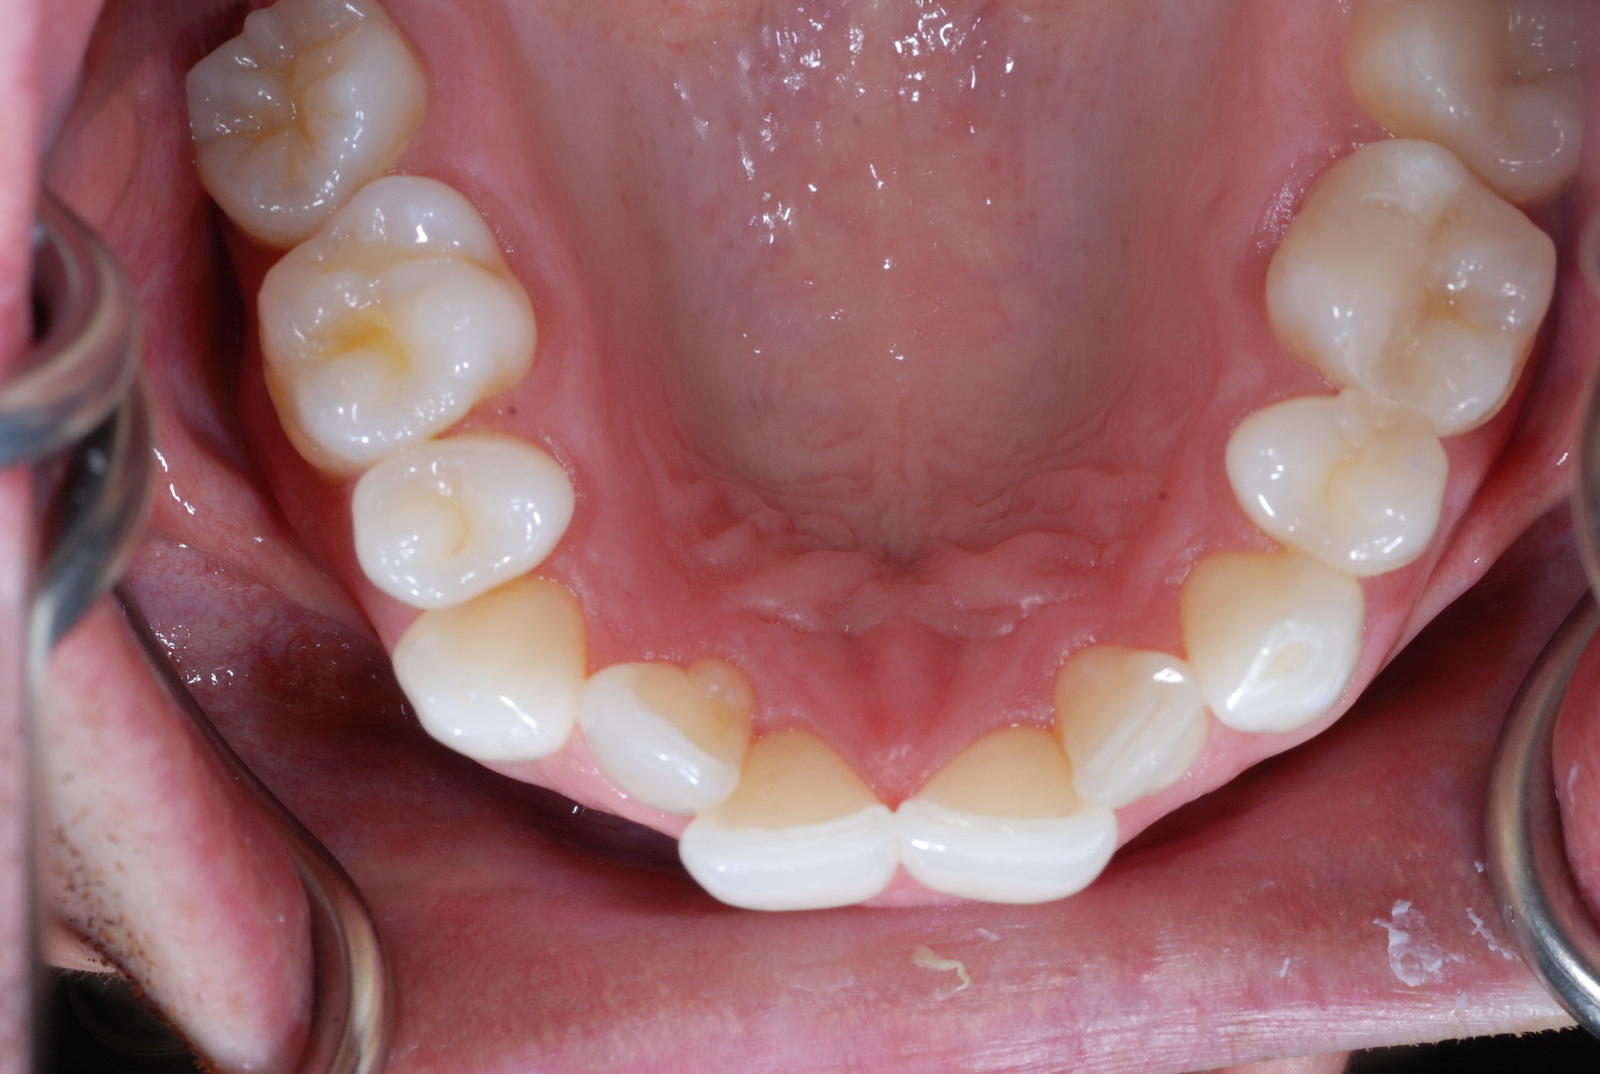
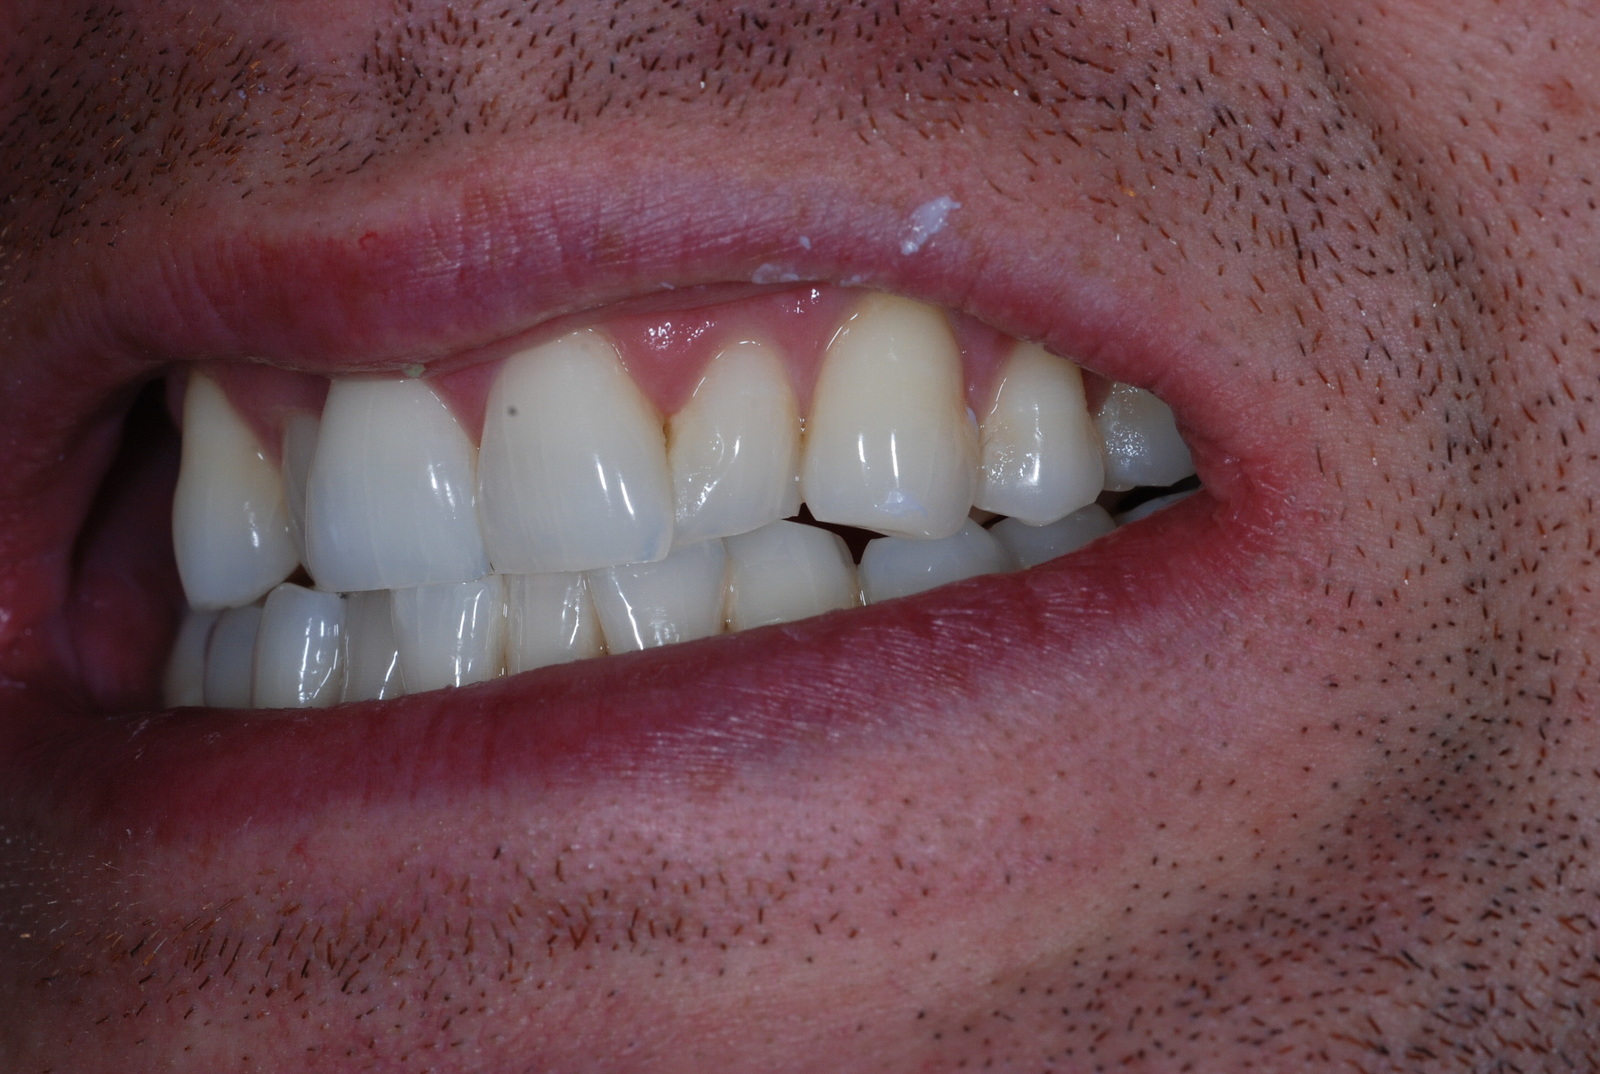
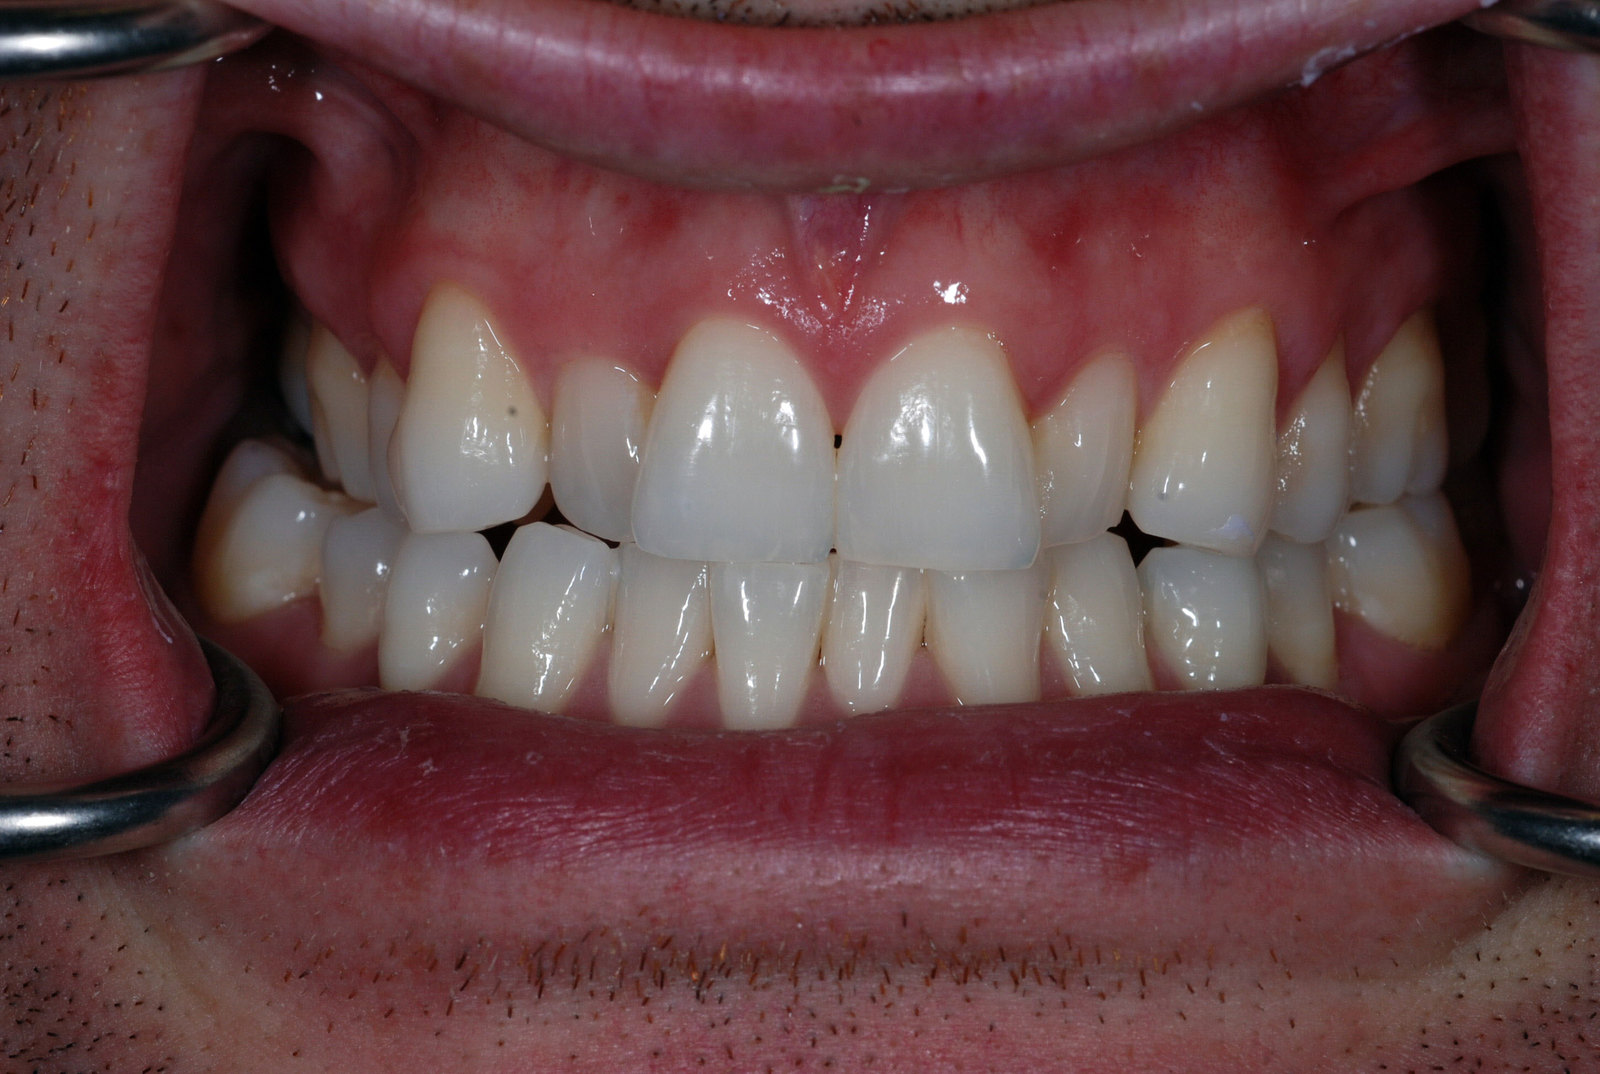
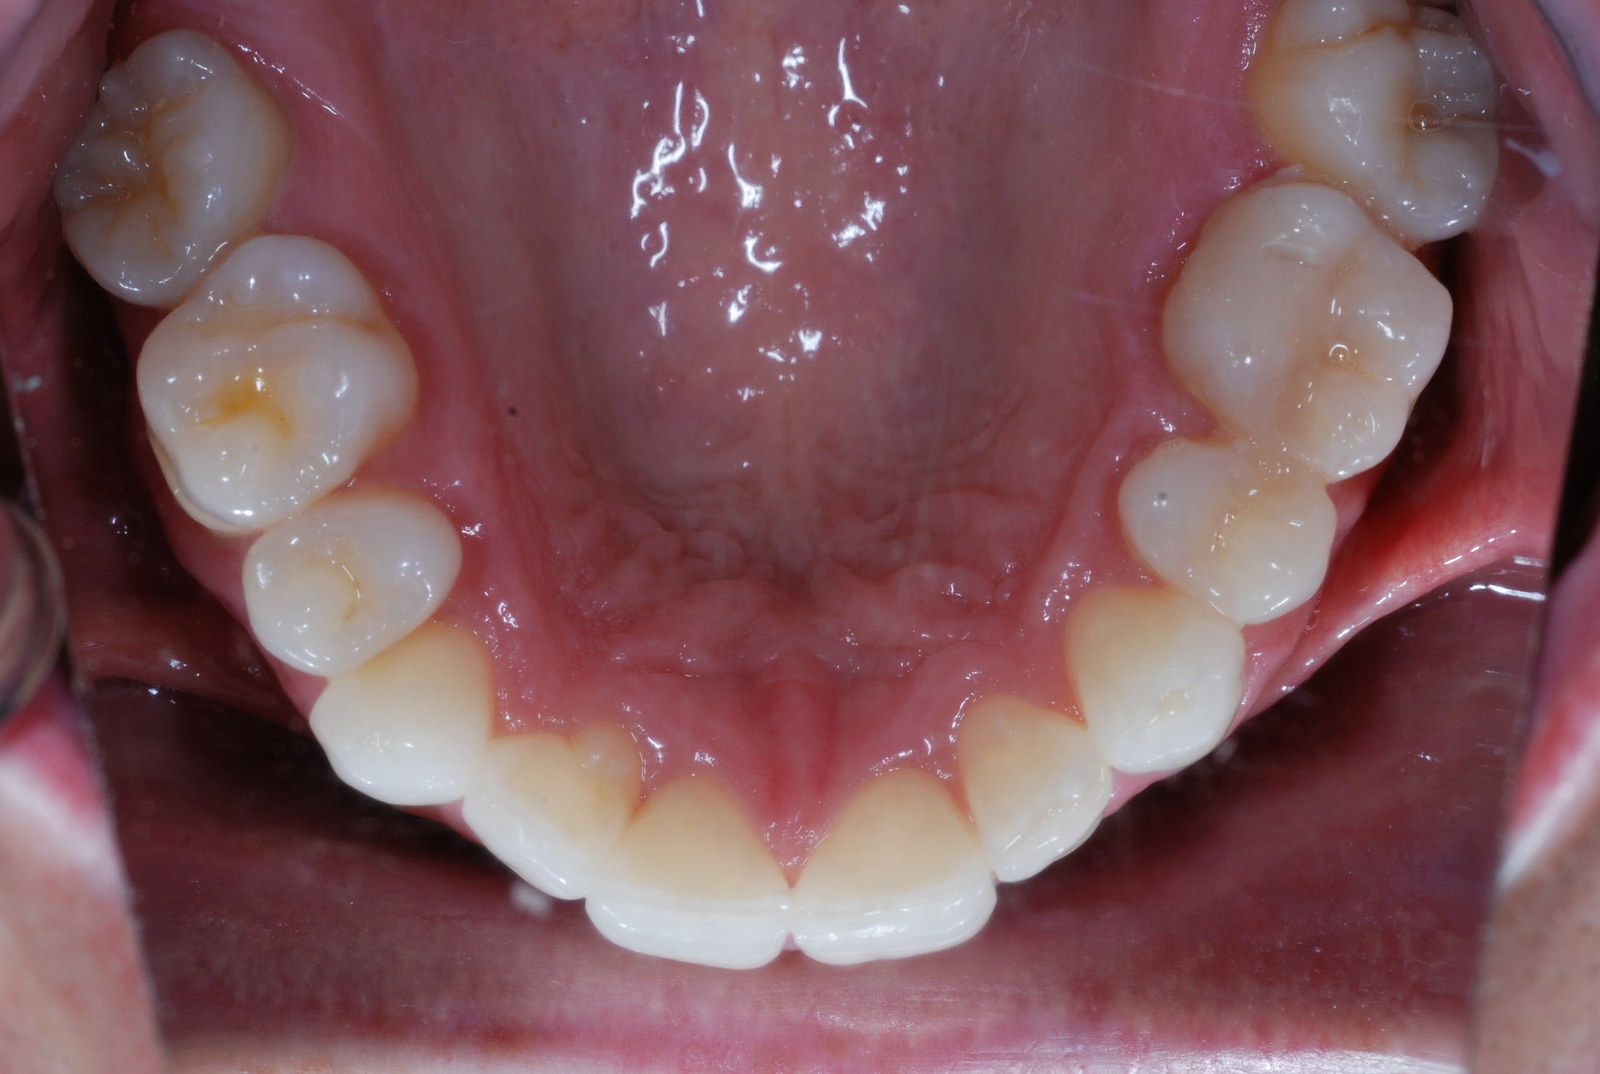
The patient had mild upper and lower crowding, with class III incisors on a mild skeletal class III base with an increased Frankfort-mandibular plane angle (FMPA) (Figures 7-9). He chose the Inman Aligner because it was cost effective and required a shorter treatment time. The patient also preferred a removable appliance because he practised martial arts.
The case was planned with the aid of Spacewize, the diagnostic dental crowding calculator. An ideal curve was digitally plotted. The space calculation confirmed that this case was treatable with an Inman Aligner. The difference between the available and required space was 2.7mm, which could be created with interproximal reduction (IPR) incrementally, as the treatment progressed.
It was clear that the wear present on the upper teeth would result in an irregular incisal edge, once the teeth had aligned. The patient was informed that after alignment additional bonding would be required, and because of his edge-to-edge bite, we were unsure how frequently the restorations might need replacing or repair.
Short-term orthodontics
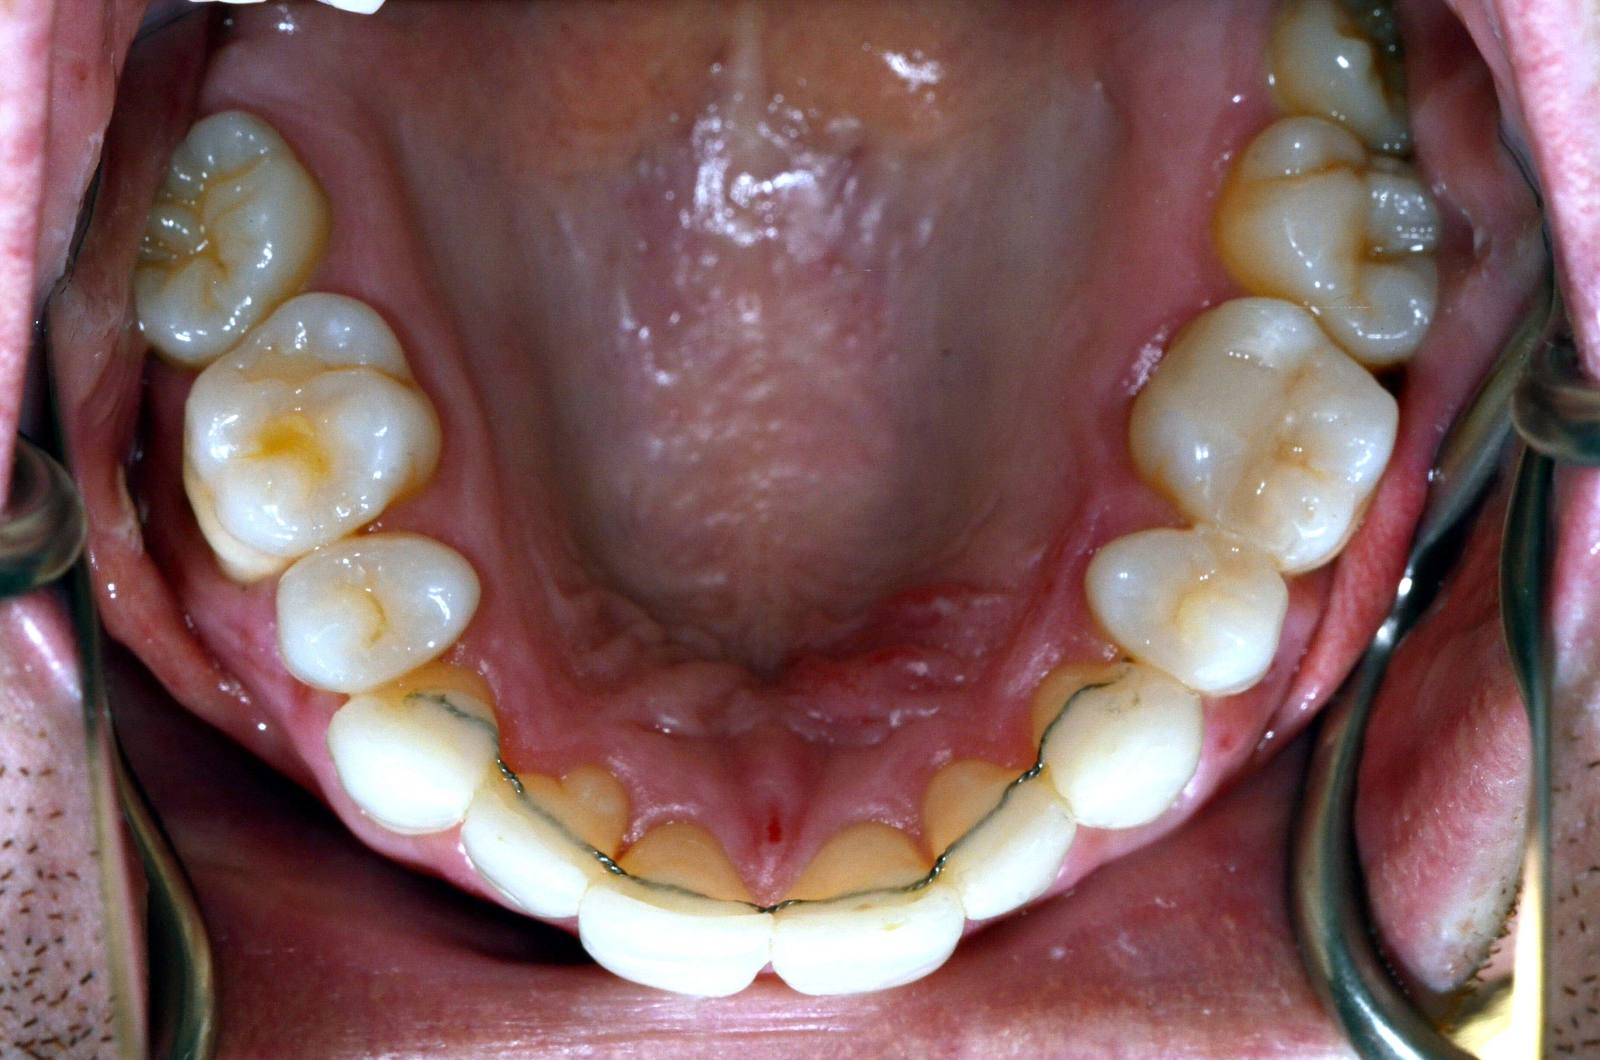
The patient had four months of active treatment using the Inman Aligner to straighten the upper anterior teeth. At two- to three-week intervals he was seen to shape the teeth progressively with IPR and create the space necessary. One clear refiner was all that was needed for the teeth to reach the desired position (Figure 10). Once we were both happy with the final result, impressions were taken using Kulzer Flexitime and wash for an upper fixed wire retainer.
Two weeks later, the retainer was bonded across the palatal surfaces of the upper six anterior teeth using Kulzer Venus Diamond Flow A1 shade, to prevent tooth relapse (Figure 11). In this case, the wire retainer was fixed in place before the edge-bonding restorations; the timing of this is a personal choice and case dependent. I have used Venus Diamond Flow for my bonded retainers since it was introduced. I like the combination of ease of manipulation, limited slumping and longevity.
A direct A1 shade bis-acryl composite mock-up was created from a laboratory wax-up, using a putty stent (Figure 12). This allowed the patient to preview and approve the final edge-bonding outcome.
Hard-wearing restorations
The patient returned for composite bonding. The treatment was performed with no local anaesthesia. The only preparation required was the smoothing of any sharp edges or unsupported enamel using polishing discs and air particle abrasion (Figure 13).
Kulzer Venus Pearl was used to restore the teeth (Figure 14). This was one of the very first Venus Pearl bonding cases I completed and, at the time, I used a multi-layer approach. To restore the incisors, a palatal shell was built in A1 shade using the palatal stent. The opaque dentine layer, Opaque Light Chromatic (OLC) shade, was then added, followed by another layer of A1 using a freehand technique against the palatal shell.
In order to create natural incisal effects, Amber (AM) shade was applied. The canines were built up in A1 shade and OLC, using the same technique. I chose Venus Pearl to restore the teeth because, like Venus Diamond, the material has an excellent long-lasting lustre, which requires minimal maintenance and is very hard wearing.
I used the Venus Supra polishing kit for the initial polish because of its range of pre- and high-gloss polishers, which are highly filled with microfine diamond powder. The red pre-polishers allow for the rapid removal of deeper scratches, and the grey polishers give a high, long-lasting lustre.
Further impressions were taken for a vacuum-formed retainer, new whitening trays and a gum shield for martial arts. Given the patient’s occlusion, the bite was opened on the palatal surfaces of the new composite edges, relying on the Dahl concept to allow the posterior occlusion to re-establish. Two weeks later the patient returned for a final polish. At the same appointment, the new gum shield retainer and whitening trays were provided.
Reflecting on the case
The orthodontic treatment in this case was very simple. Using the Inman Aligner suited what the patient wanted to achieve and how he wanted to achieve it. He could not have worn fixed appliances, due to participating in contact sport.
The patient was informed at the beginning of his treatment that, because of uneven edge wear, further procedures would be required in addition to orthodontics. When teeth are misaligned, patients are often unaware that their teeth have uneven edges.
In hindsight, I can see that there would have been some benefit in bringing the lateral incisors more upright, but the final aesthetic result is only very slightly compromised because of this.
The posterior occlusion took longer than normal to fully re-establish. Following the composite build-ups, the patient was comfortable with this new position almost immediately, despite the open posterior occlusion. If faced with the same problem now, I would have encouraged the relative axial movement of the posterior teeth, with some very minor interproximal polishing. This would help to ensure that overly tight interproximal contacts would not slow down
the settling.
Patient encouraged by positive outcome
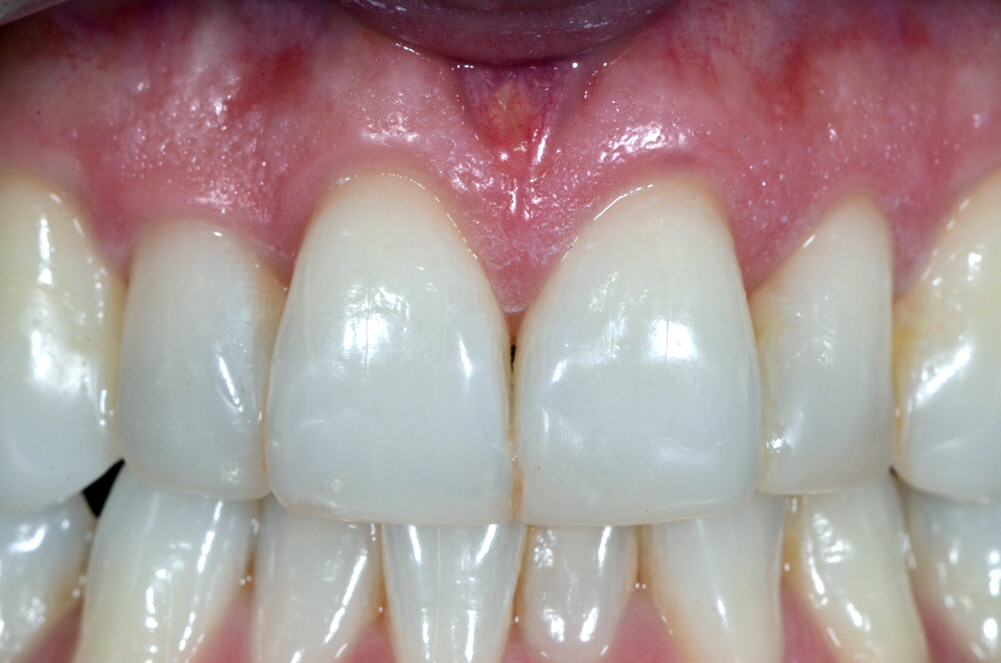
The patient was delighted with the treatment outcome and continues to be seen regularly for dental examinations. In 2014, 18 months after placing the composite, the patient presented with a small etch chip on the UR3 mesially (Figure 15).
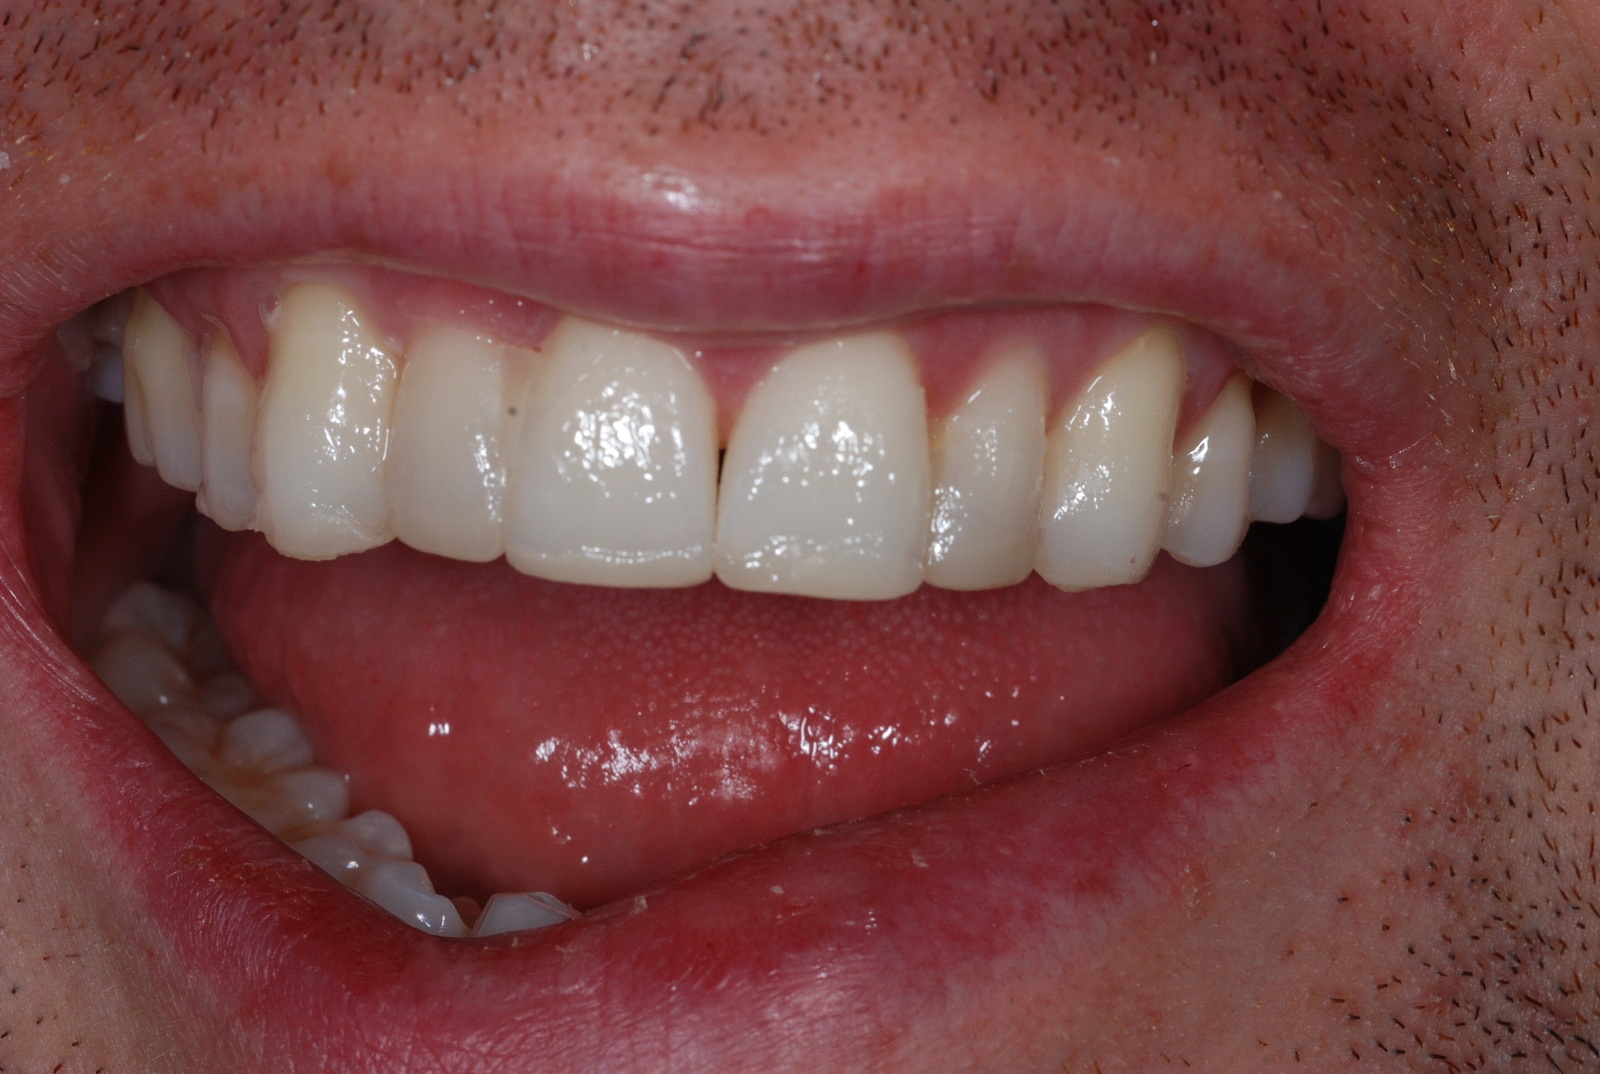
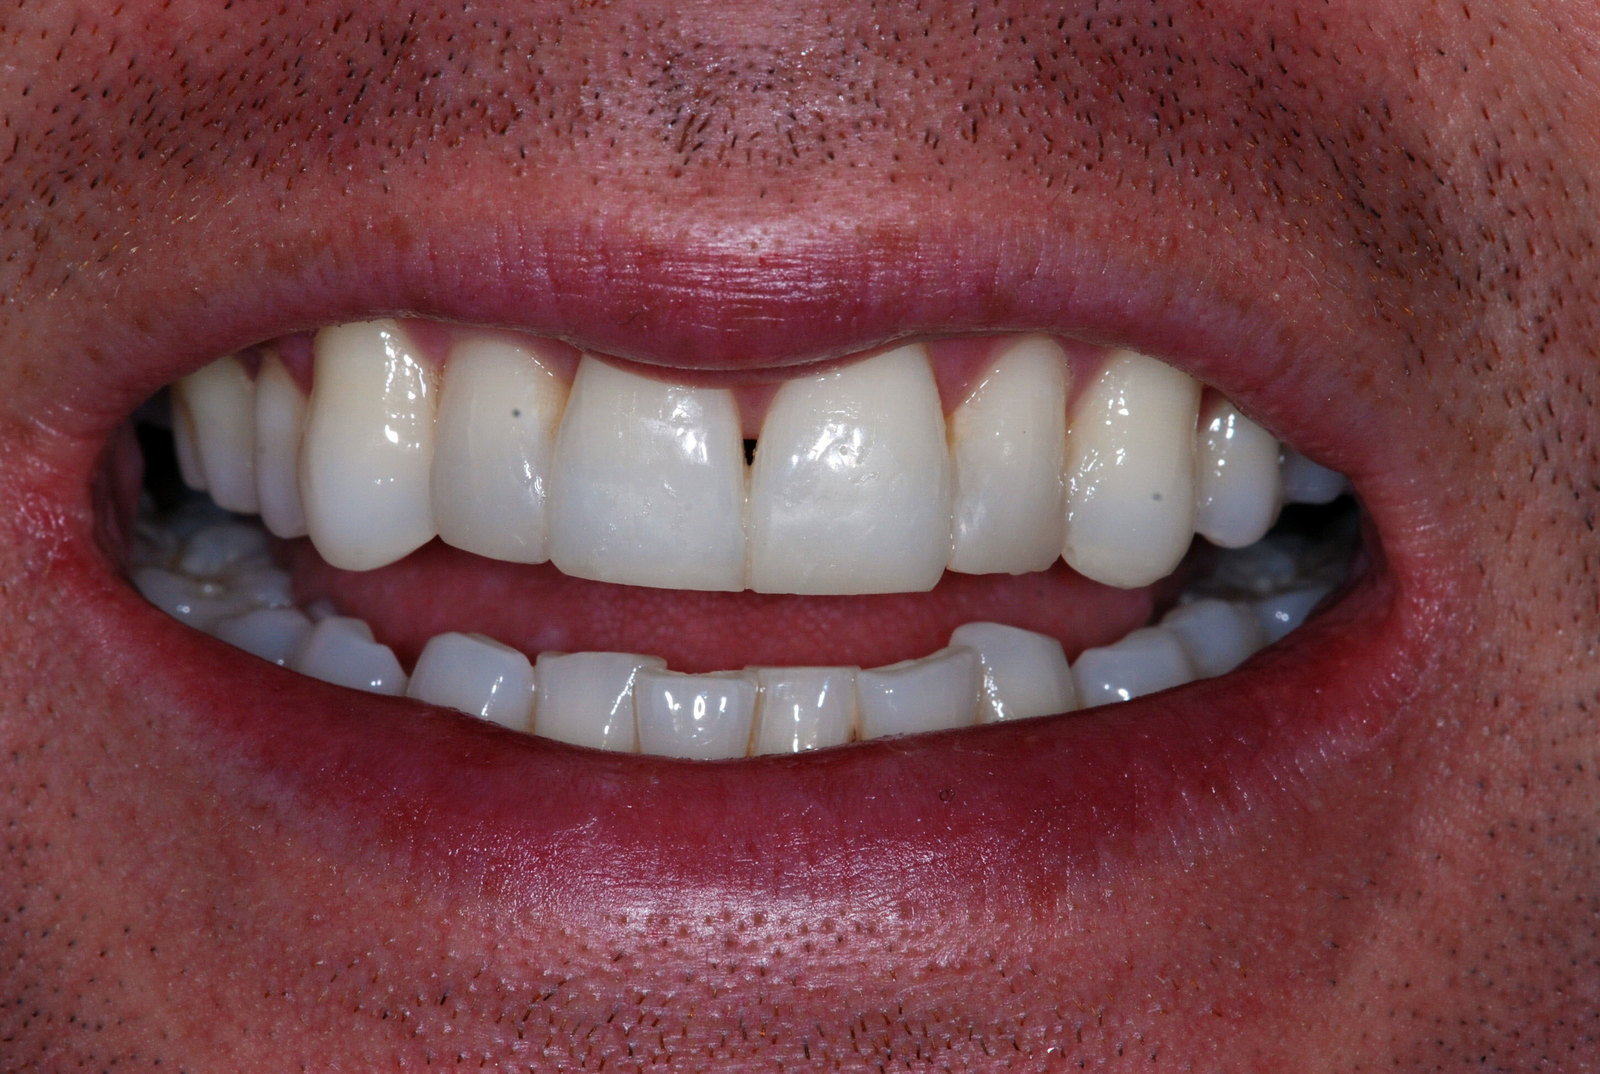
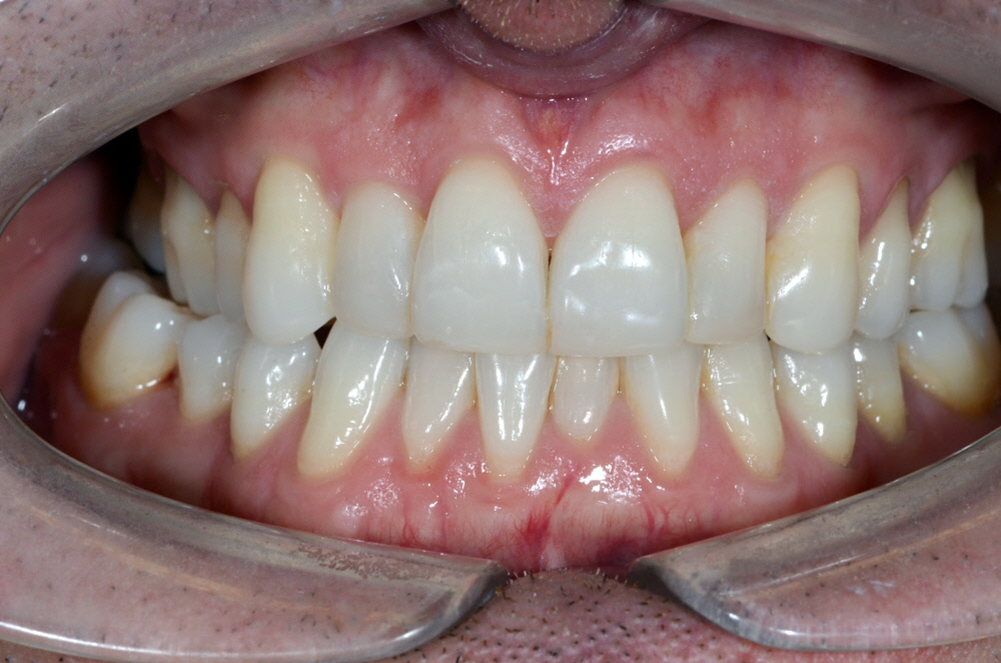
At the time, the patient declined to have it restored, but it was subsequently repaired in 2016. The most recent review was completed in 2017, exactly five years since the edge-bonding (Figure 16). As can be seen in the photographs, there has been no further chipping, no appreciable wear of the composite, and no loss of colour or staining (Figure 17).
This case highlights the predictability that we can now achieve with composite bonding. At the time I completed these restorations, Venus Pearl was a new product. In this case, Venus Pearl has held up to a fairly unfavourable occlusion, which demonstrates the inherent strength of the material. In addition, I have been impressed with its easy and convenient handling.
When placing edge-bonding restorations today, I rarely use wax-ups and palatal stents. I prefer to preview the result intraorally with freehand build-ups, and then obtain patient approval. I also take photographs as a guide for the final restorations.
Now, I normally use only two layers of composite when placing this type of edge bonding. I follow the protocol of the ‘reverse triangle’ technique, which involves single layers of the opaque dentine shades and the chosen Vita shade of enamel composite. This simplified method works well for me and reduces the possibility of introducing errors or bubbles between multiple layers.
Tooth whitening did two very important things for this patient. First, it made him more dentally aware, which encouraged him to improve his oral hygiene. Secondly, it opened his eyes to the possibility that he could further enhance his smile. Whitening is a gateway procedure to other elective dental procedures.