
The Aligner Dental Academy presents a five-step guide to getting the most of your Invisalign cases and building clinical confidence.
Many Invisalign clinicians find that one of the biggest hurdles to treating more complex cases isn’t the treatment itself, it’s having the confidence to critically review and optimise the ClinCheck before treatment begins.
ClinCheck should not be regarded as a polished animation that simply requires approval. It is a clinical prescription and must reflect the patient’s diagnosis, facial aesthetics, periodontal health, restorative objectives, and functional requirements.
A reliable review process begins by defining the intended final tooth positions before assessing the digital setup. Each ClinCheck should then be evaluated systematically against these predetermined treatment goals.
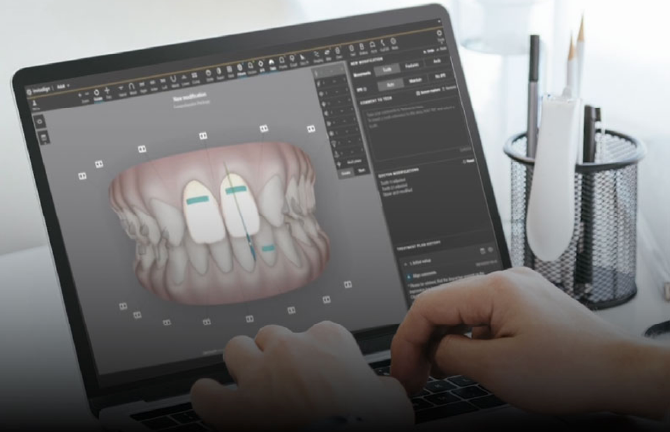
Begin with a comprehensive assessment and clear treatment objectives
Before reviewing the first ClinCheck, complete a thorough clinical assessment using photographs, radiographs, intraoral scans, and appropriate occlusal records. Identify the patient’s primary concern and translate it into specific, clinically achievable treatment objectives.
These objectives provide a benchmark against which the digital treatment plan can be assessed. They also support clear communication with the patient and contribute to a robust consent process.
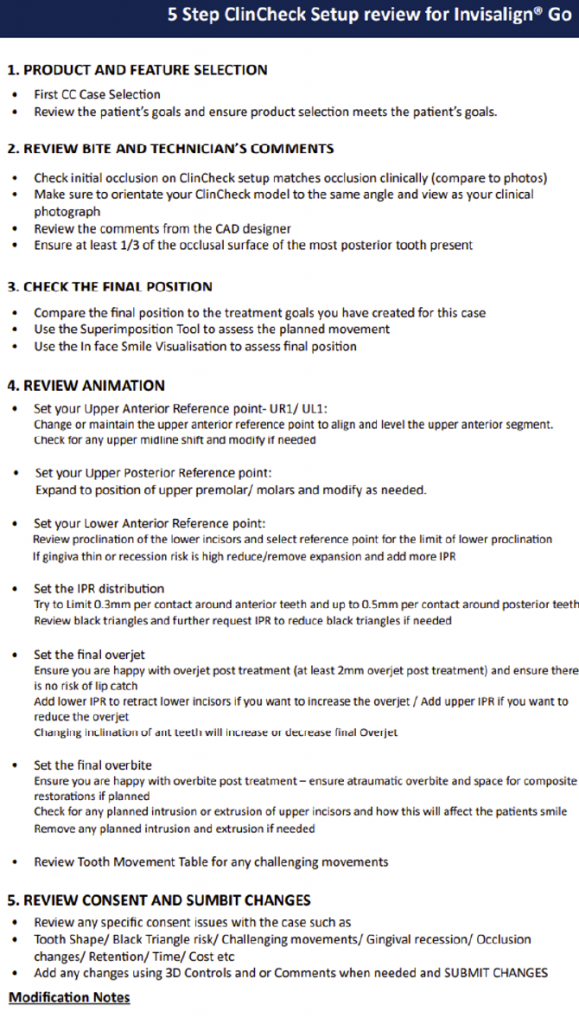
Step one: product and feature selection
Whether you are a GO or Comprehensive provider, the first thing to do is to check that the product type you have selected is able to meet your patients treatment goals. For example if your patient speficially wants to have a wide smile, then ensuring the plan is on GO plus can help deliver that as you can expand to the first molar.
Step two: review bite and technicians comments
Verify the accuracy of the starting occlusion
Even the most sophisticated digital setup has limited value if it begins from an inaccurate representation of the patient’s bite.
Compare the initial digital occlusion with the clinical photographs, intraoral scan, and occlusal records. Pay particular attention to: occlusal cant, mandibular deviation, facial asymmetry, dental midlines, posterior intercuspation, arch relationships, overjet and overbite.
Orientate the ClinCheck model to correspond with the clinical photographs so that the comparison is meaningful and consistent.
Review the technician’s comments before proceeding. These may highlight incomplete records, unclear instructions, or limitations associated with the requested movements. Confirm that an adequate proportion of the occlusal surface of the most posterior teeth has been captured, as incomplete scan data may compromise the accuracy of the digital occlusion.
Step three: assess the proposed final position against the prescription
Evaluate the proposed endpoint before becoming absorbed in the animation. The final setup should resolve the patient’s presenting concern while remaining consistent with the agreed aesthetic, periodontal, restorative, and functional objectives.
A useful framework is the four-sentence prescription, which defines four key reference points:
- The patient’s presenting complaint
- The desired position of the upper anterior teeth
- The intended upper posterior position and arch form
- The desired lower incisor position, overjet, and overbite.
This approach describes the intended endpoint in clear, familiar, and facially driven language before the automated setup is reviewed.
Begin with the upper central incisors. Their inclination, vertical position, and relationship to the smile line influence the overall aesthetic result. Assess whether the planned intrusion or extrusion will improve tooth display and the smile arc, and confirm that the upper dental midline has not shifted unintentionally.
Next, evaluate the upper posterior reference point and proposed arch form. Expansion should be purposeful and supported by the diagnosis rather than accepted as an automatic feature of treatment.
Finally, assess the lower incisors carefully, particularly in patients with a thin gingival phenotype, reduced periodontal support, or pre-existing recession. Excessive proclination or buccal movement may create avoidable periodontal risk.
The Aligner Dental Academy’s guide to the four-sentence treatment plan provides a practical framework for modifying ClinCheck plans.
Use the available visual assessment tools
Superimposition is particularly valuable for identifying the magnitude and direction of planned tooth movement. Compare the initial and final positions from both occlusal and lateral perspectives.
Grid tools can assist in estimating movement, while in-face smile visualisation may support assessment of: incisor position, smile arc, tooth display, dental midlines and facial integration.
These tools are important because a final digital model may appear well aligned while still containing undesirable expansion, unnecessary round-tripping, or unfavourable changes in incisor inclination.
Step four: review the complete sequence of tooth movement
Once the proposed endpoint is acceptable, examine how the software intends to achieve it.
Play the animation from beginning to end and look to ensure the final position is meeting the upper and lower anterior reference point and the posterior reference point. In addition look for the following movements:
- Round-tripping
- Excessive simultaneous movement
- Loss of anchorage
- Unfavourable sequencing
- Unnecessary expansion or proclination
- Potential occlusal interferences.
Consider whether additional auxiliaries, such as elastics, bite ramps, or attachments, may be required.
Review the tooth movement table and identify movements that may be biologically demanding or less predictable. ClinCheck displays prescribed movement; it does not guarantee biological expression. Difficult rotations, extrusion, intrusion, torque, and root movement therefore require particular scrutiny.
A common error is to assess only the final position without reviewing the sequence through which that position is intended to be achieved.
Audit interproximal reduction carefully
Do not accept prescribed interproximal reduction automatically. Review the amount, location, distribution, and timing of all planned IPR.
The Aligner Dental Academy recommends limiting IPR to approximately 0.3 mm per anterior contact and up to 0.5 mm per posterior contact. These values should nevertheless be adapted to the patient’s dental anatomy, enamel availability, periodontal condition, and clinical access.
IPR may also be used strategically. For example, lower-arch IPR may facilitate lower incisor retraction and increase overjet, whereas upper-arch IPR may assist in reducing excessive overjet.
Consider tooth morphology, contact-point position, and the risk of black triangles. Space creation and distribution should support the intended aesthetic, restorative, and occlusal outcome rather than merely resolve crowding numerically.
Protect the final occlusion
Confirm that the proposed overjet and overbite are functional, atraumatic, and compatible with any planned or existing restorations.
Maintain adequate overjet, commonly at least 2 mm, to reduce the risk of an unfavourable anterior relationship.
Remain alert to the risk of posterior open bite. Excessive anterior contact, poor arch coordination, unsuitable staging, and inappropriate single-arch treatment may all compromise the final occlusion.
Single-arch treatment should be considered only when arch coordination, function, overjet, and overbite can be maintained predictably. Where these relationships cannot be preserved, dual-arch treatment may offer a safer and more reliable approach.
Step five: conclude with informed consent and precise communication
Before approving the plan, revisit all case-specific consent considerations, including: gingival recession, black triangles, IPR, tooth-shape limitations, difficult or less predictable movements, potential occlusal changes, treatment duration, retention requirements, additional costs, the possible need for refinement, treatment costs etc.
Where modifications are required, use 3D Controls alongside concise and specific written instructions. The four-sentence prescription can be included within the modification request to provide the technician with a clear description of the intended endpoint.
When the revised setup is returned, verify each requested change individually. Do not assume that all instructions have been interpreted or incorporated correctly.
Conclusion
A consistent ClinCheck review is an extension of diagnosis and treatment planning, not a separate administrative step. By combining a facially driven prescription with a structured review process, clinicians can identify errors earlier, communicate more effectively, and deliver treatment that is safer, more efficient, and better aligned with the patient’s clinical needs and expectations.
This article is sponsored by the Aligner Dental Academy.