 This month Kreena Patel explores how to manage curved canals during endodontic treatment.
Curvatures present many challenges to clinicians. This month, I will discuss how to assess canal curvatures and the potential complications that can arise during treatment.
I will also share advice on how to manage these more complex cases.
Assessment
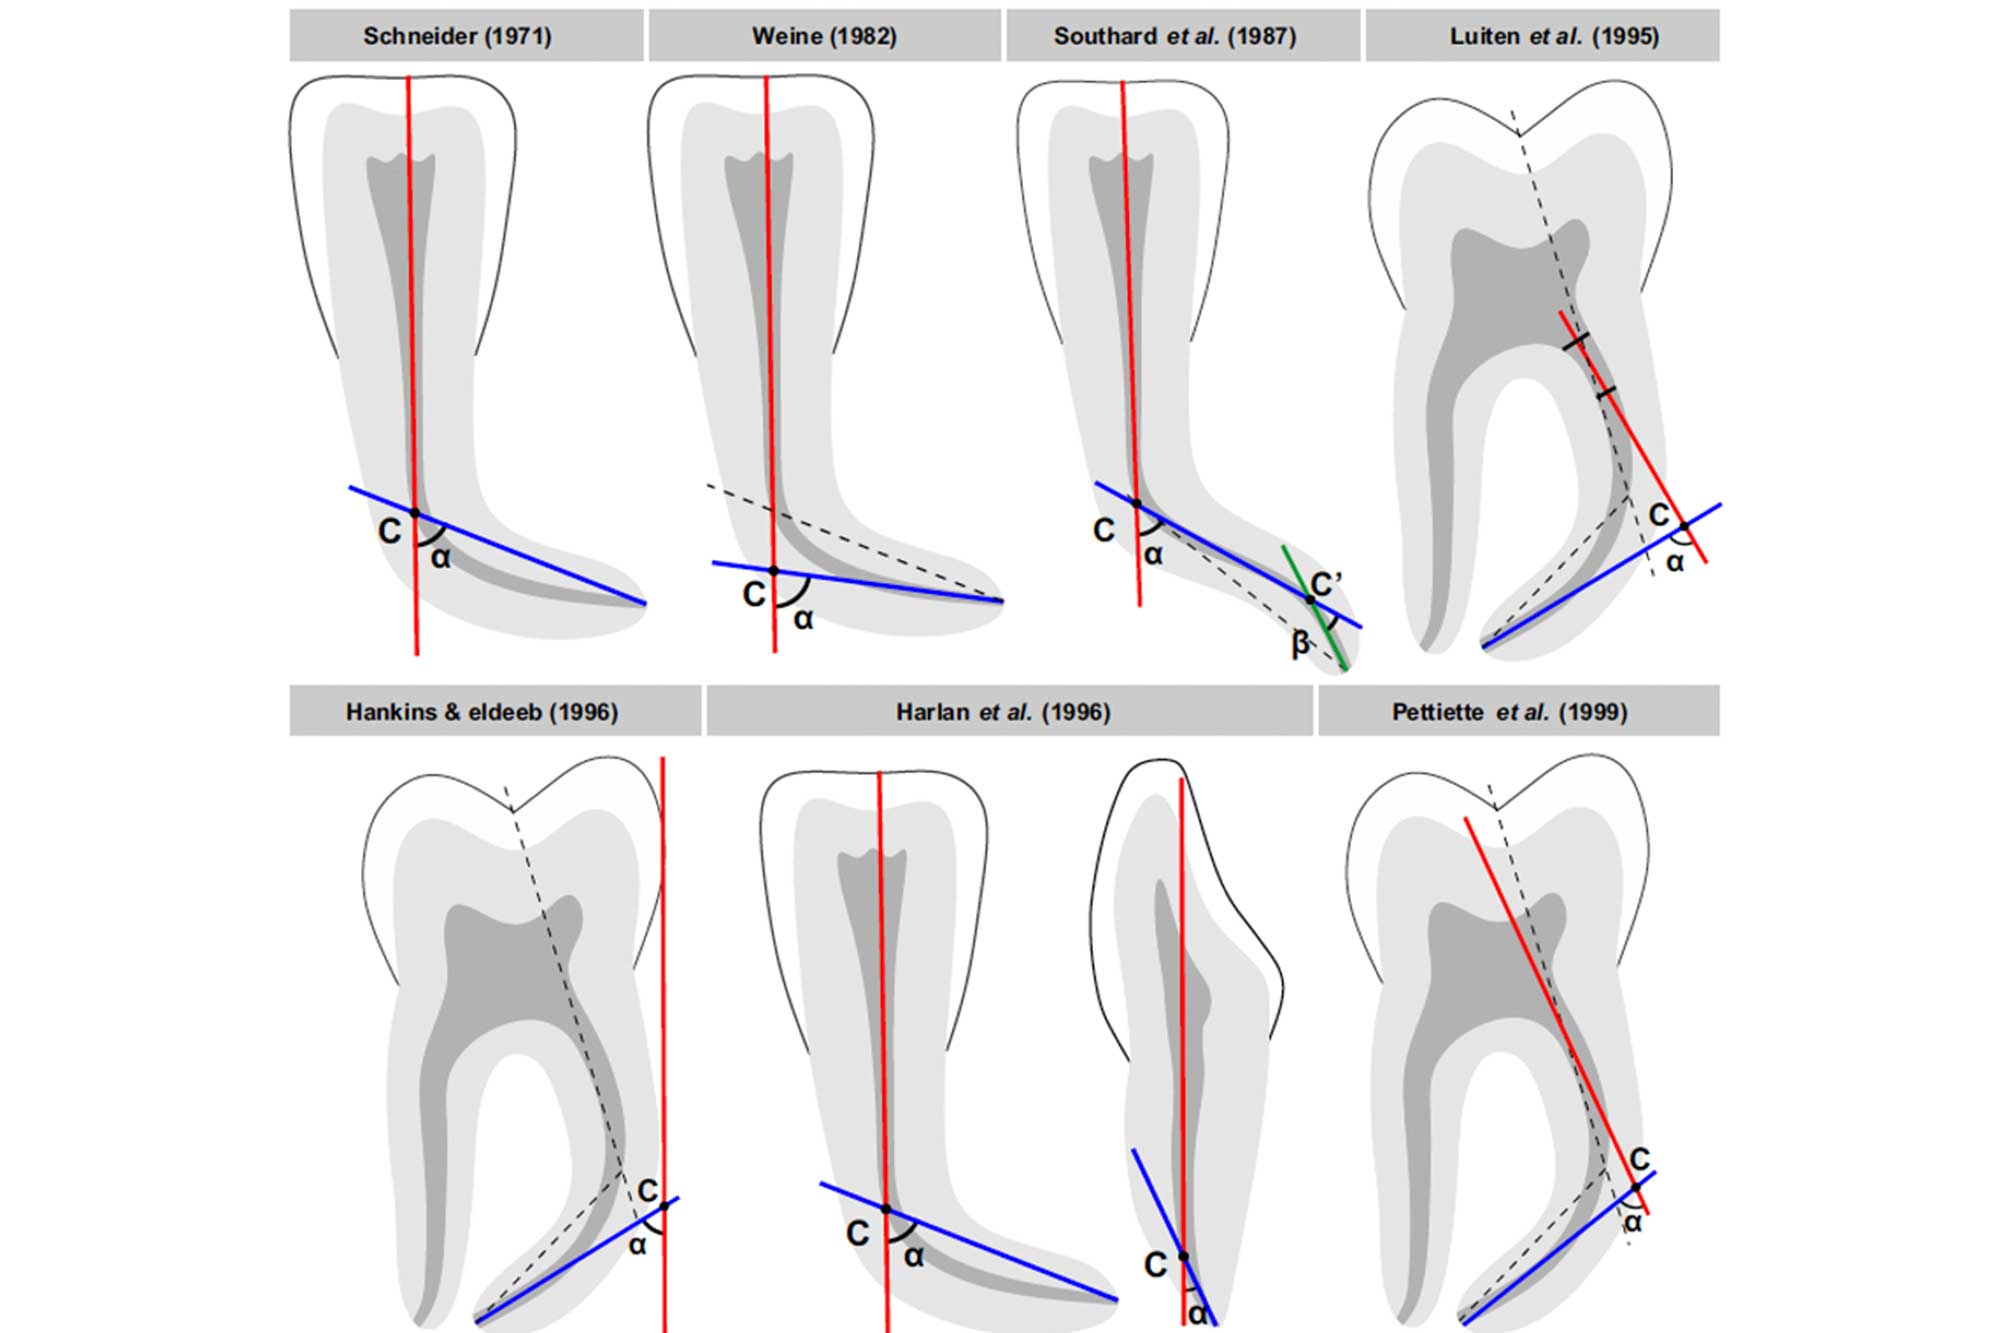
It is important to assess the location, angle and radius of the curve (Figures 1 and 2).
Numerous techniques have been proposed to measure canal curvatures (Figure 1). However, there is a lack of consensus on which technique is best (Hartmann et al, 2018).
These methods help to assign a specific level of potential difficulty to the treatment. The clinician can then decide if they have the appropriate competence to treat the tooth, or if it is beyond their skill set and requires referral (Figure 2).

Complications
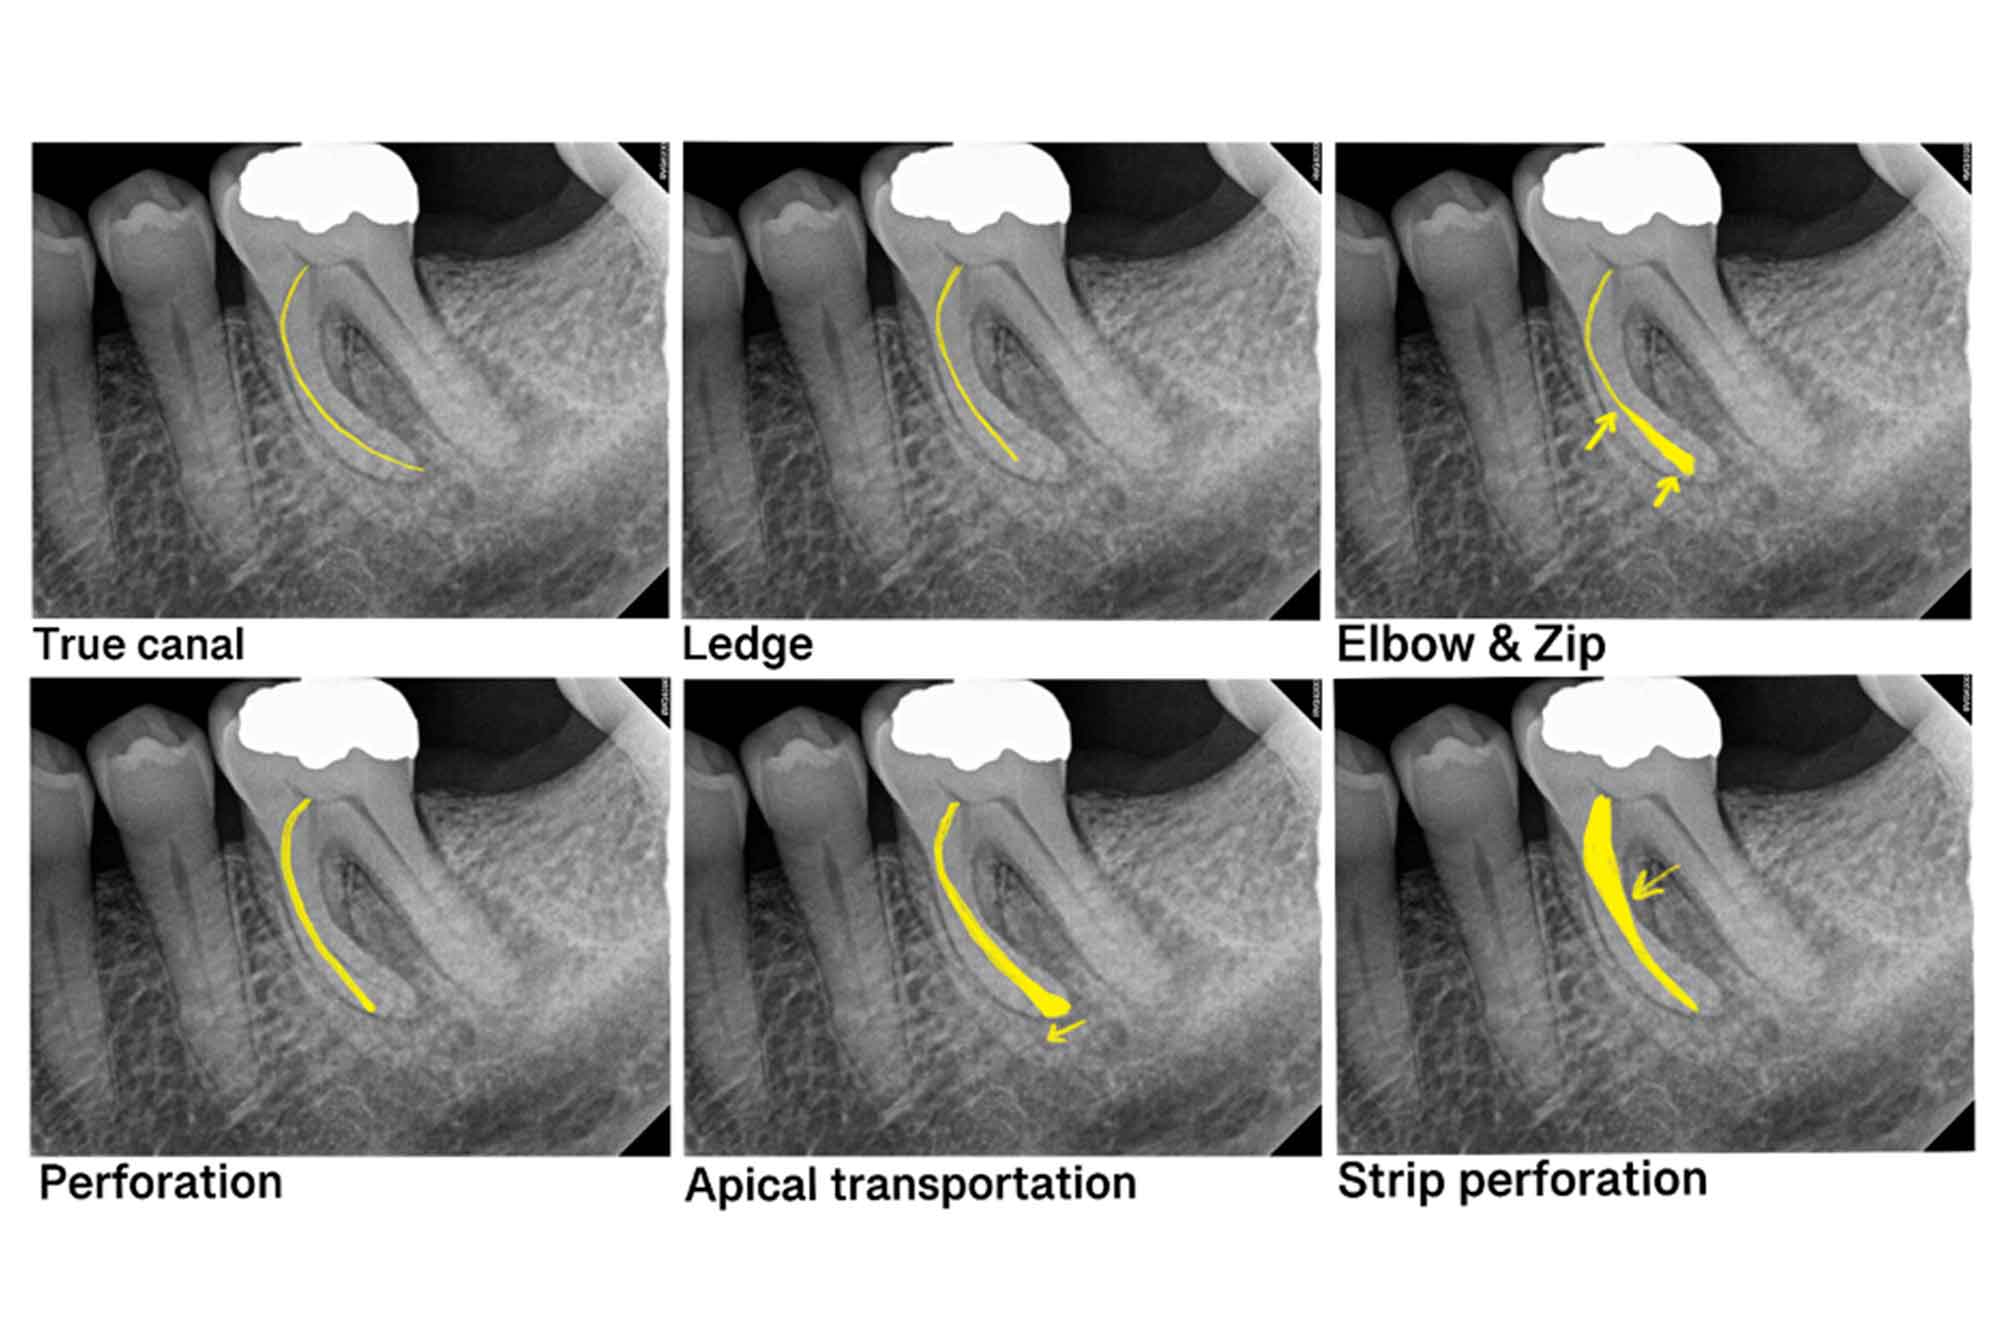
Curvatures can lead to many iatrogenic complications (Figure 3):
- Ledges
- Zip formation
- Perforations
- Apical transportation
- File separation.
It is particularly difficult (and not always possible) to manage iatrogenic complications that occur when treating curved canals.
Advice
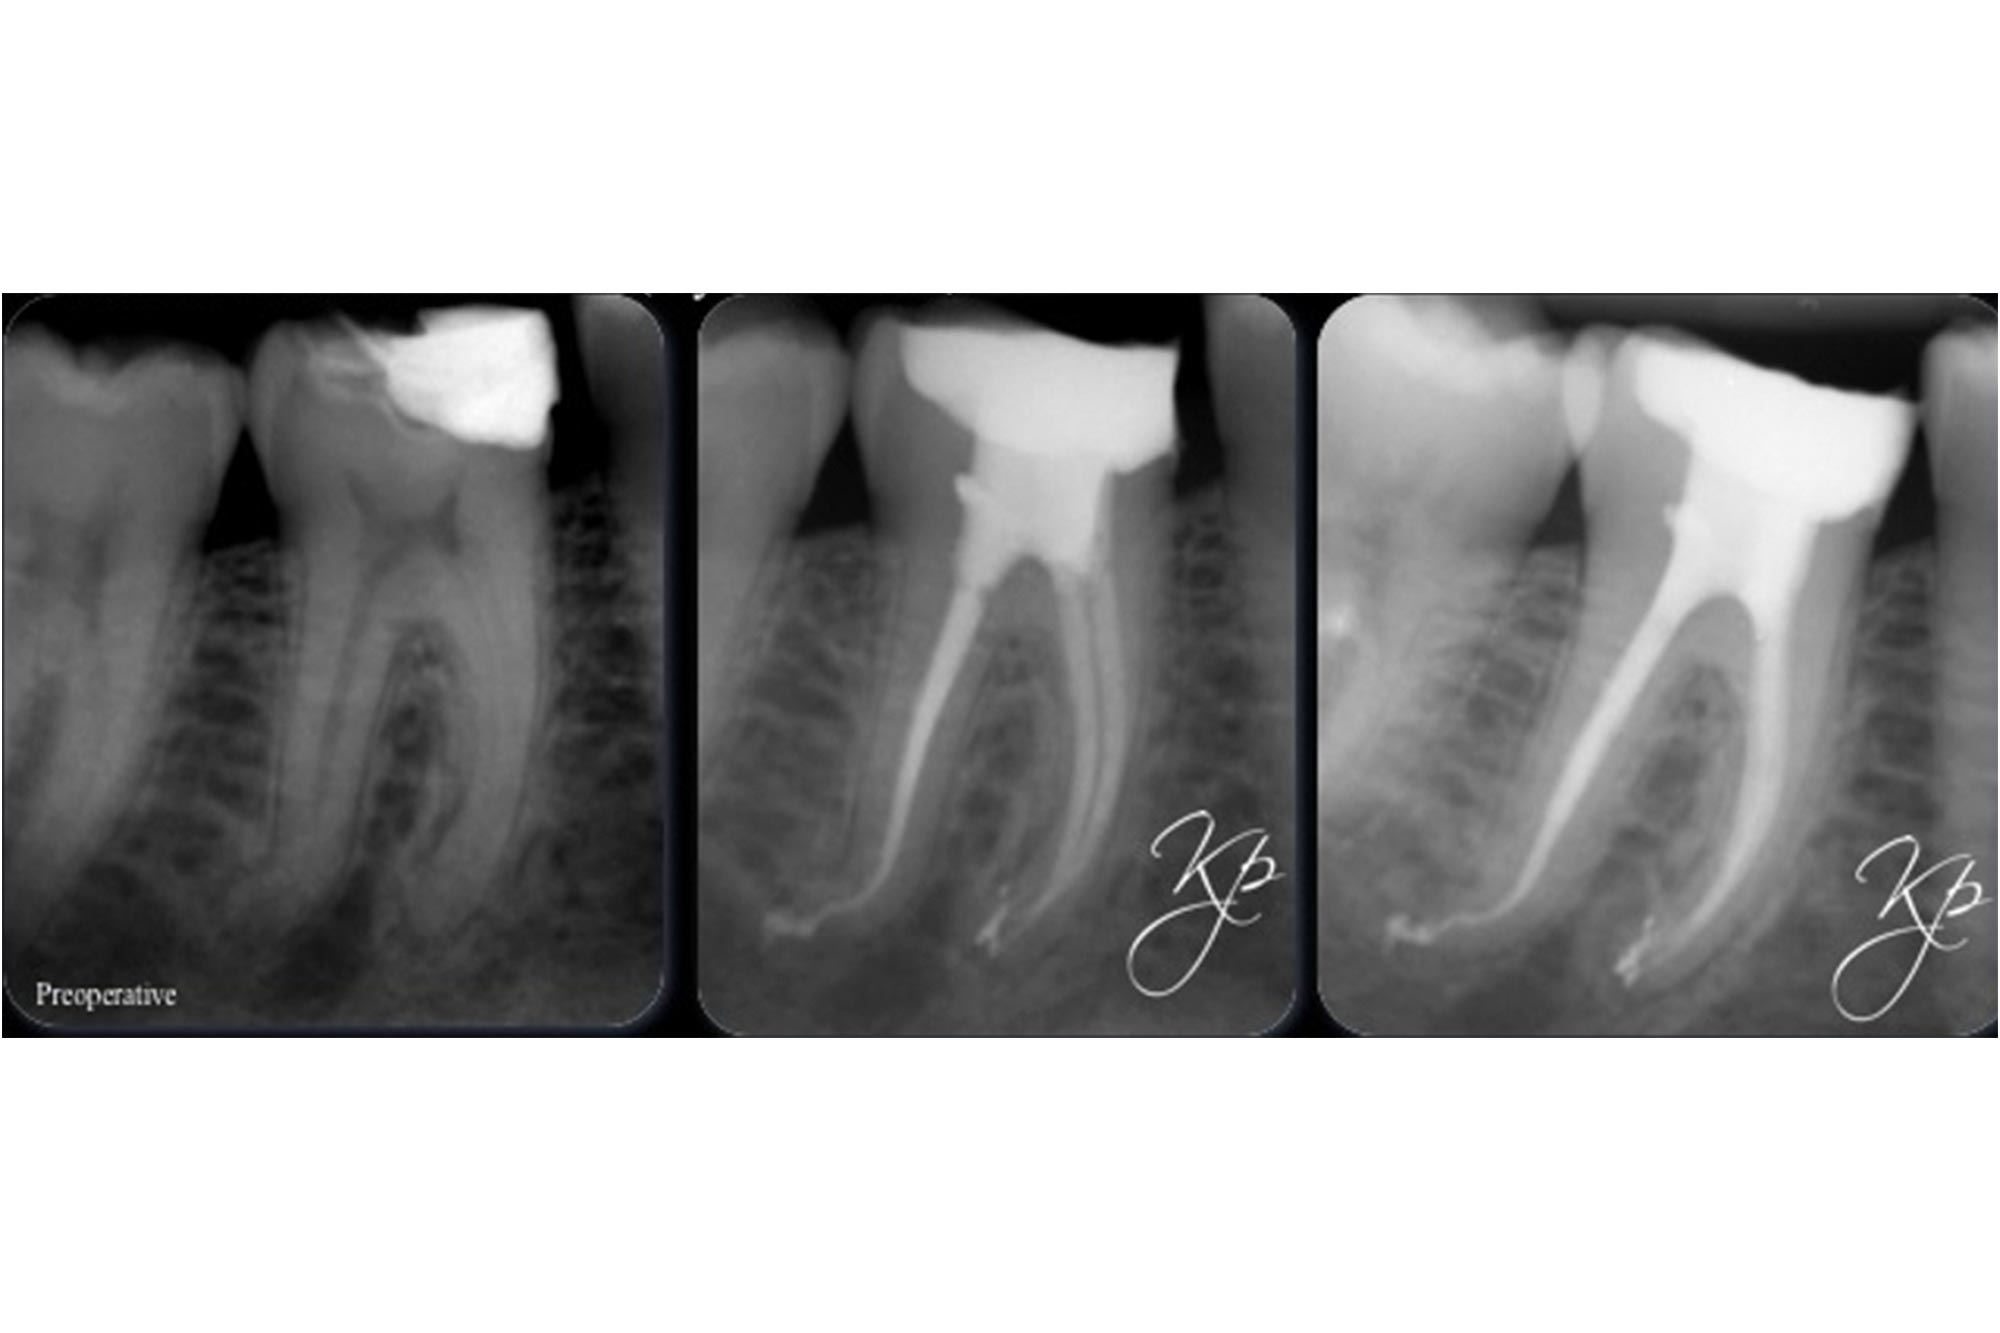
- Patience: time spent planning how to approach these cases is essential. It is also important to have patience and allow enough time for treatment (Figure 4)


Figure 4: Root canal treatment of LL6. Careful analysis of the preoperative radiograph will help you assess the anatomy and any potential curvatures. On first glance, LL6 does not appear to be particularly challenging. However, more careful examination reveals two long mesial roots with apical curvatures
- Straight line access: it is important to gain straight line access to curved canals. This reduces the strain placed on endodontic files as they do not have to bend when entering the canal. The shape of the access cavity is refined during the procedure conservatively using ultrasonics
- Coronal flaring: spend time flaring the coronal part of the canal. This will reduce the degree of the curvature and can transform a C-shaped curve into a J-shaped curve (Figure 5). I usually use rotary nickel-titanium orifice openers for this. I do not like using gates gliddens in posterior teeth because they can be destructive and create ledges
- Glide path: it is essential to create a well-defined glide path with hand files before using rotary files to avoid instrument fracture. Start with small hand files that are safe-ended (non-active tip). Pre-curve all hand files prior to placing then into the canal. The tip of a straight file will not follow the canal curvature, and is more likely to create a ledge.
I usually start with a size 8 hand file and work up to a size 10. At this stage a flexible rotary glide path file is very useful to enlarge the space. I do not recommend taking larger hand files (size 15+) around the curvature. These are too stiff to negotiate difficult curves and risks altering the anatomy.
A very curved canal may need approaching in stages (Figure 6). I advise preparing the canal using hand and rotary files just short of the curvature prior to trying to negotiate around it. This gives the hand file slightly more space and you can gain better tactile feedback from the tip.
Do not force a hand file that is unable to progress down the canal following light watch winding motions. If this occurs prepare the canal 1mm short of where the hand file binds with rotary files. At this point the hand files are often able to advance further down the canal.
- Cleaning and shaping: use a flexible rotary file system that respects the canal anatomy when preparing curved canals (Figure 7)
 Figure 7: A flexible rotary system is important when managing curved canals

- Irrigation: frequent irrigation using sodium hypochlorite helps prevent debris blocking the canal. However, I do not recommend irrigating with EDTA solution early in the shaping procedure. This is a chelating agent which also softens dentine, and can make it easier to create ledges
- Patency and recapitulation: it is important to frequently recapitulate and maintain patency using small hand files (size 8-10). Debris can quickly accumulate resulting in blockages. This can lead to iatrogenic errors (Figure 8)


Figure 8: Root canal treatment UR6: the MB1 and MB2 were calcified and curved. Small hand files were using to maintain patency throughout the cleaning and shaping procedure. This prevented debris accumulating and blocking the canal
- CBCT: a preoperative CBCT is very helpful when treatment planning curved canals. The CBCT may reveal that two of the canals merge; with this information you can plan to prepare the ‘less curved’ canal first, and shape the merging canal to the to the level of the join (Figure 9).


Figure 9 and CBCT video: a preoperative CBCT was taken prior to commencing root canal treatment on LL7. This revealed an extra distal root. There was a significant curvature on the MB and ML, and they merged in the apical third. These details helped plan the root canal treatment
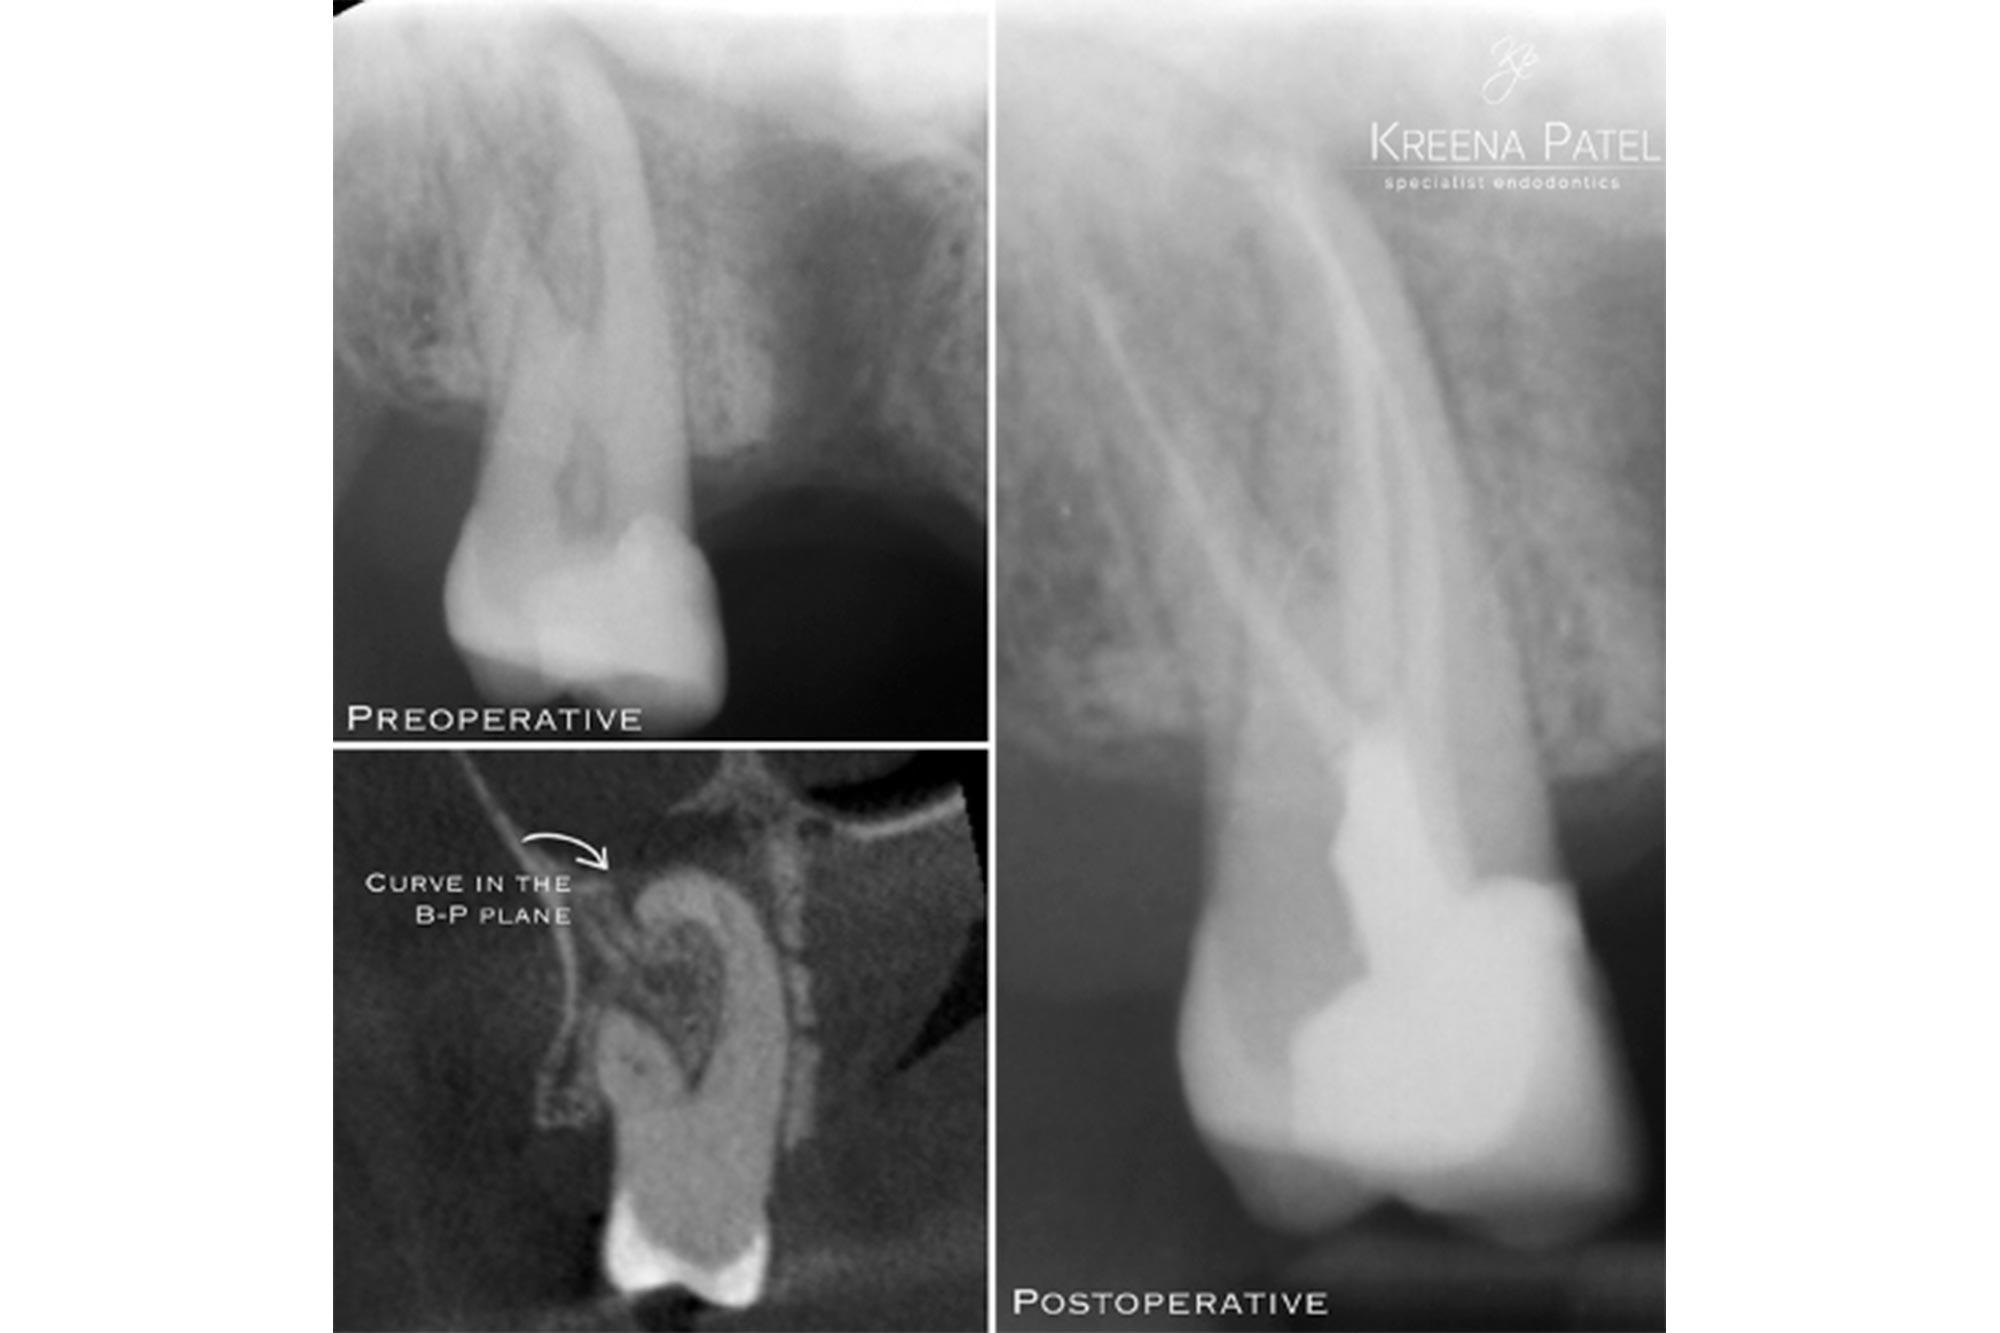
Curvatures present in the mesial-distal we can see on a radiograph. However, those present in a buccal-palatal (or buccal-lingual) plane are frequently missed. A CBCT enables clinicians to see the ‘third dimension’, which can aid preparation of these cases (Figure 10).
Conclusion
Root canal treatment of curved canals presents many challenges for clinicians. It is important to carefully assess the difficulty of cases prior to treatment.
Additional training and courses are often required prior to treating more complex cases. Iatrogenic errors and complications are difficult to correct.
This article aims to share clinical tips to help approach curved canals systematically. A preoperative CBCT is particularly useful to help with treatment planning.
References
Hartmann RC, Fensterseifer M, Peters OA, de Figueiredo JAP, Gomes MS and Rossi-Fedele G (2019) Methods for measurement of root canal curvature: a systematic and critical review. Int Endod J 52(2): 169-80
If you would like to learn more about endodontics follow Kreena on Facebook and Instagram @kreenaspecialistendodontics.
Follow Dentistry Online on Instagram to keep up with all the latest dental news and trends.

