Clinical photographer Laura Short, in collaboration with DB Orthodontics, reveals why so much dental photography still falls short, even in experienced hands, and what can be done to improve it.
In this three-part series, Laura explores the real challenges practices face, shares expert insight from the clinical photography setting, and highlights the tools and systems that make repeatable, high-quality images possible.
Let’s be honest: to say dental photography has been talked about extensively is an understatement. Most clinicians qualified years ago, learned the basics, invested in a camera and perhaps a ring flash, and considered the job done. But despite how frequently the topic is discussed, as a clinical photographer working daily in a hospital environment, I still see the same avoidable mistakes repeated time and time again – even by highly experienced clinicians.
So the real question isn’t whether we still need to talk about dental photography. It’s: ‘How do we overcome the challenges practices face when trying to create accurate, standardised clinical images?’
The myth: once you’ve learned the basics, there’s nothing new to learn
Clinical photography remains a core tool in modern dentistry. NHS Health Careers defines it as the daily recording of clinical conditions, used for diagnosis and to document treatment over time. In practice, photography supports everything from diagnosis and treatment planning to surgical documentation, teaching, research, and medico-legal record keeping.
Whether you’re an orthodontist tracking tooth movement, a therapist monitoring periodontal changes, or a nurse supporting documentation, consistent photography improves both patient care and professional communication.
Patient expectations are higher
The fundamentals haven’t changed, but expectations certainly have. Patients are more visually aware, social media has raised the bar, and before-and-after images are scrutinised more closely than ever. Consistency is no longer a ‘nice to have’; it’s essential, particularly when it comes to medico-legal protection.
Photography today isn’t just documentation. It’s communication. And communication only works when images are accurate, repeatable, and comparable, which is where many practices quietly fall down.
What I’ve learned as a clinical photographer
The biggest issue I see isn’t just the camera choice. It’s a lack of planning.
Poor clinical photography almost always comes down to inconsistent positioning, variable distances, unreliable retraction, or products that simply don’t perform as they should. You don’t need to be a photographer to take good clinical images. While professional photographers bring valuable expertise, consistent, high-quality clinical images are achieved though having the right system in place.
If you can’t reliably measure change, your photography isn’t doing its job. Measurability only comes from accuracy and standardisation.
Why accuracy and standardisation matter
Standardisation ensures that photographs can be repeated, compared over time, and used meaningfully in a clinical context. According to gov.uk, standardisation provides rules and guidelines that allow outcomes to be consistently reproduced – a principle that is critical in clinical photography.
National guidance is available from the Institute of Medical Illustrators (IMI), offering a robust framework for best practice. While these guidelines are invaluable, each practice or department should agree on a local protocol based on IMI recommendations, ensuring consistency across the entire clinical team.
Consent and GDPR
Informed consent is a fundamental part of clinical photography. Patients must give consent before images are taken, and that consent must clearly state how photographs will be used, whether for clinical records, teaching, research, or publication – while fully complying with GDPR requirements.
Many departments, including Birmingham Dental Hospital, use a dedicated clinical photography consent form. A clear, documented process protects both the patient and the clinician.
Camera setup and the importance of getting the basics right
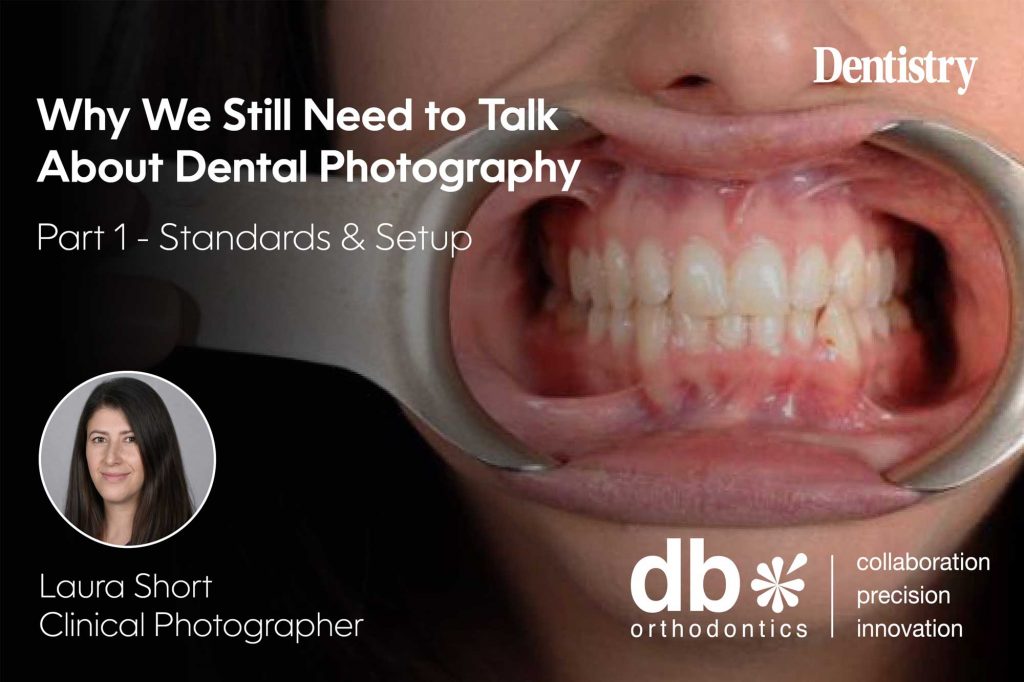
High-quality extra-oral and intra-oral images require a camera body with manual settings, a true macro lens (typically 100mm or 105mm to achieve correct magnification), and a macro ring flash to ensure even illumination. Macro lenses reduce distortion, while ring flashes provide consistent lighting for facial views, close-ups, and surgical documentation.
Understanding exposure is essential. Aperture controls depth of field, shutter speed affects motion blur, and ISO determines sensor sensitivity. In clinical photography, extreme settings should be avoided. If exposure adjustments are needed, ISO should be prioritised while keeping aperture and shutter speed consistent to maintain sharpness and reproducibility.
Achieving correct colour
Accurate colour reproduction is equally critical. A standardised white balance – typically set to flash or custom-matched to your flash – ensures tooth colour and soft tissue tones are represented faithfully. Incorrect white balance can compromise diagnosis and shade matching.
When it comes to focusing and framing, magnification should be set using the scale on the lens, with focus achieved through a gentle rock-and-pull motion rather than refocusing. Keeping the camera parallel to the teeth and reviewing images on playback before moving on helps avoid common errors. As a simple rule of thumb: smiling teeth usually mean the camera is too high; frowning teeth suggest it’s too low.
Standard photographic sets
Many departments rely on a standard photographic set to maintain consistency. At Birmingham Dental Hospital, this includes Standard Orthodontic View 10 (with facial views) and Standard Orthodontic View 5 (without facial views). Using a defined image set ensures no critical views are missed and allows accurate comparison throughout treatment.
Why product choice matters more than people admit
You can follow every protocol perfectly, but if your retractors deform, mirrors distort, or contrastors introduce glare, your results will suffer. This is where clinical photography often fails – not in the camera, but before the shutter is even pressed.
Warped retractors, mirrors that are too short and rest on molars, or shiny surfaces causing unwanted reflections all compromise image quality. Photography doesn’t always fail because of technique. Sometimes it fails because of ineffective products.
My favourite photography products
My go-to set includes Gold Series retractors that maintain their shape even after hundreds of autoclave cycles, chrome-coated mirrors that deliver sharp, high-reflectivity images, and black anodised aluminium palatal contrastors that eliminate background distraction and enhance incisal detail.
All are from DB Orthodontics, chosen because they are dependable, long-lasting, and available in sizes suited to every view and position. In a busy hospital environment like Birmingham Dental Hospital – where products are heavily used and repeatedly sterilised – this level of durability is essential. These are tools I rely on daily, and they continue to prove their value over time.
Click here to view the full range of photography materials from DB Orthodontics.
If your photography isn’t consistent, it isn’t clinically useful. In Part 2, I’ll break down the most common mistakes I see every day – and how to fix them quickly.
This article is sponsored by DB Orthodontics.

